Table of Contents
Advertisement
Available languages
Available languages
Quick Links
Getting Started
Démarrage
Online Setup
Configuration en ligne
Detailed instructions and videos are
available on the Canon website.
Des instructions détaillées et des vidéos
sont disponibles sur le site Web de Canon.
Setup a Computer
Configurer un ordinateur
Setup a Smartphone
Configurer un smartphone
Read Safety and Important Information
(addendum) first.
Commencez par lire Sécurité et informations
importantes (addendum).
Advertisement
Table of Contents

Subscribe to Our Youtube Channel
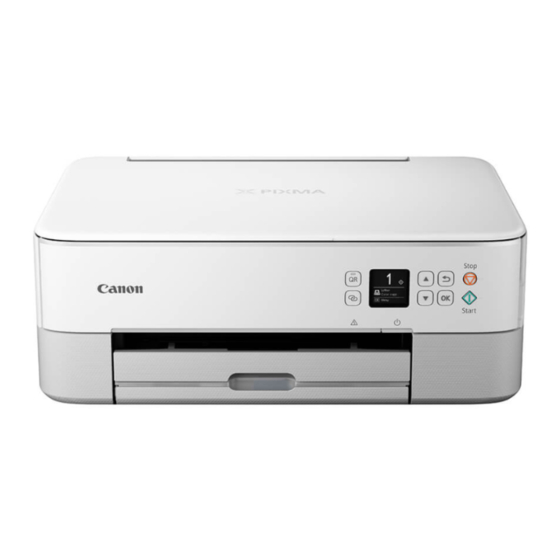
Summary of Contents for Canon PIXMA TS5365
- Page 1 Online Setup Configuration en ligne Detailed instructions and videos are available on the Canon website. Des instructions détaillées et des vidéos sont disponibles sur le site Web de Canon. Setup a Computer Configurer un ordinateur Setup a Smartphone Configurer un smartphone Read Safety and Important Information (addendum) first.
- Page 2 Installing the Printer ........................page 1 Installation de l'imprimante ....................page 1 Connecting to a Computer, Smartphone or Tablet ..........page 4 Connexion à un ordinateur, un smartphone ou une tablette ......page 4 Holding the Printer Manipulation de l'imprimante Instructional Videos Instructions vidéo Accéder...
-
Page 3: Setting Up The Printer
Setting Up the Printer 1. Box Contents Press the ON button. • • FINE cartridges Power cord • Setup CD-ROM for Windows • Safety and Important Information • Getting Started (this manual) Color Black Use the {, } and OK buttons to select a language. -
Page 4: Installing The Fine Cartridges
Setting Up the Printer 4. Installing the FINE Cartridges Set the Color FINE cartridge in the FINE cartridge holder. Open the scanning unit / cover. Important Do not bump the FINE cartridge. Doing so may cause a malfunction. Caution Do not touch the FINE cartridge holder until it stops moving. Pinch and open the ink cartridge locking cover Push down the ink cartridge locking cover firmly on the left-hand side. -
Page 5: Loading Paper
5. Loading Paper Attach the cassette cover and replace the cassette. Press the OK button. • Look at it from the side to confirm Remove the cassette from the printer and it looks like the diagram. remove the cassette cover. Pull out the paper output tray. -
Page 6: Connecting To A Computer
Computer Smartphone smartphone Connecting to a Computer If you are using multiple computers, perform these steps on each computer. Click Download. Access the Canon website from a computer. Run the downloaded file. Click Start Setup. Select Set Up. Enter your printer's model name and click Go. -
Page 7: Connecting To A Smartphone
Refer to your smartphone and wireless router manuals for more details. Install the "Canon PRINT Inkjet/SELPHY" app on your smartphone. • Scan the QR code shown on the right to access the Canon website, and then download the app. Open the installed app. -
Page 8: Loading Photo Paper
Loading Photo Paper Photo paper can only be loaded in the rear tray. Open the rear tray cover and extend the paper Load several sheets of photo paper with the support. print side facing up and slide the side paper guide against the edge of the paper stack. -
Page 9: Configuration De L'imprimante
Configuration de l'imprimante 1. Contenu de la boîte Appuyez sur le bouton MARCHE (ON). • • Cartouches FINE Cordon d'alimentation • CD-ROM d'installation pour Windows • Sécurité et informations importantes • Démarrage (ce manuel) Couleur Noire Utilisez les boutons {, } et OK pour sélectionner une langue. -
Page 10: Installation Des Cartouches
Configuration de l'imprimante 4. Installation des cartouches Installez la cartouche FINE couleur dans le porte-cartouche FINE. FINE Ouvrez l'unité de numérisation / capot. Important Ne cognez pas la cartouche FINE. Cela risquerait d'entraîner un dysfonctionnement. Attention Ne touchez pas le porte-cartouche FINE avant son arrêt. Pincez et ouvrez le couvercle de verrouillage de Poussez fermement vers le bas le couvercle cartouche d'encre sur la gauche. -
Page 11: Chargement Du Papier
5. Chargement du papier Fixez le couvercle de la cassette et remettez la cassette en place. Appuyez sur le bouton OK. • Observez-la depuis le côté pour Retirez la cassette de l'imprimante et retirez le confirmer qu'elle se présente couvercle de la cassette. comme dans le diagramme. -
Page 12: Connexion À Un Ordinateur
Ordinateur Smartphone smartphone Connexion à un ordinateur Si vous utilisez plusieurs ordinateurs, effectuez ces étapes sur chaque ordinateur. Cliquez sur Télécharger. Accès au site Web Canon à partir d'un ordinateur. Exécutez le fichier téléchargé. Cliquez sur Commencer la configuration. Sélectionnez Configuration. - Page 13 Pour plus d'informations, consultez la documentation de votre smartphone et du routeur sans fil. Installez l'application « Canon PRINT Inkjet/SELPHY » sur votre smartphone. • Scannez le code QR qui apparaît à droite pour accéder au site Web Canon, puis téléchargez l'application. Ouvrez l'application installée.
- Page 14 Chargement de papier photo Le papier photo peut être chargé uniquement dans le réceptacle arrière. Ouvrez le couvercle du réceptacle arrière et Chargez plusieurs feuilles de papier photo face déployez le support papier. à imprimer vers le haut et faites glisser le guide papier latéral contre le bord de la pile de papier.
- Page 15 RMC (Regulatory Model Code): K10500...
- Page 16 Access Online Manual Accès au Manuel en ligne From your browser À partir de votre navigateur QT6-3164-V01 XXXXXXXX © CANON INC. 2019 PRINTED IN XXXXXXXX IMPRIMÉ XX XXXXXXXX...


Need help?
Do you have a question about the PIXMA TS5365 and is the answer not in the manual?
Questions and answers