Advertisement
Available languages
Available languages
Quick Links
Advertisement

Subscribe to Our Youtube Channel
Related Manuals for Philips FC8619/01


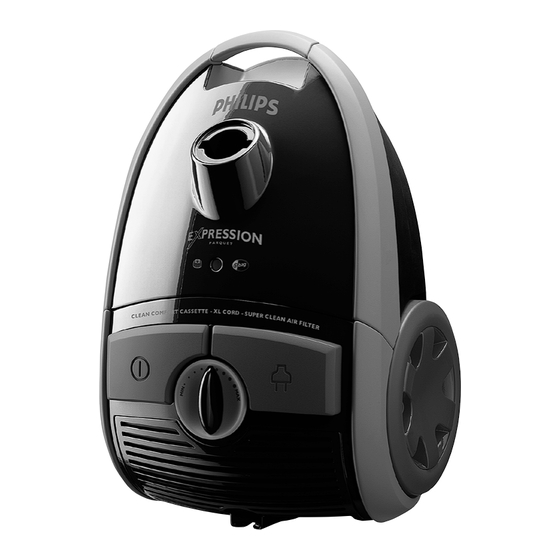
Summary of Contents for Philips FC8619/01
- Page 1 FC8619 - FC8600...
- Page 5 English 6 한국어 11 繁體中文 16...
- Page 6 Do not use the appliance if the plug, the mains cord or the appliance itself is damaged. If the mains cord is damaged, you must have it replaced by Philips, a service centre authorised by Philips or similarly qualified persons in order to avoid a hazard.
-
Page 7: Accessory Clip
To disconnect the tube parts from each other and from the handgrip of the hose, pull while turning a little. Button coupling (specific types only) To connect the tube to the handgrip of the hose, press the spring-loaded lock button on the handgrip and insert the handgrip into the tube. - Page 8 If you want to pause for a moment, insert the ridge on the nozzle into the parking slot to park the tube in a convenient position (Fig. 17). storage Switch off the appliance and remove the mains plug from the wall socket. Press the cord rewind button to rewind the mains cord (Fig. 18). Put the appliance in upright position. To attach the nozzle to the appliance, insert the ridge into the storage slot (Fig. 19). Always put the Tri-Active nozzle in the carpet setting when you store it. Also prevent the side brushes from becoming bent (Fig. 9). Replacing/emptying the dustbag Always unplug the appliance before you replace the disposable dustbag or empty the reusable dustbag.
- Page 9 Turn the filter 180° and let the water flow along the pleats in opposite direction (Fig. 32). Continue this process until the filter is clean. Never clean the washable filter with a brush (Fig. 33). Note: Cleaning does not restore the original colour of the filter, but does restore its filtration power. Carefully shake the water from the surface of the filter. Let the filter dry at least 2 hours before you put it back into the vacuum cleaner. Place the filter back behind the brackets. Make sure that the Philips logo on the filter is visible in the upper left hand corner (Fig. 29). Close the filter grille (‘click’) (Fig. 30).
- Page 10 (Fig. 34). Guarantee & service If you need information or if you have a problem, please visit the Philips website at www.philips.com or contact the Philips Customer Care Centre in your country (you find its phone number in the worldwide guarantee leaflet).
- Page 11 제품 소개 필립스 제품을 구입해 주셔서 감사합니다! 필립스가 드리는 지원 혜택을 받으실 수 있도 록 www.philips.com/welcome에서 제품을 등록하십시오. 중요사항 본 제품을 사용하기 전에 이 사용 설명서를 주의 깊게 읽고 나중에 참조할 수 있도록 잘 보관하십시오. 위험 물, 다른 용액 또는 가연성 물질은 절대 흡입하지 마십시오. 타고 남은 재는 완전히...
- Page 12 한국어 원뿔형 커플링(특정 모델만 해당) 연장관과 손잡이를 서로 연결하려면 연장관을 살짝 돌리면서 좁은 부분을 넓은 부분 에 끼우십시오 (그림 3). 2 연장관과 손잡이를 분리하려면 살짝 돌리면서 잡아당겨 빼십시오. 버튼 결합 기능(특정 모델만 해당) 호스 손잡이에 연장관을 연결하려면 손잡이에 있는 스프링식 잠금 버튼을 누르고 손 잡이를 연장관에 끼우십시오. 스프링식 잠금 버튼을 연장관 구멍에 맞추십시오(‘찰 칵’ 소리가 남) (그림 4). 2 호스의 손잡이에서 연장관을 분리하려면 스프링식 잠금 버튼을 누르고 연장관에서 손잡이를 잡아당기십시오. 참고: 노즐을 연결하고 분리할 때에도 같은 방법을 사용하십시오. 길이 조절이 가능한 연장관(특정 모델만 해당) 진공 청소기를 사용하는 동안 연장관을 사용하기 편한 길이로 조절하십시오 (그림 5). Tri-Active 노즐(특정 모델만 해당) Tri-Active 노즐은 카페트 및 일반 바닥에서 사용할 수 있는 다용도 노즐입니다. 노즐...
- Page 13 제품 상단의 조절기(특정 모델만 해당) (그림 16) 4 청소를 잠시 중단하려면 노즐 걸이를 임시 보관용 홈에 끼워서 연장관을 편안하게 세 워두십시오 (그림 17). 보관 제품 전원을 끄고 벽면 콘센트에서 전원 플러그를 뽑으십시오. 2 코드 되감기 버튼을 눌러 전원 코드를 되감으십시오 (그림 18). 3 제품을 똑바로 세워놓으십시오. 노즐 걸이를 보관 홈에 끼워서 노즐을 제품에 부착하 십시오 (그림 19). 4 청소기를 보관할 때는 Tri-Active 노즐을 항상 카페트 설정에 두십시오. 또한 측면 브러시가 휘어지지 않도록 하십시오 (그림 9). 먼지 봉투 교체/비우기 교체형 먼지 봉투를 교체하거나 재사용이 가능한 먼지 봉투를 비우기 전에 항상 전원 플 러그를 뽑으십시오. 교체형 먼지 봉투를 교체 먼지 봉투 교체 표시등의 색깔이 바뀌면 즉시 먼지 봉투를 교체하십시오(예를 들어, 노즐을 바닥에 대고 있지 않은 경우도 해당) (그림 20). 먼지 봉투를 열려면 덮개를 위로 올리십시오 (그림 21).
- Page 14 한국어 영구 모터 보호 필터 먼지 봉투를 교체할 때마다 영구 모터 보호 필터를 청소하십시오. 먼지 봉투가 들어있는 먼지 봉투 거치대를 분리하십시오 (그림 22). 2 제품에서 모터 보호 필터 거치대를 꺼내십시오. 필터를 거치대에서 꺼내십시오 (그림 26). 3 휴지통 위에서 필터를 털어내 필터를 청소하십시오. 4 새 필터를 흰색 부분이 먼지통을 향하도록 하여 거치대 안에 다시 넣으십시오. 거치 대를 꼭 눌러서 아래 부분이 잘 맞도록 하십시오 (그림 27). 5 먼지 봉투가 들어있는 먼지 봉투 거치대를 제품에 다시 넣으십시오 (그림 25). 수퍼클린 에어 필터(특정 모델만 해당) 제품 뒤편에 있는 수퍼클린 에어 필터는 정전기로 충전되는 섬유를 이용하여 배출 공기 에서 다량의 미세한 입자를 필터링합니다. 수퍼클린...
- Page 15 장소에 버리십시오. 이런 방법으로 환경 보호에 동참하실 수 있습니다 (그림 34). 품질 보증 및 서비스 보다 자세한 정보가 필요하시거나, 사용상의 문제가 있을 경우에는 필립스전자 홈페이지 www.philips.co.kr 를 방문하시거나 필립스 고객 상담실로 문의하십시오. 전국 서비스 센터 안내는 제품 보증서를 참조하십시오. *(주)필립스전자: (02)709-1200 *고객 상담 실: (080)600-6600(수신자부담) 문제...
- Page 16 繁體中文 簡介 恭喜您購買本產品並歡迎加入飛利浦!請於 www.philips.com/welcome 註冊您的產品, 來善用飛利浦提供的支援。 重要事項 在使用本產品前,請先仔細閱讀本使用手冊,並保留說明以供日後參考。 危險 請勿用來吸水或任何其它液體。請勿吸取易燃性物質,且請勿吸取尚未完全冷卻的灰 燼。 警示 在您連接電源之前,請檢查本地的電源電壓是否與產品所標示的電源電壓相符。 當插頭、電線或產品本身受損時,請勿使用產品。 如果電線損壞,必須交由飛利浦、飛利浦授權之服務中心,或是具備相同資格的技師 更換,以免發生危險。 本產品不適合供下列人士 (包括小孩) 使用:身體官能或心智能力退化者,或是經驗與 使用知識缺乏者。他們需要有負責其安全的人員在旁監督,或指示產品的使用方法, 方可使用。 請勿讓孩童將本產品當成玩具。 請勿將軟管、吸塵管或其他配件指向眼睛或耳朵,連接至使用中的吸塵器時,也不可 將其放入口中。 警告 當您使用吸塵器來清除灰燼、細沙、石灰、水泥灰塵與類似物質時,集塵袋孔會逐漸 阻塞,使得集塵袋已滿指示燈顯示集塵袋已滿。即使集塵袋並未全滿,也請更換可拆 式集塵袋並且清空可重複使用的集塵袋 (請參閱「更換/清空集塵袋」單元)。 請勿在未安裝馬達防護濾網的時候使用本產品,否則可能會損壞馬達並縮短產品壽 命。 請務必使用隨附的飛利浦 s-bag ` 合成集塵袋或重複使用型集塵袋 (僅限部份國家)。 電磁場 (EMF) 本飛利浦產品符合電磁場 (electromagnetic fields,EMF) 所有相關標準。若正確處理及依...
- Page 17 按鈕結合機關 (限特定機型) 按下握把上的彈簧鎖定按鈕,將握把插入吸塵管,即可將吸塵管連接至軟管上的握 把。將彈簧鎖定按鈕卡進吸塵管上的開孔 (會聽見「喀噠」一聲)。 (圖 4) 2 若要從軟管握把移除吸塵管,按下彈簧鎖定按鈕,然後將握把拔出吸塵管即可。 注意: 可使用相同方法連接、移除吸頭。 伸縮桿 (限特定機型) 將吸塵管調整至使用起來最舒適的長度。 (圖 5) Tri-Active 全方位三效合一吸頭 (限特定機型) 全方位三效吸頭是地毯及硬質地板專用的多用途吸頭。 兩側吸頭的側刷可吸除更多灰塵及髒污,讓您將家具和其他不易移動的物品清理得更 乾淨。 (圖 6) 吸頭前端開口可吸除更大碎屑。 (圖 7) 若要清理硬質地板,請以腳推壓吸頭頂端的搖動開關。 (圖 8) 清潔地板的毛刷條從殼體內推出。在此同時,輪子會抬起,可防止刮傷地板又可加強 移動性。 2 清潔地毯時,請再次推壓搖動開關。 (圖 9) 將毛刷條收進吸頭殼體內,輪子將會自動降下。 兩用吸頭 (限特定機型) 兩用吸頭可用於地毯或硬質地板。 若要清理硬質地板,請以腳推壓吸頭頂端的搖動開關 (圖 10) 將毛刷條從吸頭殼體內推出,以清潔硬質地板。 2 清潔地毯時,請再次推壓搖動開關。 (圖 11) 將毛刷條收進吸頭殼體內。 細隙吸頭與小吸頭。 直接將縫隙吸頭 (1) 或小吸頭 (2) 連接至握把或吸塵管。 (圖 12) 配件夾 將配件夾扣在吸塵管上。 (圖 13) 2 將縫隙吸頭和小吸頭扣在配件夾上。 使用此電器 請將電線由產品拉出,並將插頭插入牆上插座。 2 用腳按下吸塵器頂部的開/關 (on/off) 按鈕,以開啟產品電源。 (圖 14) 3 使用吸塵器時,您可以用以下裝置調整吸力:...
- Page 18 繁體中文 3 將產品直立起來,將吸頭突出部份插入儲存槽,讓吸頭與產品相連接。 (圖 19) 4 在您收納全方位三效吸頭時,請務必將它設為地毯設定。請避免側邊毛刷彎曲變 形。 (圖 9) 更換/清空集塵袋 更換拋棄式集塵袋或清空可重複使用的集塵袋之前,請務必拔除電源插頭。 更換拋棄式集塵袋 如果集塵袋已滿指示燈的顏色長時間改變 (換言之,即使吸頭沒有貼緊地板的情況 下),請立即更換集塵袋。 (圖 20) 請將蓋子往上拉,掀開蓋子。 (圖 21) 2 將集塵袋支托架從本產品中提起。 (圖 22) 請確定從吸塵器中提起集塵袋時開口是向上的。 3 拉著紙板拉片,將已滿的集塵袋從支托架中移除。 (圖 23) 移除集塵袋時,集塵袋會自動封口。 4 將新集塵袋的紙板前端儘可能套入集塵袋支托架上的兩個狹槽中。 (圖 24) 5 將集塵袋支托架重新裝入吸塵器。 (圖 25) 注意: 如果沒有裝入集塵袋,您將無法關上蓋子。 清空可重複使用的集塵袋 (僅限部份國家) 在某些國家,吸塵器也擁有可重複使用的集塵袋,可供使用並且重複清空。您可以使用重 複使用的集塵袋代替拋棄式的集塵袋。 若要拆卸或安裝可重複使用的集塵袋,請依照「更換拋棄式集塵袋」的更換步驟進行即 可。 清空可重覆使用的集塵袋: 將夾子朝集塵袋的側邊滑動。 2 將集塵室中的內容物搖動倒入垃圾桶中。 3 若要關閉集塵袋,請將夾子朝集塵袋下緣滑動。 濾網的清潔與保養 在清潔或更換濾網之前,請務必拔除電源插頭。 永久馬達防護濾網 每次更換集塵袋時,請清潔永久馬達防護濾網。 將集塵袋支托架連同集塵袋一起一併拆除。 (圖 22) 2 將馬達防護濾網支托架從產品中移除,將濾網支托架取出。 (圖 26) 3 在垃圾桶上抖動濾網。 4 將濾網重新裝入支托架上,白色那一面朝向集塵室。將支托架用力往下壓,以確定底 部妥善安裝至定位。 (圖 27) 5 將集塵袋支托架連同集塵袋一起一併裝回本產品中。 (圖 25) 高效微塵濾網...
- Page 19 飛利浦 Classic s-bag ` 合成集塵袋型號為 FC8021。 飛利浦醫療級 Clinic s-bag ` 高效過濾合成集塵袋型號為 FC8022。 飛利浦抗臭 s-bag ` 合成集塵袋型號為 FC8023。 訂購濾網 高效微塵濾網型號為 FC8032。 非可水洗超淨空氣 HEPA 12 抗敏濾網型號為 FC8044。 可水洗超淨空氣 HEPA 12 抗敏濾網型號為 4322 000 39090 環境保護 電器壽命結束時請勿與一般家庭廢棄物一併丟棄。請將該產品放置於政府指定的回收 站,此舉能為環保盡一份心力。 (圖 34) 保固與服務 若您需要相關資訊或有任何問題,請造訪飛利浦網站 www.philips.com,或連絡您當地的 飛利浦客戶服務中心 (您可以在全球保證書上找到連絡電話)。如果您當地沒有客戶服務中 心,請洽詢當地飛利浦經銷商,或與飛利浦小家電及個人護理用品部門聯繫。 繁體中文...
- Page 20 繁體中文 故障排除 本單元概述您使用本產品時最常遇到的問題。如果您無法利用以下資訊解決您遇到的問 題,請聯絡您所在國家/地區的顧客服務中心。 吸力不足。 A 請檢查集塵袋是否已滿。 必要時,請更換拋棄式集塵袋或清空可重複使用的集塵袋 (僅限部份國家)。 B 請檢查濾網是否需要清潔或更換。 必要時,請清潔或更換濾網。 C 請檢查吸力旋鈕是否設定在最大位置,和/或手把上的撥環是否關閉。 D 請檢查吸頭、吸塵管或軟管是否有阻塞。 (圖 35) 若要去除阻塞物,請拆除阻塞的部分,並將它以相反的方向 (盡可能地) 連接。打開吸 塵器,使空氣以相反方向強制吹出阻塞的部分。...
- Page 24 4222.003.3112.5...
Need help?
Do you have a question about the FC8619/01 and is the answer not in the manual?
Questions and answers