Table of Contents
Advertisement
Available languages
Available languages
Quick Links
DEHUMIDIFIER
Owner's Manual...............................1 - 8
DÉSHUMIDIFICATEUR
Manuel du propriétaire...................9 - 16
DESHUMIDIFICADOR
Manual del propietario.................17 - 24
DANBY PRODUCTS LIMITED, ONTARIO, CANADA N1H 6Z9
DANBY PRODUCTS INC., FINDLAY, OHIO, USA 45840
OWNER'S MANUAL
MANUEL DU PROPRIÉTAIRE
MANUAL DEL PROPIETARIO
MODEL • MODÈLE • MODELO
DDR030BHWDB
DDR050BHWDB
2017.09.21
Advertisement
Table of Contents

Related Manuals for Danby DDR030BHWDB


Summary of Contents for Danby DDR030BHWDB
- Page 1 MANUAL DEL PROPIETARIO DEHUMIDIFIER Owner’s Manual.......1 - 8 MODEL • MODÈLE • MODELO DÉSHUMIDIFICATEUR Manuel du propriétaire....9 - 16 DDR030BHWDB DDR050BHWDB DESHUMIDIFICADOR Manual del propietario....17 - 24 DANBY PRODUCTS LIMITED, ONTARIO, CANADA N1H 6Z9 DANBY PRODUCTS INC., FINDLAY, OHIO, USA 45840 2017.09.21...
- Page 2 Welcome Welcome to the Danby family. We are proud of our quality products and we believe in dependable service. We suggest that you read this owner’s manual before plugging in your new appliance as it contains important operation information, safety information, troubleshooting and maintenance tips to ensure the reliability and longevity of your appliance.
-
Page 3: Read And Follow All Safety Instructions
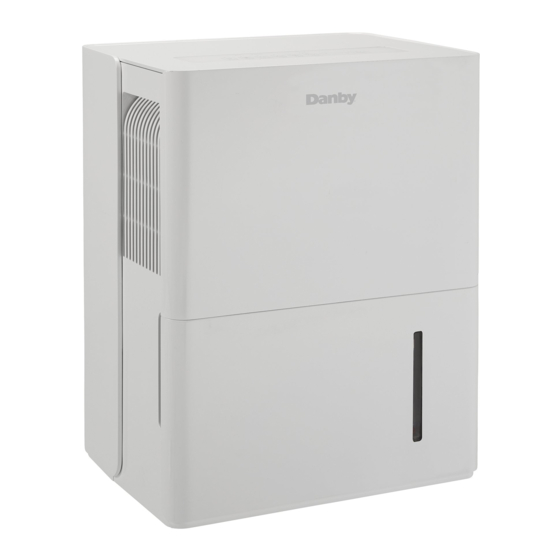
Important Safety Information READ AND FOLLOW ALL SAFETY INSTRUCTIONS SAFETY REQUIREMENTS GROUNDING INSTRUCTIONS This appliance is not intended for use by persons This appliance must be grounded. Grounding (including children) whose physical, sensory or reduces the risk of electrical shock by providing an mental capabilities may be different or reduced, escape wire for the electrical current. - Page 4 OPERATING INSTRUCTIONS LOCATION FEATURES Front • Place the dehumidifi er on a smooth, level fl oor that is strong enough to support the appliance with a full bucket of water. 1. Control Panel 2. Handles (both sides) • To maintain effi ciency, operate the appliance 3.
-
Page 5: Control Panel
OPERATING INSTRUCTIONS CONTROL PANEL 5. Continuous Mode Button and Indicator Light 1. Defrost Indicator Light • Press this button to activate continuous mode. • The defrost indicator light will illuminate This will run the dehumidifying function when frost has accumulated on the interior continuously. -
Page 6: Timer Function
OPERATING INSTRUCTIONS TIMER FUNCTION WATER REMOVAL Auto On Function There are two ways to remove collected water from the appliance. 1. Press the timer button until the auto on indicator 1. Water Bucket light illuminates. 2. Use the up and down arrows to select the desired amount of time before the appliance The dehumidifi... -
Page 7: Care And Maintenance
CARE & MAINTENANCE AIR FILTER CLEANING The air fi lter should be cleaned approximately every To avoid possible electric shock, ensure that the 2 weeks. The air fi lter may require more frequent appliance is unplugged before performing any cleaning if there is signifi cant dander or fur in the cleaning or maintenance. -
Page 8: Troubleshooting
TROUBLESHOOTING Danby Consumer Care: 1-800-263-2629 Hours of operation: Monday to Thursday 8:30 am - 6:00 pm Eastern Standard Time Friday 8:30 am - 4:00 pm Eastern Standard Time Information in this manual is subject to change without notice. PROBLEM POSSIBLE CAUSE Appliance will not operate •... - Page 9 Sale of Goods Act or like legislation or statute is hereby expressly Nothing within this warranty shall imply that Danby will be responsible or liable for any spoilage or damage to food or other c ontents of this appliance, whether due excluded.
- Page 10 Bienvenue Bienvenue à la famille Danby. Nous sommes fi ers de la qualité de nos produits et nous croyons en le service fi able. Nous vous suggérons de lire ce manual d’utilisation avant de brancher votre nouvel appareil car il contient des informations inportantes sur l’utilisation, la sécurité, le dépannage et la maintenance, afi...
-
Page 11: Instructions De Mise À La Terre
Informations importantes de sécurité LIRE ET SUIVRE TOUTES LES INSTRUCTIONS DE SÉCURITÉ EXIGENCES DE SÉCURITÉ INSTRUCTIONS DE MISE À LA TERRE Cet appareil n’est pas destiné à être utilisé par Cet appareil doit être mis à la terre. La mise à des personnes (y compris des enfants) dont les la terre réduit le risque de choc électrique en capacités physiques, sensorielles ou mentales... -
Page 12: Instructions D'utilisation
INSTRUCTIONS D’UTILISATION EMPLACEMENT CARACTÉRISTIQUES Avant • Placez le déshumidifi cateur sur un plancher lisse et plat qui est assez solide pour supporter l’appareil avec un seau complet d’eau. 1. Panneau de contrôle 2. Poignées (des deux côtés) • Pour maintenir l’effi cacité, faites fonctionner 3. -
Page 13: Panneau De Contrôle
INSTRUCTIONS D’UTILISATION PANNEAU DE CONTRÔLE 5. Bouton de mode continu et voyant lumineux 1. Voyant lumineux de dégivrage • Appuyez sur ce bouton pour activer le • Le témoin de dégivrage s’allume lorsque mode continu. Cela entraînera en continu le givre s’est accumulé à l’intérieur de la fonction de déshumidifi... -
Page 14: Fonction De Minuterie
INSTRUCTIONS D’UTILISATION FONCTION DE MINUTERIE ELIMINATION D’EAU Fonction d’activation automatique Il existe deux façons d’éliminer l’eau collectée de l’appareil. 1. Appuyez sur le bouton de la minuterie jusqu’à 1. Seau d’eau ce que le voyant d’activation automatique s’allume. 2. Utilisez les fl èches haut et bas pour sélectionner Le déshumidifi... -
Page 15: Soins Et Maintenance
SOINS ET MAINTENANCE FILTRE À AIR NETTOYAGE Le fi ltre à air doit être nettoyé environ toutes les 2 Pour éviter tout risque d’électrocution, assurez-vous semaines. Le fi ltre à air peut nécessiter un nettoyage que l’appareil est débranché avant d’effectuer un plus fréquent si il y a un choc important ou de la nettoyage ou une maintenance. -
Page 16: Dépannage
DÉPANNAGE Danby soins du consommateur: 1-800-263-2629 Heures d’ouverture: Lundi à Jeudi 8 h 30 à 18 h, heure normale de l’Est Vendredi de 8 h 30 à 16 h, heure normale de l’Est Les informations contenues dans ce manuel sont sujettes à modifi cation sans préavis. - Page 17 En vertu de la présente, il n’existe aucune autre garantie, condition ou représentation, qu’elle soit exprimée ou tacite, de façon Nothing within this warranty shall imply that Danby will be responsible or liable for any spoilage or damage to food or other c ontents of this appliance, whether due manifeste ou intentionnelle, par Danby ou ses distributeurs agréés.
- Page 18 Bienvenido Bienvenido a la familia Danby. Estamos orgullosos de nuestros productos de calidad y creemos en un servicio confi able. Sugerimos que lea este manual del propietario antes de conectar el nuevo aparato ya que contiene información importante sobre la operación, información de seguridad, solución de problemas y consejos de mantenimiento para garantizar la fi...
-
Page 19: Instrucciones De Conexion A Tierra
Informacion de Seguridad Importante LEA Y SIGA TODAS LAS INSTRUCCIONES DE SEGURIDAD REQUERIMIENTOS DE SEGURIDAD INSTRUCCIONES DE CONEXION A TIERRA Este aparato no está diseñado para ser utilizado Este aparato debe estar conectado a tierra. La por personas (incluyendo niños) cuyas capacidades puesta a tierra reduce el riesgo de descarga físicas, sensoriales o mentales sean diferentes eléctrica proporcionando un cable de escape para... - Page 20 INSTRUCCIONES DE OPERACIÓN UBICACIÓN CARACTERISTICAS Frente • Coloque el deshumidifi cador en un piso liso y nivelado que sea lo sufi cientemente fuerte para sostener el aparato con un cubo lleno de agua. 1. Panel de control 2. Manijas (ambos lados) •...
- Page 21 INSTRUCCIONES DE OPERACIÓN PANEL DE CONTROL 5. Botón de modo continuo y luz indicadora 1. Luz indicadora de descongelación • Pulse este botón para activar el modo • La luz indicadora de descongelación se continuo. Esto ejecutará la función de ilumina cuando se ha acumulado escarcha deshumidifi...
-
Page 22: Función Del Temporizador
INSTRUCCIONES DE OPERACIÓN FUNCIÓN DEL TEMPORIZADOR REMOCION DE AGUA Función encendido automático Hay dos formas de eliminar el agua recogida del aparato. 1. Pulse el botón del temporizador hasta que 1. Cubo de agua se ilumine la luz indicadora de encendido automático. -
Page 23: Cuidado Y Mantenimiento
CUIDADO Y MANTENIMIENTO FILTRO DE AIRE LIMPIEZA El fi ltro de aire debe limpiarse aproximadamente Para evitar posibles descargas eléctricas, asegúrese cada 2 semanas. El fi ltro de aire puede requerir de que el aparato esté desenchufado antes de una limpieza más frecuente si hay caspa o pelaje realizar cualquier limpieza o mantenimiento. -
Page 24: Solución De Problemas
SOLUCIÓN DE PROBLEMAS Danby cuidado del consumidor: 1-800-263-2629 Horas de operación: Lunes a Jueves 8:30 am - 6:00 pm Hora estándar del este Viernes 8:30 am - 4:00 pm Hora estándar del este La información de este manual está sujeta a cambios sin previo aviso. - Page 25 EXCLUSIONES Nothing within this warranty shall imply that Danby will be responsible or liable for any spoilage or damage to food or other c ontents of this appliance, whether due Salvo lo aquí indicado por Danby, no existen otras garantías, condiciones o representaciones, explícitas o implícitas, concretas o to any defect of the appliance, or its use, whether proper or improper.
- Page 26 NOTES / REMARQUES / NOTAS : __________________________________________________________________________________________ __________________________________________________________________________________________ __________________________________________________________________________________________ __________________________________________________________________________________________ __________________________________________________________________________________________ __________________________________________________________________________________________ __________________________________________________________________________________________ __________________________________________________________________________________________ __________________________________________________________________________________________ __________________________________________________________________________________________ __________________________________________________________________________________________ __________________________________________________________________________________________ __________________________________________________________________________________________ __________________________________________________________________________________________ __________________________________________________________________________________________ __________________________________________________________________________________________ __________________________________________________________________________________________ __________________________________________________________________________________________ __________________________________________________________________________________________ __________________________________________________________________________________________ __________________________________________________________________________________________ __________________________________________________________________________________________...
- Page 27 NOTES / REMARQUES / NOTAS : __________________________________________________________________________________________ __________________________________________________________________________________________ __________________________________________________________________________________________ __________________________________________________________________________________________ __________________________________________________________________________________________ __________________________________________________________________________________________ __________________________________________________________________________________________ __________________________________________________________________________________________ __________________________________________________________________________________________ __________________________________________________________________________________________ __________________________________________________________________________________________ __________________________________________________________________________________________ __________________________________________________________________________________________ __________________________________________________________________________________________ __________________________________________________________________________________________ __________________________________________________________________________________________ __________________________________________________________________________________________ __________________________________________________________________________________________ __________________________________________________________________________________________ __________________________________________________________________________________________ __________________________________________________________________________________________ __________________________________________________________________________________________...
- Page 28 MODEL • MODÈLE • MODELO MODEL • MODÈLE • MODELO DDR030BHWDB DDR050BHWDB Printed in China Danby Products Limited, Guelph, ON, Canada N1H 6Z9 Imprimé en Chine Danby Products Inc., Findlay, Ohio, USA 45840 Impreso en China...
Need help?
Do you have a question about the DDR030BHWDB and is the answer not in the manual?
Questions and answers