
Related Manuals for Count KF-200

Summary of Contents for Count KF-200
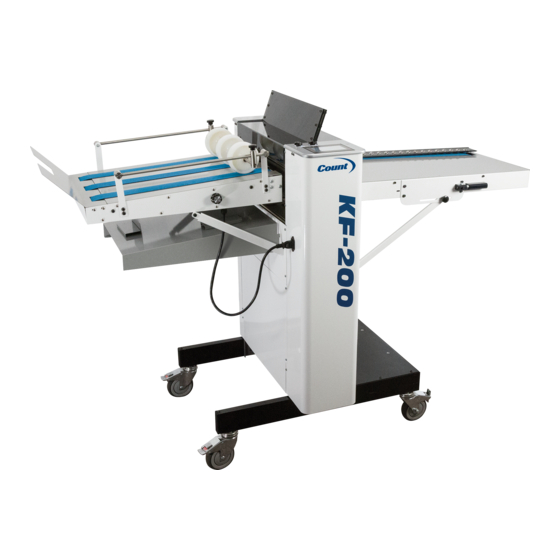
- Page 1 KF-200 12-2016 Version 1.0 Knife Folding Machine Serial Number ___________________________ Date ___________________________________...
- Page 2 Page left blank intentionally...
-
Page 3: Table Of Contents
CARE AND MAINTENANCE ....................... 7 BEARINGS/BUSHINGS: ......................... 7 SENSOR EYE: ..........................7 KEEP THE ROLLERS CLEAN: ......................7 IMPORTANT NOTES BEFORE OPERATING THE KF-200 ..............7 DOUBLE FEEDING: ........................7 KNOB SETTINGS: .......................... 7 START DELAY: ..........................7 COMPONENT IDENTIFICATION ......................8 SETTING UP YOUR KF-200 ....................... - Page 4 MEASURE SHEET ........................17 RUN SCREEN ..........................17 MICRO ADJUSTING THE FOLD POSITION ................... 18 REPEAT LAST JOB ........................18 BI-PASS MODE ........................... 18 TRANSPORT OPERATION ......................19 AUTO FOLD SETUP ......................... 19 HALF FOLD SETUP: ........................19 TRI-FOLD SETUP: ........................20 Z FOLD SETUP: ...........................
-
Page 5: Introduction
INTRODUCTION PREFACE The KF-200 is a precision folding machine. With its intuitive touchscreen design it can perform 6 different types of automated setup folds of pre-creased paper. It has a manual feature that allows for the fold to be placed virtually anywhere on the sheet. When properly setup and using pre-creased sheets, the knife blade folding mechanism will prevent the cracking of digitally printed material when folded. -
Page 6: Electrical Specifications
ELECTRICAL SPECIFICATIONS Power Requirement: 110v/220v, 60/50 HZ, AC 15AMP Circuit Protection: 5 AMP Circuit Breaker NOTE: Older buildings, overloaded lines, and bad grounds can affect the operation of your KF- 200. A regulated dedicated line is recommended. Operating the machine through a power strip is not recommended. -
Page 7: Care And Maintenance
CARE AND MAINTENANCE The KF-200 is a precision machine. It is very important to keep it free of excessive dust, dirt and foreign matter. We recommend that you keep the machine covered when not in use. BEARINGS/BUSHINGS: The bearings are sealed roller bearings and are designed to be self lubricating, however dirt and dust can get into them causing clogging and dirt build up. -
Page 8: Component Identification
COMPONENT IDENTIFICATION Touch Screen Gap Knobs Register Table Assembly Motorized Delivery Register Guide Rail Micro Skew Adjustment Paper Stop Power Switch Delivery Tray REFERENCES Touch Screen Pg. 13 Register Table Assembly Pg. 10 Register Guide Rail Pg. 10 Motorized Delivery Pg. -
Page 9: Setting Up Your Kf-200
SETTING UP YOUR KF-200 This machine is 90% ready to go when it arrives on your dock. There are only a few items that need to be put into position before it is ready to use. Those items are below:... -
Page 10: Paper Stop Assemblies
As shown below there are hooks that hold the bi-pass tray into position. If the magnetic paper stops have already been placed you should remove them for easier installation of the tray. Then angle upward and insert the hook into the slot then rotate downward to place the lower hook into the slot. -
Page 11: Register Guide Installation
REGISTER GUIDE INSTALLATION The register guide for the machine is recommended to be installed by two people but can be done with one although it is more difficult. Start by removing the knobs located on the lower support arms. Next locate the entry pins. Install the hooks on the front of the register guide to the pins. -
Page 12: Connecting Kf-200 To Accucreaser / Fc114A
Connecting KF-200 to ACCUCREASER / FC114A The KF-200 is designed to run in line with the Count Accucreaser and The Count FC-114 A creasing machines. To Connect them, there is a hook on the non operator side of the KF-200 register that needs to be attached to the exit shaft of the creasing machine as seen below. -
Page 13: Main Power
MACHINE OPERATION There is one main power switch on the KF-200 located on the lower portion of the operator side cover. Everything else is controlled by the Touch Screen. All paper run through the KF-200 folding machine must be creased. -
Page 14: Touch Screen Controller
TOUCH SCREEN CONTROLLER THE TOUCH SCREEN CONSISTS OF FIVE SECTIONS: 1. Count Logo and Service Access 2. Auto Setup 3. Manual Setup 4. Repeat Last Job 5. Bi-Pass Mode TOUCH SCREEN OPERATION When the machine is turned on the display may take up to 7 seconds for the home screen to display. -
Page 15: Auto Setup Screen
AUTO SETUP SCREEN From the home screen press the Auto Setup button. The select fold screen appears. Press the desired image to select that fold. Select the fold you want by pressing the image. PAPER THICKNESS Select the thickness of paper to be folded. This is important as thinner stocks will fold differently than thicker stocks. -
Page 16: Knob Settings / Gap Adjustment
KNOB SETTINGS / GAP ADJUSTMENT This adjustment is very important and affects the operation of the machine dramatically. The knobs are positioned from left to right. Knob 1 is on the left and knob 2 is on the right. Knob 1 controls gap 1 and knob 2 controls gap 2. -
Page 17: Measure Sheet
Once measured press accept to go to the run screen. RUN SCREEN On the Run Screen there is a counter that will count how many sheets are run through the machine. It can be reset by pressing the counter reset. When the run button is not selected you can jog the machine forward and backward using the jog arrows. -
Page 18: Micro Adjusting The Fold Position
MICRO ADJUSTING THE FOLD POSITION It is very important to understand the relationship of the fold offset versus the crease offset. When folding a creased stock the nature of the creased paper when folded is to follow the crease. If possible, adjust the crease before micro adjusting the crease. If you wish to move the position of the fold relative to the lead edge you would need to adjust the position of the crease and not necessarily the position of the fold. -
Page 19: Transport Operation
TRANSPORT OPERATION The Run Button will start the knife home function. Once the blades are in position the transport will start. This is about a 2 second delay and is normal. Press it again to stop the transport. Each Mode has a timeout feature to preserve the life of the machine. ... -
Page 20: Tri-Fold Setup
TRI-FOLD SETUP: Press the Auto Setup Button > Tri-Fold > Paper Thickness > Adjust the Knob Setting > OK, I have made the Adjustment > Start Measuring > Physically Run a sheet through the machine for the sensor to measure > Accept > Run. Z FOLD SETUP: Press the Auto Setup Button >... -
Page 21: Double Parallel Fold Setup
DOUBLE PARALLEL FOLD SETUP: Press the Auto Setup Button > Tri-Fold > Paper Thickness > Adjust the Knob Setting > OK, I have made the Adjustment > Start Measuring > Physically Run a sheet through the machine for the sensor to measure > Accept > Run. MANUAL SETUP Manual Setup allows you to type in the distance in MM for the lengths you want the fold locations. -
Page 22: Saving Manual Fold Jobs
SAVING MANUAL FOLD JOBS Press the Manual Setup Button > Fold 1 > Enter In Distance For each fold in mm > Memory Save > Select Position to save in 1, 2, 3, or 4. RECALLING MANUAL FOLD JOBS Press the Manual Setup Button > Memory Recall > 1, 2, 3, or 4 > Accept > Run. -
Page 23: In Feed Register Guide
Register Guide Ball Rack IN FEED REGISTER GUIDE Micro Skew Adjustment ADJUSTING THE MICRO SKEW OF THE IN-FEED REGISTER There is a skew adjust to the in-feed register that is set to square from the factory. If you are dealing with stock that is not cut square this is the procedure to adjusting the micro skew. You will need a 5/32 “L”... -
Page 24: Delivery Table
DELIVERY TABLE The delivery table for the KF-200 is a motorized delivery that has a variable speed knob that is used to adjust the speed. It also has a smart sensor that ensures the paper only travel a short distance to ensure continued shingling. The speed of the conveyor is directly related to how tight the shingle of the sheets is. -
Page 25: Checking The Sensors
CHECKING THE SENSORS 1. Turn machine power on and allow screen to turn on 2. There should be 2 lights on the sensor; a green indicating power is getting to the sensor and orange that is the reflecting signal. If both lights are not on, there is a problem and must be fixed before you are able to run. -
Page 26: Trouble Shooting
TROUBLE SHOOTING POWER DOES NOT TURN ON 1. Check circuit breaker in electrical cabinet. 2. Check outlet for power. TRANSPORT “LOCKS UP” AFTER OR WHILE FOLDING 1. Check the knob setting. Increase gap. 2. Check the belts to ensure they are still tight. 3. - Page 27 Page left blank intentionally...
Need help?
Do you have a question about the KF-200 and is the answer not in the manual?
Questions and answers