Table of Contents
Advertisement
Quick Links
Advertisement
Table of Contents

Related Manuals for DAVIS IC6312AU


Summary of Contents for DAVIS IC6312AU
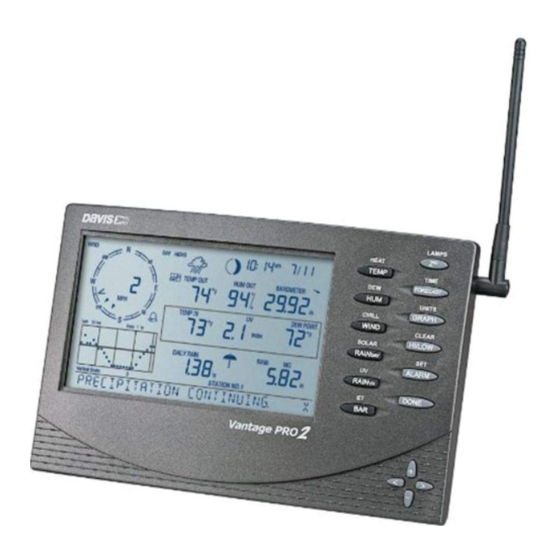
- Page 1 Console Manual ™ ™ For Vantage Pro2 & Vantage Pro2 Plus Weather Stations Supplied in Australia by Instrument Choice Call our scientists on 1300 737 871 www.instrumentchoice.com.au ® Davis Instruments, 3465 Diablo Avenue, Hayward, CA 94545-2778 U.S.A. • 510-732-9229 • www.davisnet.com...
- Page 2 Connect the equipment into an outlet on a circuit different from that to which the receiver is connected. • Consult the dealer or an experienced radio/TV technician for help. Changes or modification not expressly approved in writing by Davis Instruments may void the warranty and void the user's authority to operate this equipment. FCC ID: IR2DWW6312...
-
Page 3: Table Of Contents
Table of Contents Welcome to Vantage Pro2 ...................1 Console Features ....................... 1 Vantage Pro2 Options ....................2 Installing the Console ......................4 Powering the Console ....................4 Installing the AC Power Adapter ................4 Installing Batteries ....................5 Connecting Cabled Stations ..................5 Console Location ...................... -
Page 4: Welcome To Vantage Pro2 Tm
Wireless consoles can also collect data from optional Vantage Pro2 sensors or a Davis Vantage Vue ISS, and can also retransmit data to other Vantage Pro2 or Van- tage Vue consoles or a Davis Weather Envoy. You can have an unlimited number of... -
Page 5: Vantage Pro2 Options
Vantage Pro2 Options Console Modes The console operates in five basic modes: Setup, Current Weather, Highs and Lows, Alarm, and Graph. Each mode lets you access a different set of console functions or display a different aspect of your weather data. Vantage Pro2 Options Optional Sensors &... - Page 6 (#6560) Optional Accessories Accessories are available from your dealer or may be ordered directly from Davis Instruments. Envoys: Wireless Weather Envoy (#6316,) Envoy8X (#6318) Performs many of the same functions as a Vantage Pro2 console, but without a display.
-
Page 7: Installing The Console
Chapter 2 Installing the Console The Vantage Pro2 console is designed to give extremely accurate readings. As with any precision instrument, use care in its assembly and handling. Although installing the console is relatively simple, following the steps outlined in this chapter and assembling the Vantage Pro2 correctly from the start will help ensure that you enjoy all of its fea- tures with a minimum of time and effort. -
Page 8: Installing Batteries
ISS. Maximum cable length from ISS to the console using Davis Instruments cables is 1000 feet. To connect the console to the ISS: 1. Firmly insert the console end of the straight-through four-conductor wire into the console receptacle marked “ISS”... -
Page 9: Console Location
Console Location 2. Ensure that the ISS cable is not twisted through the access port. Note: The ISS must be assembled and connected to the console so that it is receiving power before the console connection can be tested. Once the console and ISS are both powered up, cable connection should be tested and established. - Page 10 Console Location 2. Lean the kickstand out by pulling on its top edge. You’ll see the indentation for your finger at the top edge of the console. 3. Slide the catch to rest the kickstand in the appro- priate angle. Choose low angles for display on a coffee table or other low area.
- Page 11 Console Location Wall Mounting The console mounts to the wall using two keyholes located on the back of the case. To mount the console on a wall: 1. Use a ruler to mark two mounting hole positions on the wall 8 inches (203 mm) apart.
-
Page 12: Using Your Weather Station
Chapter 3 Using Your Weather Station The console LCD screen and keyboard provide easy access to your weather informa- tion. The large LCD display shows current and past environmental conditions as well as a forecast of future conditions. The keyboard controls console functions for viewing current and historical weather information, setting and clearing alarms, changing sta- tions types, viewing and/or changing station settings, setting up and viewing graphs, selecting sensors, getting the forecast, and so on. - Page 13 Setup Mode Screen 1: Active Transmitters Screen 1 displays the message “Receiving from...” and shows the transmitters being received by the console. In addition, an “X” blinks in the lower right-hand corner of the screen every time the console receives a data packet from a station. The rest of the LCD screen is blank.
- Page 14 Setup Mode Screen 2: Transmitter ID configuration If you have a cabled station, or if you have a wireless station and are using the default transmitter ID setting, press DONE to move to the next screen. Note: Typically, you can use the default transmitter ID setting of 1 unless you are installing one of the optional transmitter stations.
- Page 15 Setup Mode Note: Make a note of the ID selected for retransmit. The console that receives the data from the console you have selected to retransmit should be configured to receive the transmitter ID you selected. See “Screen 2: Configuring Transmitter IDs — Wireless Only”...
- Page 16 Royal Observatory in Greenwich, England. Hayward, California, the home of Davis Instruments, observes Pacific Stan- dard Time. The UTC offset for Pacific Standard Time is -8:00, or eight hours behind Universal Time (UTC).
- Page 17 Setup Mode Screen 8: Daylight Saving Settings In most of North America (except Saskatchewan, Arizona, Hawaii, and the Mexican State of Sonora); and Europe use the AUTO daylight saving setting. The console is pre- programmed to use the correct starting and stopping dates for daylight saving time in these areas, based on the time zone setting in screen 7.
- Page 18 Setup Mode 1. Press the < and > keys to move from one numeral to another. 2. Press the + and - keys to adjust a numeral up or down. 3. To switch between feet and meters, press 2ND then press UNITS. 4.
- Page 19 Setup Mode Screen 12: Rain Collector The tipping bucket in the Vantage Pro2 rain collector has been calibrated at the factory to measure 0.01''of rain with each tip for US models, or 0.2 mm of rain with each tip for UK and EU models.
- Page 20 Setup Mode Note: This setting determines when the yearly rain total is reset to zero. Davis Instruments recommends a January rain season setting (the default), unless you reside in the west coast of the United States, the Mediterranean coast, experience dry winters in the Southern Hemisphere.
-
Page 21: Current Weather Mode
Current Weather Mode Current Weather Mode In the Current Weather Mode you can display the current data readings from your sta- tion, select units of measure, and calibrate, set, or clear weather variables. You can see up to ten weather variables on the screen at the same time, as well as the time and date, the moon and forecast icons, a forecast or special message from your station, and a graph of the currently selected variable. - Page 22 Selecting Units of Measure these steps cycles through the units available for barometric pressure: millibars, mil- limeters, inches, and hectoPascals. BAROMETER BAROMETER BAROMETER Displaying Units: Barometric Pressure Units: millibars (mb), millimeters (mm) and TEMP IN TEMP OUT WIND WIND TEMP OUT HUM OUT BAROMETER TEMP IN...
- Page 23 Selecting Units of Measure Temperature may be displayed in degrees Fahrenheit (ºF) or Celsius TEMP (ºC). Temperatures can also be displayed in degrees or in tenths of a degree. 2. Press TEMP again to select inside temperature. Each consecutive press of TEMP displays temperature readings for any optional temperature, temperature/humidity, soil temperature, soil moisture stations also con- nected to your console.
- Page 24 Selecting Units of Measure Pressure Trend The pressure trend arrow indicates the current barometric trend, measured over the last three hours. The pressure trend is updated every 15 minutes. The pres- sure trend requires three hours of data in order to be calculated so it won’t dis- play right away on a new station.
- Page 25 Selecting Units of Measure RAIN YEAR RAIN STORM WIND TEMP OUT HUM OUT BAROMETER RAIN TEMP IN HUM IN HEAT INDEX Last 24 hrs Every 1 RAIN YEAR DAILY RAIN STATION NO.1 Vertical Scale: DAILY RAIN RAIN RATE in/hr Daily Rain, Rain Storm, Rain Year, Rain Month, & Rain Rate Rain Rate Press RAINYR to display the current rain rate.
- Page 26 Selecting Units of Measure WIND YEAR GRAPH TEMP OUT HUM OUT BAROMETER TEMP IN HUM IN HEAT INDEX YEAR Last 24 hrs Every 1 DAILY RAIN RAIN YEAR STATION NO.1 Vertical Scale: Solar Radiation, Current ET, ET Month & ET Year Solar Radiation Press and release 2ND then press SOLAR to display the current SOLAR...
-
Page 27: Displaying The Forecast
Displaying the Forecast Displaying the Forecast Your console generates a weather forecast based on the barometric reading & trend, wind speed & direction, rainfall, temperature, humidity, latitude & longitude, and time of year. Included in the forecast is a prediction of the sky condition (sunny, cloudy, etc.) and changes in precipitation, temperature, wind direction or wind speed. -
Page 28: Calibrating, Setting, And Clearing Variables
Calibrating, Setting, and Clearing Variables Calibrating, Setting, and Clearing Variables To fine-tune your station, you can calibrate most of the weather variables. For example, if your outside temperature seems consistently too high or too low, you can enter an offset to correct the deviation. Calibrating Temperature And Humidity You can calibrate inside &... - Page 29 Calibrating, Setting, and Clearing Variables 6. Press DONE to exit calibration. Setting Weather Variables You can set values for the following weather variables: • Daily Rain—Sets the daily rain total. Monthly and yearly rain totals are updated. • Monthly Rain—Sets the current months total rain. Does not affect yearly rain total. •...
-
Page 30: Highs And Lows Mode
Highs and Lows Mode 2. Press 2ND then press and hold CLEAR for at least six seconds. 3. Release CLEAR when “CLEARING NOW” displays at the bottom of the console’s screen. Highs and Lows Mode The Vantage Pro2 records highs and lows for many weather conditions over three dif- ferent periods: days, months, and years. -
Page 31: Alarm Mode
Alarm Mode The HIGH or LOW icon, as well the DAY, MONTH or YEAR icon lights to display which High/Low screen you’ve selected. 3. Press the < and > keys to scroll back and forth through the last 24 values. Pressing the <... - Page 32 Alarm Mode UV Dose The UV dose alarm sounds when the accumulated UV dose has exceeded the dose you set. The UV dose alarm does not arm unless the initial UV dose for the day has been reset. Once the UV dose alarm value is set, clear the accumulated UV dose. See “Clear- ing Weather Variables”...
- Page 33 Alarm Mode Vantage Pro2 Station AlarmsVantage Pro2 Station Alarms Variable Alarms Storm Warning - uses trend value falling rate Barometric Pressure Trend Storm Clearing - uses trend value rising rate Evapotranspiration ET Alarm - uses total ET for the day Humidity, Inside High and Low Humidity, Outside...
-
Page 34: Graph Mode
Graph Mode Clearing Alarm Settings 1. Press ALARM to enter alarm mode. The ALARM and HIGHS icons appear. 2. Select the alarm setting you wish to clear. 3. Press 2ND, then press and hold CLEAR until the setting changes to all dashes. You have cleared the alarm setting. - Page 35 Graph Mode If you press the - key the graph shifts from the last 24 hours to the GRAPH TEMP OUT last 24 days. Now each dot repre- sents the high recorded on the day shown in the date field. To see the HIGHS Last 24 days...
- Page 36 Graph Mode Vantage Pro2 Console Graphs Weather Variable Available Graphs* Barometric Pressure H, L H, L Evapotranspiration (ET)** Humidity, Inside H, L H, L Humidity, Outside H, L H, L Dew Point H, L H, L Leaf Wetness*** H, L Rain Storm**** Rain Rate...
-
Page 37: Troubleshooting And Maintenance
If you are having a problem with your sta- tion, please consult this troubleshooting guide before calling Davis technical support. You may be able to quickly solve the problem yourself. Please see “Contacting Davis Technical Support” on page 53. - Page 38 Vantage Pro2 Troubleshooting Guide 4-1: T ABLE ROUBLESHOOTING UIDE Problem Solution Check to see if ISS is near mechanical or radiant heat source. Outside temperature sen- Check calibration number and adjust if necessary. ISS or temp sor reading seems too high sensor may need to be relocated.
-
Page 39: Console Diagnostic Mode
Console Diagnostic Mode • An “X” flashes for every data packet received by the console. • An “R” displays when the console is trying to re-establish a lost connection. The console tries for 10 minutes to re-establish a connection before going into L Mode.When no data packets have been received for 10 minutes, the console dashes- out any missing sensor readings. - Page 40 ‡ Note: All values with a * mark the value as being for Davis Instruments Internal use. All values with a mark values that are the same on both the Statistical and Reception Diagnostic screens. Time of day or number of times the anemometer reed switch was seen closed The reed switch closes once each revolution of the anemometer wind cups.
- Page 41 If the console is not listen- ing to repeaters, this section remains blank. Please see Application Note 25 available on the Davis Instruments Support web page for more information on using repeaters.
- Page 42 Console Diagnostic Mode The information that is displayed in this screen includes: ° Last 24 days Every 1 STATION NO. Vertical Scale: Screen 2: Reception Diagnostics Screen 8-bit timer value of next reception. Radio frequency error of the last packet received successfully. In normal opera- tion, this value is +1, -1, or 0.
-
Page 43: Console Maintenance
Console Maintenance Console Maintenance Changing Batteries Use this procedure to change console batteries without losing any stored weather data or console configuration settings. Plug in the AC adapter or, if the AC adapter is not present, enter Setup Mode by pressing DONE and then the - key. -
Page 44: Appendix A Weather Data
Appendix A Weather Data Refer to this appendix to learn more about the weather variables that are measured, dis- played, and logged by your Vantage Pro2 Station. Some weather variables require optional sensors. See “Optional Sensors & Transmitting Stations” starting on page 2. Wind The anemometer measures wind speed and direction, and is part of the Integrated Sen- sor Suite (ISS). - Page 45 Note: Heat Index is equal to the air temperature at or below 0° F (-18° C). Temperature/Humidity/Sun/Wind (THSW) Index The THSW Index uses humidity and temperature like for the Heat Index, but also includes the heating effects of sunshine and the cooling effects of wind (like wind chill) to calculate an apparent temperature of what it “feels”...
- Page 46 the time it is displayed. Converting at display time reduces possible compounded rounding errors over time. Four separate variables track rain totals: “rain storm,” “daily rain,” “monthly rain,” and “yearly rain.” Rain rate calculations are based on the interval of time between each bucket tip, which is each 0.01'' rainfall increment or 0.2 mm.
- Page 47 dence suggests that UV exposure should be avoided and that even low UV doses can be harmful. UV MEDs MED (Minimum Erythemal Dose) is defined as the amount of sunlight exposure neces- sary to induce a barely perceptible redness of the skin within 24 hours after sun expo- sure.
- Page 48 A-2: E ABLE NVIRONMENT ANADA YPES AND EACTION TO THE Skin Type Skin Color History of Tanning & Sunburning White Always burns easily, never tans White Always burns easily, tans minimally Light Brown Burns moderately, tans gradually Moderate Burns minimally, tans well Brown Dark Brown Burns rarely, tans profusely...
- Page 49 A-3: UV I ABLE NDEX Index Values Exposure Category 0 - 2 3 - 4 Moderate 5 - 6 High 7 - 9 Very High Extreme Evapotranspiration (ET) Evapotranspiration (ET) is a measurement of the amount of water vapor returned to the air in a given area.
-
Page 50: Appendix B Specifications
Appendix B Specifications See complete specifications for your Vantage Pro2 Station at our website: www.davisnet.com. Console Specifications Console Operating Temperature ..+32° to +140°F (0° to +60°C) Non-operating Temperature ... +14° to +158°F (-10° to +70°C) Console Current Draw . -
Page 51: Console Data Display Specifications
Console Data Display Specifications Console Data Display Specifications Historical Data ..... Includes the past 24 values listed un- less otherwise noted; all can be cleared and all totals reset. -
Page 52: Weather Data Specifications
Weather Data Specifications Weather Data Specifications Note: These specifications include optional sensors that may not be installed in your Vantage Pro2 Station. Weather Data Specifications Required Nominal Variable Resolution Range Sensors Accuracy (+/-) 16'' to 32.5'' Hg 0.03'' Hg Barometric 410 to 820 mm 0.01'' Hg;... - Page 53 Weather Data Specifications Weather Data Specifications Required Nominal Variable Resolution Range Sensors Accuracy (+/-) Solar Radiation Solar sensor 1 W/m 0 to 1800 W/m 5% of full scale Inside Included in +32 to +140F; 0.1F; 0.1C 1F; 0.5C 0 to +60C Temperature Console ISS, Temp...
-
Page 54: Appendix C Wireless Repeater Configuration
Appendix C Wireless Repeater Configuration A Vantage Pro2 Wireless Repeater (#7626, #7627) or Long-Range Wireless Repeater (#7653, #7654) increase transmission distances or improve transmission quality between a station and a console. A repeater receives information transmitted from a Vantage Pro2 station and retransmits it to a console. Depending on transmission dis- tance, one repeater or several repeaters can be used to collect and retransmit weather data. - Page 55 If the transmitter ID being repeated is displayed and an “X” flashes in the bottom right corner of the ticker tape, the transmitter is being repeated and received by the console successfully. The repeater’s information also displays at the bottom of the console’s diagnostics screens.
-
Page 56: Vantage Pro2 Console Icons
— E-mail to Technical Support. info@davisnet.com — General e-mail. www.davisnet.com — Davis Instruments web site. See the Weather Support sec- tion for copies of user manuals, product specifications, application notes, and infor- mation on software updates. Watch for FAQs and other updates.
Need help?
Do you have a question about the IC6312AU and is the answer not in the manual?
Questions and answers