Advertisement
Available languages
Available languages
Quick Links
Write purchased model number here.
Table of Contents:
Warranties ................................................................................................................ Page 2
Installation Instructions ...................................................................................... Pages 3 - 8
Clean and care ........................................................................................................ Page 9
Maintenance ........................................................................................................... Page 9
Cartridge Summary Reference Sheet ............................................................. Page 9
Classic Series Replacement Parts ..................................................................... Page 12
For additional replacement parts, visit www.deltafaucet.com
CAUTION: This system/device must be set by the
installer to ensure safe, maximum temperature.
Any change in the setting may raise the discharge
temperature above the limit considered safe and
may lead to hot water burns.
NOTICE TO INSTALLER: CAUTION! – As the
installer of this valve, it is your responsibility
to properly INSTALL and ADJUST this valve
per the instructions given. This valve does
not automatically adjust for inlet temperature
changes, therefore, someone must make the
necessary Rotational Limit Stop adjustments
at the time of installation and further adjustments
may be necessary due to seasonal water
temperature change. YOU MUST inform the
owner/user of this requirement by following the
instructions. If you or the owner/user are unsure
how to properly make these adjustments please
refer to page 6 and if still uncertain, call us at
1-800-345-DELTA.
After installation and adjustment, you must affix
your name, company name and the date you
adjusted the Rotational Limit Stop to the caution
www.deltafaucet.com
Owners Manual
13/14 Series
You May Need
label provided and apply or attach the label to
the back side of the closest cabinet door and
the warning label to the water heater. Leave
this Instruction Sheet for the owner's/user's
reference.
WARNING: This pressure balanced or
thermostatic bath valve is designed
to minimize the effects of outlet water
temperature changes due to inlet pressure
changes, commonly caused by dishwashers,
washing machines, toilets and the like. It may
not provide protection from hot water burns
when there is a failure of other temperature
controlling devices elsewhere in the plumbing
system, if the rotational limit stop is not
properly set or if the hot water temperature is
changed after the settings are made or if the
water inlet changes due to seasonal changes.
WARNING: Do not install a shut-off device on
either outlet of this valve. When this type of
device shuts off the water flow, it can defeat
the ability of the valve to balance the hot and
cold water pressures.
1
5/10/2016
Rev. L
Advertisement

Related Manuals for Delta 13 Series


Summary of Contents for Delta 13 Series
- Page 1 6 and if still uncertain, call us at WARNING: Do not install a shut-off device on 1-800-345-DELTA. either outlet of this valve. When this type of After installation and adjustment, you must affix...
- Page 2 Delta HDF Limited Warranty All parts of the Delta HDF faucet are warranted to the original PAR TICULAR PURPOSE, ARE LIMITED IN DUR ATION TO consumer purchaser to be free from defects in material and THE DUR ATION OF THIS WARR ANT Y.
- Page 3 Installation Installation Cartridge Installation Turn off water supplies. Remove Rotate the cartridge (1) so the words cover (1), bonnet nut (2) and test cap (3) “hot side” (2) appear on the left. Insert from the body. If this is not a thin wall cartridge into valve body as shown.
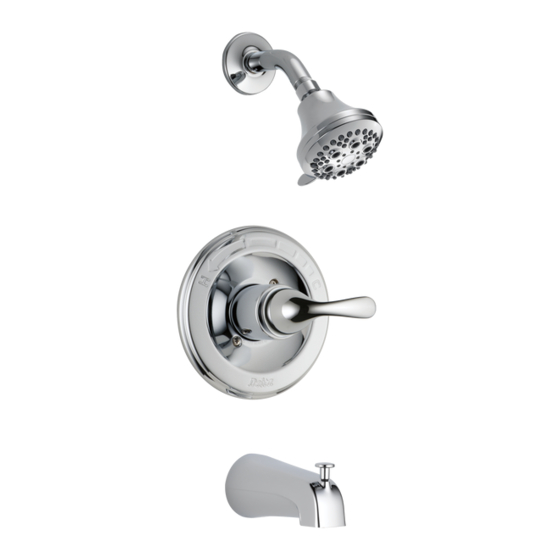
- Page 4 Installation Showerhead and Tub Spout Installation FOR SHOWERHEAD INSTALLATION: Connect top outlet (1) to shower arm (2) with proper fittings. To prevent damage to finish on shower arm, insert wall end of shower arm into shower flange (3) before screwing arm into riser connection.
- Page 5 Installation Showerhead and Tub Spout Installation FOR TUB SPOUT INSTALLATION: Refer to the installation instructions supplied with your spout. Do not connect deck mount spouts to in-wall valves. Do not use hand showers connected in lieu of a tub spout to a tub/shower valve. Do not use PEX tubing for tub spout drop.
- Page 6 Installation Adjusting the Rotational Limit Stop – Identify RSL type from pages 6-7. Hotter Disc Stem 1st Position RLS with removable disc IMPORTANT: The Rotational Limit Stop is used to limit the a comfortable bath or shower is typically amount of hot water available such that, if set between 90°F - 110°F.
- Page 7 Installation Adjusting the Rotational Limit Stop – Identify RSL type from pages 6-7. Hotter Cooler RLS with pull/turn adjustment IMPORTANT: The Rotational Limit Stop is used to limit the a comfortable bath or shower is typically between 90°F - 110°F. amount of hot water available such that, if set properly, a scald injury is less likely to occur if the •...
- Page 8 Installation Trim Installation Escutcheon Installation for Models T14053, T14253, T14453, T14067, T14267 & T14467. Slide O-ring (1) over cartridge and the bonnet nut (2). The O-ring, which acts as a spacer to steady the sleeve, should rest behind the bonnet nut. If your model requires a spacer (3), insert it into the sleeve (4) and push it to the front.
- Page 9 Clean and Care ® Care should be given to the cleaning Warning: Scrubbing Bubbles Bathroom of this product. Although its finish is ® Cleaner and Lysol Basin Tub and Tile extremely durable, it can be damaged by Cleaner must not be used on the clear knob harsh abrasives or polish.
- Page 10 Cartridge Summary Reference Sheet ® Monitor Series 1300/1400 Cartridge shipped in July 2006 and after Cartridge shipped before March 2006. ® (prior to MultiChoice transition). Shorter lower Shorter lower housing housing White White Blue or off-white Blue Order RP19804 to replace cartridge. Order RP19804 to replace cartridge.
- Page 11 6 y si todavía no está seguro, llámenos al entrada son por los cambios estacionales. 1-800-345-DELTA. ADVERTENCIA: No instale un aparato de corte Después de hacer la instalación y el ajuste,...
- Page 12 Delta Faucet Company. Esta Delta Faucet Company reemplazará, SIN CARGO, ® garantía le aplica sólo a las llaves de agua de Delta durante el período de garantía aplicable, cualquier pieza fabricadas después del 1 de enero 1995 e instaladas en los o acabado que pruebe tener defectos de material y/o Estados Unidos de América, Canadá...
- Page 13 Installation Instalación Instalación del Cartucho Gire el cartucho (1) de manera que las palabras Cierre los suministros de agua. Quite la ‘hot side’ (lado caliente) (2) aparezcan a la cubierta (1), la tuerca tapa (2) y la tapa de izquierda. Introduzca el cartucho en la válvula prueba (3).
- Page 14 Instalación Instalación de la Cabeza de la Regadera y el Surtidor de la Bañera PARA LAS INSTALACIONES DE LAS CABEZAS DE REGADERA: Conecte la toma de salida de agua superior (1) al brazo de la regadera (2) con los accesorios apropiados. Para prevenir daño al acabado del brazo de la regadera, introduzca el extremo que va hacia la pared del brazo de la regadera dentro del reborde (3) antes de atornillar el brazo en la conexión de...
- Page 15 Instalación Instalación de la Cabeza de la Regadera y el Surtidor de la Bañera PARA LA INSTALACIÓN DEL SURTIDOR DE LA BACERA: Refiérase a las instrucciones para la instalación suministradas con su surtidor. No conecte los surtidores para las instalaciones en las superficies horizontales en las válvulas dentro de las paredes.
- Page 16 Instalación El Ajuste del Tope que Limita la Rotación – Identifique el tipo RSL des de las páginas 6-7. Más Caliente Disco Unidad del Vástago Posición Primera RLS con disco desmontable. IMPORTANTE: variadas en el agua de salida. Una temperatura El Ajuste del Tope que Limita la Rotación se de agua para un baño o ducha confortable usa para limitar la cantidad de agua caliente típicamente es entre 90°F - 110°F.
- Page 17 Instalación El Ajuste del Tope que Limita la Rotación – Identifique el tipo RSL des de las páginas 6-7. Hotter Cooler RLS con ajuste de tracción/giro. IMPORTANTE: temperatura del agua fría es más fría que durante el verano resultando en tem-peraturas El Ajuste del Tope que Limita la Rotación se variadas en el agua de salida.
- Page 18 Instalación Instalación Final La instalación de la roseta para los modelos T14053, T14253, T14453, T14067, T14267 y T14467. Deslice el aro O (1) sobre el cartucho y la tu- erca tapa (2). El aro O, el cual funciona como un separador para estabilizar la manga, debe quedar apoyado en la tuerca tapa.
- Page 19 Limpieza y Cuidado de su Llave Tenga cuidado al ir a limpiar este producto. ¡ADVERTENCIA! No se puede usar ® Aunque su acabado es sumamente durable, SCRUBBING BUBBLES BATHROOM ® puede ser afectado por agentes de limpieza CLEANER o LYSOL BASIN TUB AND TILE o para pulir abrasivos.
- Page 20 Hoja resumen de referencia para el cartucho ® Monitor Series 1300/1400 El cartucho enviado en julio 2006 y después El cartucho enviado antes de marzo 2006. ® (antes de la transición a MultiChoice Más corto Más Más corto Más abajo Bastidor abajo Bastidor Blanco Blanco...
- Page 21 été effectués ou si la température et si cette ince rtitude persiste, appelez-nous au de l’eau d’alimentation a changé en raison du 1-800-345-DELTA. changement de saison. Après avoir terminé l’installation et le réglage, vous MISE EN GARDE – N’installez pas de dispositif devez inscrire, sur l’étiquette de mise en garde...
- Page 22 écrire appeler au numéro applicable. à l’adresse applicable ci-dessous. Garantie Limitée sur les Robinets Ultra-Robustes Delta de la Série HDF Toutes les pièces des robinets ultra-robustes Delta de la D’ADÉQUATION DU PRODUIT AVEC UN USAGE série HDF sont protégées contre les défectuosités du...
- Page 23 Installation Installation Installation de la cartouche Tournez la cartouche (1) de sorte que la Interrompez l’arrivée d’eau. Enlevez le mention « hot side » (2) se trouve du côté couvercle (1), l’écrou à portée sphérique (2) gauche. Introduisez la cartouche dans le et le capuchon d’essai (3) du corps.
- Page 24 Installation Installation de la pomme de douche et du bec de baignoire INSTALLATION DE LA POMME DE DOUCHE : Raccordez la sortie supérieure (1) au tuyau d’alimentation de la pomme de douche (2) à l’aide des raccords appropriés. Pour éviter d’abîmer le fini du tuyau de la pomme de douche, introduisez le côté...
- Page 25 Installation Installation de la pomme de douche et du bec de baignoire INSTALLATION DU BEC DE BAIGNOIRE : Consultez les instructions d’installation fournies avec le bec. Ne raccordez pas à une soupape murale à un bec conçu pour être monté sur une plage. Ne raccordez pas une douche à main à la sortie d’un robinet de baignoire-douche prévue pour un bec de baignoire.
- Page 26 Installation Réglage de la butée anti-échaudage– Identifier de Limite de Rotation type RSL des pages 6-7. Plus chaude Disque Obturateurs 1ère Position RLS avec disque amovible. IMPORTANT: en hiver qu’en été, ce qui peut entraîner une La butée antiéchaudage sert à limiter la variation de la température à la sortie du quantité d’eau chaude disponible de sorte que robinet.
- Page 27 Installation Réglage de la butée anti-échaudage– Identifier de Limite de Rotation type RSL des pages 6-7. Hotter RLS avec ajustement retirer/retourner. IMPORTANT: l’eau d’alimentation change. Par exemple, la La butée antiéchaudage sert à limiter la température de l’eau froide est plus basse quantité d’eau chaude disponible de sorte en hiver qu’en été, ce qui peut entraîner une Une blessure par échaudage est moins variation de la température à...
- Page 28 Installation Installation des pièces de finition Installation de la rosace pour les modèles T14053, T14253, T17T453, T14067, T14267 et T14467. Faites glisser le joint torique (1) sur la cartouche et l’écrou à portée sphérique (2). Le joint sert de pièce d’espacement et il stabilise le manchon;...
- Page 29 Instructions de nettoyage ® Il faut le nettoyer avec soin. Même si son de Baignoires et de Carreaux Lysol fini est extrêmement durable, il peut être les manettes et les poignées sphériques abîmé par des produits fortement abrasifs transparentes. Ces produits peuvent faire ou des produits de polissage.
- Page 30 Fiche de référence sommaire de la cartouche ® Monitor Series 1300/1400 Cartouche expédiée en juillet 2006 et par la suite (avant Cartouche expédiée avant mars 2006. ® la transition à MultiChoice Logement inférieur Logement inférieur plus court plus court Blanc Blanc Bleu ou blanc...
- Page 31 For illustrative purposes, the replacement parts for the 13 /14 Classic Series are shown on the following pages. For replacement parts on all other collections, please refer to the parts diagrams available on www.deltafaucet.com. Para los fines ilustrativos, las piezas de repuesto para la Serie Clásica 13 /14 se muestran en las siguientes páginas.
- Page 32 T13020, T13022, T13120, T13122, T13220, T13220-H2O, T13222, T13220-SHCCER, T13420-SHCCER, T13420, T13420-H2O& T13422 Models / Modelos / Modèles RP38452▲ RP38357▲ RP6023▲ RP46384▲ RP54752▲ RP43381▲ Shower Flange Showerhead Shower Arm Showerhead Showerhead Showerhead Pestaña de Cabeza de Rogadora Brazo de la Rogadora Cabeza de Rogadora Cabeza de Rogadora Cabeza de Rogadora...
- Page 33 T13090, T13091, T13290, T13291, T13490 & T13491 Models / Modelos / Modèles RP38357▲ RP40594▲ RP43381▲ RP6023▲ Showerhead RP6025▲ Showerhead Showerhead Shower Arm Cabeza de Rogadora Shower Flange Cabeza de Rogadora Cabeza de Rogadora Brazo de la Rogadora Pomme de Douche Pestaña de Pomme de Douche Pomme de Douche...
- Page 34 Notes / Notas / Notes 68881 Rev. L...
- Page 35 Notes / Notas / Notes 68881 Rev. L...
- Page 36 Delta Faucet Company Product Service 55 E. 111th Street Indianapolis, IN 46280 68881 Rev. L...
Need help?
Do you have a question about the 13 Series and is the answer not in the manual?
Questions and answers
I have a series 13 the water pressure and temp was low so I bought a new series 13/14 valve that solved the pressure problem but the temperature still only reaches 100 with the setting set as far as it will go to the left toward hot. How can I increase temp above 100? Wife continues to complain..