Advertisement
Owners Manual
Assembly Instructions
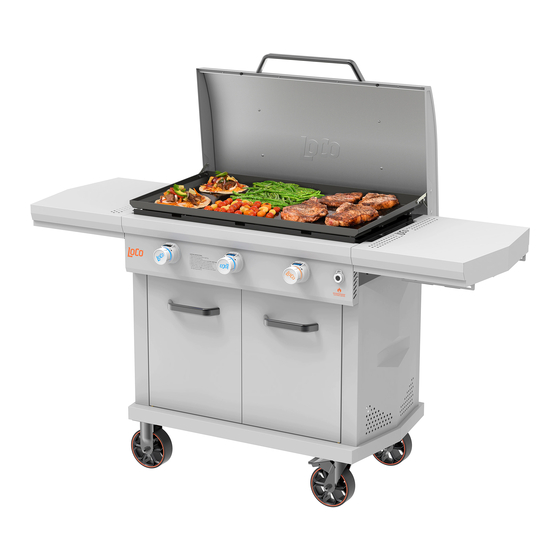
36" 3-Burner Patented SmartTemp™
Precision Griddle
Model: LCG3ST3C36
WARNING
READ INSTRUCTION MANUAL BEFORE ATTEMPTING TO ASSEMBLE OR OPERATE THIS PRODUCT.
Adult assembly required. Keep screws and parts out of reach of children.
INSTALLER: Leave these instructions with consumer.
CONSUMER: Retain these instructions for future reference.
LCG3ST3C36 • IM • 051022
Advertisement
Table of Contents

Related Manuals for LOCO COOKERS SmartTemp LCG3ST3C36


Summary of Contents for LOCO COOKERS SmartTemp LCG3ST3C36
- Page 1 Owners Manual Assembly Instructions 36” 3-Burner Patented SmartTemp™ Precision Griddle Model: LCG3ST3C36 WARNING READ INSTRUCTION MANUAL BEFORE ATTEMPTING TO ASSEMBLE OR OPERATE THIS PRODUCT. Adult assembly required. Keep screws and parts out of reach of children. INSTALLER: Leave these instructions with consumer. CONSUMER: Retain these instructions for future reference.
- Page 2 WARNING This instruction manual contains important information necessary for the proper • Do not store or use gasoline or other assembly and safe use of the appliance. fl ammable liquids or vapors in the vicinity of this or any other appliance. Read and follow all warnings and instructions before assembling and using •...
-
Page 3: Table Of Contents
TABLE OF CONTENTS Warnings 2, 4-7 Parts Diagram Parts List Hardware Assembly Instructions 11-19 Leak Testing 20-21 Operation 21-23 Special Features 24-25 Care and Maintenance 26-29 Troubleshooting 30-32 Warranty lococookers.com... -
Page 4: Warnings
WARNINGS SAVE THESE INSTRUCTIONS • The installation must conform with local codes • When cooking with oil or grease, have a Type or, in absence of local codes, with the National BC or ABC fi re extinguisher readily available. Fuel Gas Code, ANSI Z223.1/NFPA 54, or the •... - Page 5 WARNINGS • Use caution when in close proximity to • Failure to raise the side shelves while igniting this appliance. Falling or tripping near the the burners, or not waiting 5 minutes to allow appliance may result in the splashing or gas to clear if the burners do not light, may igniting of hot cooking liquids and potentially result in an explosive fl...
- Page 6 WARNINGS: LP TANK DANGER LP TANK REMOVAL, TRANSPORT AND STORAGE 1. Do not store a spare LP gas cylinder 1. Turn control knobs and LP tank valve OFF. under or near this appliance. Turn coupling nut counterclockwise by hand only. Never use tools to disconnect. 2.
- Page 7 WARNINGS: LP TANK for Cylinders, Spheres and Tubes for the Transportation of Dangerous Goods and Commission, CAN/CSA-B339. The LP tank must include the following: • A cylinder connection device compatible with the connection for outdoor cooking appliances. • Safety relief valve. •...
-
Page 8: Parts Diagram
PARTS DIAGRAM... -
Page 9: Parts List
PARTS LIST Part # Description Qty Part # Description Cart Door, Left Lid Handle Wheel (Non-Locking) Lid Hinge Bracket, Long Side Shelf Bracket Lid Hinge Bracket, Short Side Shelf, Right Cooktop Trash Bag Rack Support Cooktop Locking Foot Trash Bag Rack Burner Tent AA Battery Burner Tube, Pilot... -
Page 10: Hardware
HARDWARE M4x10 Screw M6x12 Screw M6x10 Screw M4x10 Screw M4 Hex Nut Qty. 21 Qty. 49 Qty. 8 Qty. 5 Qty. 2 Tools required: Phillips head screwdriver • Adjustable wrench (Not included) Cooktop adjustment wrench (Included) Two people required for assembly. -
Page 11: Assembly Instructions
ASSEMBLY INSTRUCTIONS lococookers.com... - Page 12 ASSEMBLY INSTRUCTIONS...
- Page 13 ASSEMBLY INSTRUCTIONS lococookers.com...
- Page 14 ASSEMBLY INSTRUCTIONS...
- Page 15 ASSEMBLY INSTRUCTIONS Slide white insulation back from connectors to identify wire colors. Match wire colors. • Black to black • Red to red lococookers.com...
- Page 16 ASSEMBLY INSTRUCTIONS Use included adjustment wrench. See page 24 “Integrated Grease Management.” Screw cooktop locking feet (6) into bottom of cooktop.
- Page 17 ASSEMBLY INSTRUCTIONS Repeat on front shelf bracket. To lower side shelf, lift upward and rotate downward. Note: Side shelves support a maximum weight of 25 lbs. (11.3 Kg) lococookers.com...
- Page 18 ASSEMBLY INSTRUCTIONS Rack secures behind screw D to prevent extension when shelf is lowered. Repeat on front shelf bracket. To lower side shelf, lift upward and rotate downward, as shown in previous shelf assembly step. Note: Side shelves support a maximum weight of 25 lbs.
- Page 19 ASSEMBLY INSTRUCTIONS Follow instructions on the “LEAK TESTING” page to connect regulator to LP tank. LP tank valve must face front of cart. Tank Retention Screw Tighten tank retention screw to secure tank to cart. LP Tank Not Included. lococookers.com...
-
Page 20: Leak Testing
LEAK TESTING CONNECTING REGULATOR TO LP TANK: LEAK TESTING VALVES, HOSE AND REGULATOR: 1. Make sure LP tank is properly secured in griddle cart. • A leak test is recommended before each use and must be repeated each time LP 2. -
Page 21: Operation
LEAK TESTING OPERATION STEPS TO LEAK TEST: PLUGGING IN YOUR GRIDDLE: 1. Confi rm that the LP tank 1. Use a clean paintbrush and 50/50 soap and water solution. Use mild soap and water. valve is completely closed (turn clockwise to a full stop) DO NOT use household cleaning agents. - Page 22 OPERATION LIGHTING YOUR SMARTTEMP™ Match Lighting: PRECISION GRIDDLE: Follow lighting steps 1 and 2. The match holder • Read all instructions before lighting. is located beneath the control panel inside the Only light burners outdoors. cart, secured by a chain. •...
- Page 23 OPERATION FLARE-UPS/GREASE FIRES: DISCONNECTING REGULATOR FROM LP TANK: • Flare-ups are a common occurrence when cooking and result from a buildup of grease 1. Turn all control knobs to the OFF position. on the griddle surface. However, frequent 2. Turn LP tank OFF by turning hand wheel fl...
-
Page 24: Special Features
SPECIAL FEATURES Three Separate Cooking Areas • Align posts on feet with slots in top of cart. Using included wrench, rotate feet 90º to lock Low heat Medium heat High heat cooktop to cart. foods foods foods • Rotate feet, adjusting cooktop height. Test with water on the cooktop until it runs toward the 350F SEAR... - Page 25 SPECIAL FEATURES Paper Towel Rack Trash Bag Rack The paper towel rack, mounted beneath the left side shelf, will rotate upward and latch to the underside of the shelf, out of the way when not The trash bag rack, mounted beneath the right in use.
-
Page 26: Care And Maintenance
CARE AND MAINTENANCE SEASONING YOUR GRIDDLE: 5. Apply an even coat of cooking oil to the griddle surface and inner and outer walls It is important to season your griddle every with paper towels. time it is used. 6. Light burners and turn control knobs to Seasoning prepares the griddle surface for use SEAR. - Page 27 CARE AND MAINTENANCE PROPER CARE AND MAINTENANCE WILL BURNER FLAME CHECK KEEP YOUR APPLIANCE OPERATING Always check the fl ame prior to each use. Light SMOOTHLY. the burners and turn control knobs to SEAR. CLEAN THOROUGHLY AFTER EVERY USE. A blue fl ame with little or no yellow fl ame will provide the best heat.
- Page 28 CARE AND MAINTENANCE CAUTION Check burner tubes for insects and insect nests. A clogged tube can obstruct the gas fl ow and can result in a fi re beneath the appliance. Prevent blockages by inspecting and cleaning burner tubes regularly. BURNER REMOVAL AND CLEANING: 2.
- Page 29 CARE AND MAINTENANCE CAUTION When the burners are reassembled, make sure to properly align burners with valve orifi ces. Doing this is critical for maximum performance and effi ciency. 6. Follow steps in reverse order to reassemble 4. Remove one screw from the back of each burners in fi...
-
Page 30: Troubleshooting
TROUBLESHOOTING PROBLEM POSSIBLE CAUSE SOLUTION Burner will not light LP tank valve is closed. Make sure the regulator is properly using ignitor. attached to the LP tank. Turn LP tank valve counterclockwise to open. Bad connection between the Make sure the regulator coupling nut is regulator and LP tank. - Page 31 TROUBLESHOOTING PROBLEM POSSIBLE CAUSE SOLUTION Sudden drop in gas The LP tank is empty. Refi ll LP tank at an authorized dealer, fl ow or reduced fl ame exchange or purchase new fi lled LP height. tank. Overfi ll Protection Device (OPD) Turn control knobs to OFF, wait 30 on LP tank has been activated/ seconds, then relight griddle.
- Page 32 TROUBLESHOOTING PROBLEM POSSIBLE CAUSE SOLUTION Excess grease collects Cooktop not adjusted for grease Using included wrench, rotate cooktop on griddle surface while drainage. feet to raise or lower cooktop until cooking. grease fl ows toward drain. Error Code ErrF 1. Empty propane cylinder. 1.
-
Page 33: Warranty
WARRANTY INFORMATION The appliance has been manufactured under the highest standards of quality and workmanship. We warrant to the original consumer/purchaser that all aspects of this product will be free of defects in material and workmanship for one (1) year from the date of purchase. A replacement for any defective part will be supplied free of charge for installation by the consumer. - Page 34 LoCo - Crazy Good Cookers, LLC. 506 Manchester Expressway • Suite A2 • Columbus, Georgia 31904 800-391-0436 • Email: customerservice@lococookers.com Connect with us @lococookers • lococookers.com #whatchagriddlin Made in China...
Need help?
Do you have a question about the SmartTemp LCG3ST3C36 and is the answer not in the manual?
Questions and answers
Need wiring diagram for LCG3ST3C36