Table of Contents
Advertisement
Quick Links
Advertisement
Table of Contents

Related Manuals for Monitor TAD-260

Summary of Contents for Monitor TAD-260
- Page 1 Monitor Installation Instructions Operating Manual...
- Page 3 Monitor Installation Instructions and Operating Manual Applicable to Firmware version 1.0 to 5.0...
-
Page 5: Help Symbols
Help Symbols Throughout the instructions symbols have been included to quickly identify the nature of the information. Detailed below is the key and brief explanation to the symbols used. Warning - an indication of the potential for equipment damage or personal injury. Information - instruction on how to complete a task or set Followed correctly the system will operate correctly. -
Page 6: Table Of Contents
Contents Section Section Page Number Help Symbols Contents About Monitor Installation Instructions Positioning Mount Control Unit Mount GSM/GPS Antenna Wiring Channel Default Configuration Power Supply Siren Strobe Beeper Remote Switching External LED Microphone Speaker Install Sensors Beam Break Microwave Magnetic Contact... -
Page 7: Section Page
Section Section Page Number Initialise Monitor System Set up Phones Changing Password Set Up Channels Set Up Key Fobs Configure Auto Status Reporting Configure Auto Call Config Battery Low Voltage Warning Set up SIM Credit Check Function Commissioning Channel Alignment Test Mode... - Page 8 Section Section Page Number GeoFence Operation Microphone Operation Speaker Operation Default Settings Electrical Specifications Wiring Diagrams Main Control Unit Connecting Shore Power Sensor Connecting Switching Relay Connecting Switching Relay (2 Way) Connecting Protecting Relay Support Firmware Updates Text Commands...
-
Page 9: About Monitor
A Sleep Safe/Part Arm feature allows for sleeping on board whilst maintaining protection from outside sensors ( not Monitor I Boat Monitoring Monitor will also sense and inform when the battery levels fall, bilge levels rise* , the smoke alarm is activated* and so on. This monitoring is always on whether the boat alarm is set or not. - Page 10 Boat Control All Monitor versions can be configured to switch one primary circuit by the key fob and text message (we suggest your lights for safely boarding when arriving back in the dark). Up to a further 8 boat circuits*...
- Page 11 What you need All of the Monitor versions can be supplied as a standard kit, or tailored to suit your needs. These kits are supplied with instructions should the preference be to carry out a DIY installation. With the exception of any holes required to pass through internal panels or trim etc.
- Page 12 Specifications may change without notice. The Monitor products are produced in the UK by TAD Electronics. “Monitor” systems are not safety critical products. They also cannot stop or prevent a burglary. However, a correctly installed, set up and maintained system, when armed will sound a siren and trigger a strobe (if fitted) and notify by SMS message if any of the zones are triggered.
- Page 13 Damage caused by incorrect installation and or operation will render this warranty void. The manufacturers of “Monitor” products will not be liable for any removal/reinstallation costs or any consequential costs whatsoever.
-
Page 14: Installation Instructions
Installation Instructions Positioning Before installation careful consideration needs to be given as to the location of the control box and sensors. Every type of boat will be different, as will each owners preferences; there is no ‘one-fits-all’ recommendation, however if the following considerations and guidance are followed the best operating condition will be achieved. - Page 15 Sensor location. Beam breaks are IP69 rated and can (but don’t have to) be positioned in outside/wet environments, these are best positioned to detect any ‘prior to entry’ movement thus preventing damage to locks, doors etc., a simple cover will prevent accidental triggering by birds.
-
Page 16: Mount Control Unit
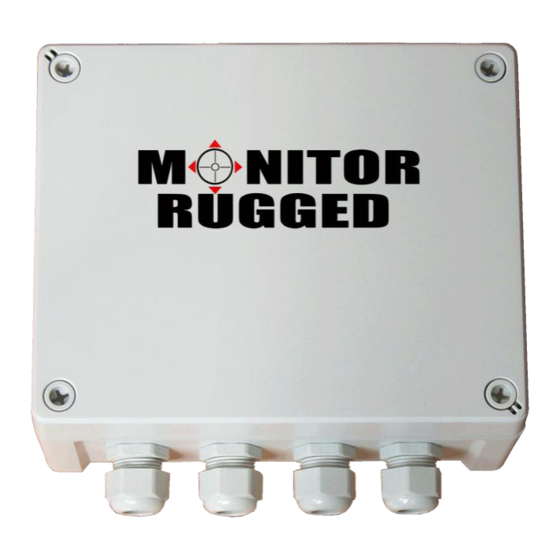
2. - Mount Control Unit 2.1. - The Monitor I, II & III Control Unit standard enclosure ( ) is not not shown a water resistant case so should be mounted in a dry environment; Monitor Rugged enclosure ( ) is designed to cope with wet boats but... -
Page 17: Mount Gsm/Gps Antenna
4.1. - A full wiring diagram has been supplied to the rear of this manual. Please refer to it when wiring the Monitor Systems. 4.2. - The Monitor System Channels can be set up to operate in several formats (e.g. as an alarm channel, a monitoring channel or a switching channel), not all channels can do all functions. -
Page 18: Channel Default Configuration
4.2.3.2. - The switched circuit to be controlled by the Key Fob & Text Message should be connected to channel 4. 4.2.3.3. - Any other switched circuits to be (Not applicable to Monitor I) controlled by text Message only should be connected to channels 5, 6 or... -
Page 19: Power Supply
Rugged enclosure. 4.5. - Power Supply 4.5.1. - Monitor systems are available in 12V (a 24V version is available at a supplement). Ensure that you are using the correct version for the supply voltage in use. -
Page 20: Siren
4.6. - Siren 4.6.1. - The siren(s) should draw no more than 1A (if using a large or multiple siren(s) results in a load of more than 1A it is recommended to use a Relay to operate the siren(s)). The siren will sound for 3 minutes when the alarm is triggered. -
Page 21: Beeper
RF key fob or by a text message (see Operation section). The default configuration is for a further 3 boat circuits to be remotely switched by text only ( not Monitor I 4.9.2. - Relays must be used on all switched circuits. For the primary RF switched circuit Connect: - POSITIVE / RED wire of the relays coil to one of the PowerOut terminals. -
Page 22: External Led
4.10. - Status LED 4.10.1. - An external LED can be connected to indicate its status (armed or disarmed) along with its current GPS and GSM signal strengths. When the system is armed the LED will flash slowly. When the system is triggered the LED will light constantly. - Page 23 4.12.2. - Connect: - POSITIVE / RED wire to terminal H (Speaker +). NEGATIVE / BLACK wire to terminal I (Speaker –).
-
Page 24: Install Sensors
5 - Install Sensors 5.1. - Monitor will operate with most types of Normally Open (NO), Normally Closed (NC) and Change of State (CH) sensors. This section provides information about each of the Standard Sensors available with the Monitor systems and how to install them. Please refer to the Commissioning section to configure the channels to match the type of sensor connected. -
Page 25: Pir
5.7. - PIR Sensor 5.7.1. - The PIR Sensor is available in either wired or wireless models (both are non- waterproof). 5.7.2. - The sensor uses a Passive Infra Red detector. It operates by signalling when movement is detected within its adjustable detection area. -
Page 26: Beam Break
5.8. - Beam Break Sensor 5.8.1. - The Beam Break Sensor is a waterproof optical beam break sensor. 5.8.2. - The sensor is a transceiver and uses a Retroflector to reflect the beam back (across the area to be protected) to the unit. -
Page 27: Microwave
5.9. - Microwave Sensor 5.9.1 - The Microwave Sensor is a non-waterproof internal movement sensor. 5.9.2. – The sensor uses microwaves (operating in the Ghz frequency range). It operates by signalling when movement is detected with its adjustable detection sphere. The sensor has one LED visible from the front indicating when movement has been adequate to trigger the module. -
Page 28: Magnetic Contact
5.10. - Magnetic Contact 5.10.1 - The Magnetic Contact Sensor is a waterproof magnetic reed switch type contact. It is typically used to protect opening hatches, windows and doors. Being a non-powered device it is suitable for use with a wireless transmitter (see Wireless Transmitter below) 5.10.2. -
Page 29: Security Loop
5.11. - Security Loop 5.11.1 - The Security Loop is a waterproof loop for securing portable assets. By passing the Security Loop through an item it will alarm if the loop is disconnected or severed. The Security Loop is available in either Wired or Wireless format. -
Page 30: Shore Power
5.12. - Shore Power Sensor 5.12.1 - The Shore Power Sensor is a mains power sensor which triggers if the shore power is lost or disconnected. 5.12.2. - The Shore Power Sensor uses a relay with a 240v coil to detect a break in the presence of the mains supply. - Page 31 Terminal (9) on the Sensor Block to one of the ground-out terminals on the Monitor Circuit Board Terminal (5) on the Sensor Block to the chosen Channel terminal (e.g. terminal V (Channel 13))on the Monitor Circuit Board 5.12.7. - N.B. If required Terminal (8) and (12) can be used to switch another circuit where an ‘ON’...
-
Page 32: Externally Powered Devices
Connect Relay terminal (30) (Common) to a chosen channel (1 to 14 (J to W) set to a Alarm NO or Alarm CH configuration (channels 9 to 12 Terminal (R to U) are set to Alarm CH as default)) on the Monitor Circuit Board... -
Page 33: Nmea Connection
5.13.1. - In order that the Unit can read the NMEA outputs all NMEA instrumentation (that remote monitoring is required) must either be left powered on or be wired such that the Monitor system can power up the NMEA equipment. For the ‘power up’ option an always on feed is required to the power in terminal of the NMEA Switching Relay. -
Page 34: Wireless Transmitter
5.14.2. - Connect all sensors Tamper connections in series to: - One wire to a free Channel (1 to 14) and The other to GroundOut. 5.14.3. – N.B the selected channel will require configuring to ‘Tamper CH’ see Advanced Set Up 5.14.4. - Page 35 5.15.5. - For separately supplied Transmitters Connection instructions will be included with the Transmitter: - 5.15.6. - See Advanced Set Up for configuration of the channel.
-
Page 36: Install Sim Card
6. - Install SIM Card The Power must not be switched on during fitting or removal of the SIM card (This includes disconnection of the internal Battery). 6.1. - Note the phone number of the SIM card, all communication to the unit will be via this phone number. -
Page 37: Configure Unit
Secret,status) . Throughout this manual it is assumed that the default password has not been changed. 7.3. - The Monitor system will reply to all messages sent to it with the correct password. 7.4. - Nothing sent to the unit (including the password) is case sensitive and spaces are ignored so can be included or omitted as preferred. - Page 38 7.6.3.2. – Until connected the Internal Green LED will flash once every few seconds indicating ‘little or no GSM signal’. Once connected the internal Green LED will flash in succession, the number of flashes indicating the GSM (mobile signal) strength, 5 flashes indicating a full signal (as 5 bars on a mobile phone screen).
-
Page 39: Set Up Phones
7.7 - Set Up Phones 7.7.1. - The Monitor system can be set up to report to up to 10 Phones ), 5 Phones ( ) & 3 Phones ( ). The system can be set monitor III monitor II... - Page 40 7.7.4. - For ease enter the system phone number into the contacts (phone book) of the phone that will be used to set up the system, it is advisable to enter the number into the contact (phone book) of all phones the system will be communicating with.
-
Page 41: Changing Password
See section on support if you forget your password. 7.9 - Set Up Channels 7.9.1. - The Monitor System Channels can be set up to operate in several formats (e.g. as an alarm channel, a monitoring channel or a switching channel), not all channels can do all functions. -
Page 42: Configure Auto Status Reporting
7.10.3.1. - Secret, fob, 2, delete 7.11. - Configure Automatic Status Reporting 7.11.1. - The system can be configured to send status reports to phones set up with an event mask (see 7.7.2.) to receive them. The default setting is a report will be sent after any power up and then at 12.00 hrs GMT at 14 day intervals, however the system can be configured to receive them at different intervals (set in days) up to a maximum of 250 days. -
Page 43: Config Battery Low Voltage Warning
7.12.5.1. - Secret, call 7.13. - Configure the Battery Low Voltage Warning 7.13.1. – The system will monitor the supply Battery and up to two further batteries ( ). If the voltage drops below a Monitor I will only monitor the 1 supply Battery threshold for more than 2 minutes a low voltage warning is sent to phones with event masks (see 7.7.2) set to receive them. -
Page 44: Set Up Sim Credit Check Function
7.14. – Set up the Credit Check function of the SIM Card 7.14.1. - If you decide, to use a pay as you go SIM card then it is useful to be able to know how much credit you have available. It is possible to do this remotely by a command called a ‘USSD string’. -
Page 45: Commissioning
8. - Commissioning 8.1. - Channel Alignment Test Mode 8.1.1 - To allow checking that sensors are installed correctly (e.g. a Beam Break is aligned with its Retroflector or a Magnetic Contact is within its proximity requirement) a channel test mode can be set. When the channel is in test mode the internal and external beepers of the control box will sound when the sensor is not aligned or OPEN, in turn the beepers fall silent when the sensor is aligned. -
Page 46: Microwave Sensor Set Up
8.3 - Microwave Sensor Set Up 8.3.1 - The sensitivity of the Microwave sensor can be adjusted from around 0.5m to excess of a 4 meter sphere; the sensitivity should be adjusted such that the area requiring detection is covered but above the waterline and not too large so as to be falsely triggered by passersby or wildlife. -
Page 47: Beam Break Sensor Set Up
8.4 - Beam Break Sensor Set Up (Alignment) 8.4.1. - N.B. No channels are default set to accept a Beam break, therefore the channel used will require configuring to this mode (see advanced set up). 8.4.2. - The beam break sensor must be aligned with the Retroflector before the adjustable saddle mount is tightened and the lid (if in a case) fitted. -
Page 48: Apply Warning Label
9. - Apply the ALARMED & MONITORED label 9.1. - As an additional preventative measure it is advisable to display the ALARMED & MONITORED label in a prominent position (should you require additional labels they can be purchased). 9.2. - Position and check Substrate After a suitable position has been determined, check that the substrate is in a good condition and suitable for the label to be stuck to. -
Page 49: Advanced Set Up
10. - Advanced Set Up 10.1. - Channel Configuration (including Naming Channels) 10.1.1. - The Monitor System Channels can be set up to operate in several formats (e.g. as an alarm channel, a monitoring channel or a switching channel), not all channels are capable of carrying out all functions and not all functions are available on some models. -
Page 50: Channel Configuration Table
Active when full armed, will trigger siren & strobe Alarm CH SS 1-14 Active when full armed, will trigger siren & strobe Monitor NC 1-14 Always active, no siren or strobe Monitor NO 1-14 Always active, no siren or strobe... - Page 51 Secret, channel, 7, 4, Front Hatch 10.1.8. - In the example shown below a Shore Power Sensor has been wired to channel 12, the channel is being configured to a Monitor Change State (CH) configuration (it will alert when shore power is turned off and also when it is turned on), it will be called ‘Shore’.
-
Page 52: Sleep Safe (Part Arm) Mode Set Up
Secret, channel 10.2. - Sleep Safe Mode Set Up (not Monitor I) 10.2.1. - Channels can be set to NOT ARM when the system is ‘Part Armed’. This feature can be used to set up a Part Armed ‘Sleep Safe’ state that protects the boat whilst on board (e.g. -
Page 53: Name The System
10.5.3.1. - Secret, speed 10.5.4. – When the boat maintains a speed above the limit for greater than 30 seconds all phones set with the Monitor Triggered event code will receive an overspeed message. 10.6. – To reset the Control Unit 10.6.1. -
Page 54: Reboot Control Unit
10.7. - To reboot the Control unit 10.7.1. - The reboot function has the same effect as turning the power off and on again. It will not delete or restore any settings. To reboot the unit send the unit the following message: - 10.7.1.1. -
Page 55: Operating Instructions
Operating Instructions 11. - Operation This section describes the operation of Monitor after it has been installed and configured. 11.1. - To query the status of the Monitor system 11.1.1. – If Secret, status is sent to the unit it will reply with a message Beginning “ALARM STATUS -”... -
Page 56: Query Nmea Equipment Status
11.2.2.2. - As an example the unit will answer “bilge is off, mains is on, fridge is on” 11.3. - To query the NMEA Equipment (Monitor III only) 11.3.1. – There are two possibilities when sending a NMEA query. If the unit is wired and configured such that it powers up the NMEA Instruments (see Section 5.13 ‘NMEA Connections’) sending an NMEA query will, power... -
Page 57: Rf Key Fob Operation
11.6. - RF Key fob Operations 11.6.1. - The RF Key Fob will operate when within the vicinity of the unit, this will depend on a number of factors such as location of unit within the boat, the boat construction etc. but as a guide it will normally operate up to 30 meters. -
Page 58: Reboot Control Unit
11.8. - To reboot the Control unit 11.8.1. - The reboot function has the same effect as turning the power off and on again. It will not delete or restore any settings. To reboot the unit send the unit the following message: - 11.8.1.1. -
Page 59: Gps Operation
GPS on or off, send the unit the following messages: - 11.11.2.1. - Secret, gps, on 11.11.2.1. - Secret, gps, off 11.11.3. - Monitor can also report its current speed and direction of travel. To query this, send the following message: 11.11.2.1. - Secret, gps General Advice ... -
Page 60: Geofence Operation
You can verify on a map that the boat really has moved a significant amount. 11.12.4. - If triggered Monitor will, depending on speed, (under 2 knots re- report every time the GeoFence distance is re-broken or over 2 knots report every 30 minutes or 10 miles whichever occurs first). -
Page 61: Microphone Operation
11.13. - Microphone (optional) 11.13.1. - If the microphone option has been purchased and plugged into the connector marked MIC on the PCB (see Wiring), it is possible to listen in to the unit. Phone the unit, (it will auto answer after 3 rings) and you can listen in to whatever the microphone picks up. -
Page 62: Default Settings
12 - Default Settings Unless otherwise stated, the Monitor System will be supplied with the following default settings: Channels - see Table 4.2.1. No phone numbers registered. Password set to ‘secret’. Disarmed. Credit number set to *#10#. Low voltage warning set to 11.0V.on main feed and 0V on 2 and 3 circuits. -
Page 63: Electrical Specifications
13 - Electrical Specifications Operation of the Nautilarm outside of these specifications is not advised and may cause damage and unexpected operation. Parameter Unit Supply Voltage WITH GPS: Supply Current @ 12V 1000* WITHOUT GPS / GPS Off: Supply Current @ 12V 1000* Battery Charging: Supply Current @ 12V... -
Page 64: Wiring Diagrams
14 - Wiring Diagram – Monitor Control Unit... - Page 65 Monitor Control Unit - Detail View 1...
- Page 66 Monitor Control unit - Detail View 2...
-
Page 67: Connecting Shore Power Sensor
14.1 – Supplementary Wiring Diagrams 14.1 1. – Shore Power Sensor... -
Page 68: Connecting Switching Relay
14.1.2. – Switching Relay... -
Page 69: Connecting Switching Relay (2 Way)
14.1.2.a – Switching Relay (2 way switching) -
Page 70: Connecting Protecting Relay
14.1.3. – Protecting Relay... -
Page 71: Support
15 - Support Should you have any problems installing or configuring the Monitor, please contact: - Precision Navigation +44(0)1473 327813 info@precisionnavigation.co.uk Assistance is normally available during normal office hours (09:00 to 17:30 Mon to Fri). If no one is available at the time of your call a Voice Mail can be left and the call will be answered within 1 working day. -
Page 72: Firmware Updates
To check to see the latest firmware available please visit www.precisionnavigation.co.uk It is possible to update the Monitor firmware, if it is required to fix a problem the relevant update will be provided free of charge. However upgrades for improved or new functionality can be purchased from www.precisionnavigation.co.uk... - Page 73 15.1 - Up Load Firmware 15.1.1 - If you have been sent a Firmware ‘Dongle’ to fix a fault or because you have purchased new or improved functionality you will need to carry out the following to upload it to the control unit. 15.1.1.1 Remove Control Box Cover and isolate the supply 15.1.1.2...
-
Page 74: Text Commands
17 - Text Commands The table below provides as aid-memoir please refer to relevant instructions for detail of each command. General Use: Command: Query status of System Secret, status Query Channel status (up to 3) Secret, state, name1, n2, Query NMEA equipment secret, nmea Query remaining SIM Credit secret, credit... - Page 75 Set Up cont.: Command: Set auto status reporting time (days) secret, auto, days Check auto status reporting time secret, auto Set auto call time (days) & tel # secret, call, days, tel# Change auto call time (days) only secret, call, days Check auto call settings secret, call...
- Page 76 Notes:...
- Page 77 Notes:...
- Page 78 Notes:...
- Page 80 Developed & Manufactured in the UK by:- TAD Electronics, & Myerchin UK Marketed by Precision Navigation Ltd Tel: +44(0)1473 327813 E-mail: info@precisionnavigation.co.uk...
Need help?
Do you have a question about the TAD-260 and is the answer not in the manual?
Questions and answers