Table of Contents
Advertisement
Quick Links
Advertisement
Table of Contents

Related Manuals for ALGE-Timing Photo Finish OPTIc3

Summary of Contents for ALGE-Timing Photo Finish OPTIc3
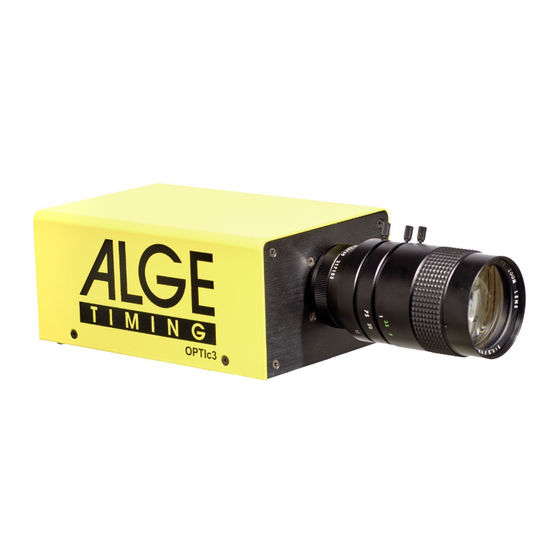
- Page 1 Version-E220509 Photo Finish OPTIc3 Manual...
- Page 2 Important Information General Before using your ALGE-TIMING device read the complete manual carefully. It is part of the device and contains important information about installation, safety and its intended use. This manual cannot cover all conceivable applications. For further information or in case of problems that are mentioned not at all or not sufficiently detailed, please contact your ALGE-TIMING representative.
- Page 3 Manual Photo Finish OPTIc3 Declaration of Conformity We declare that the following products comply with the requirements of the listed standards. ALGE-TIMING GmbH Rotkreuzstrasse 39 A-6890 Lustenau declare under our sole responsibility, that the photo finish camera of the type:...
-
Page 4: Table Of Contents
Manual Photo Finish OPTIc3 Table of Contents Introduction ........................8 OPTIc3 Models ........................8 1.1.1 OPTIc3 – System Components ......................8 1.1.2 OPTIc3-PRO – System Components ....................9 Requirements for PC (Desktop or Notebook) ................9 Accessories ..........................9 Function ..........................10 Layout of the Software OPTIc3NET................11... - Page 5 Manual Photo Finish OPTIc3 Footer ............................ 42 Menus of the Software ......................43 8.3.1 Menu <File> ............................. 43 8.3.2 Menu <TIMING> ..........................44 8.3.3 Menu <Setup> ..........................45 8.3.4 Menu <Connection> ........................50 8.3.5 Menu <Sport> ..........................51 8.3.6 Menu <Show>..........................51 8.3.7...
- Page 6 Manual Photo Finish OPTIc3 14.4 Insert Parts of Event Picture in a Heat ..............81 14.5 Export of Images ........................82 14.5.1 Export of a marked Image ......................82 14.5.2 Image Export of a View ....................... 82 Data Exchange Settings ..................83 15.1...
- Page 7 Manual Photo Finish OPTIc3 1 ..photocell socket (2 x) 2 ..gear head socket 3 ..motor zoom socket 4 ..RJ45 socket (Ethernet) 5 ..input for external power supply (+9 to 13.4 VDC) 6 ..banana socket – start impulse (2 x) 7 ..
-
Page 8: Introduction
<F1> or in the menu <HELP> (F1 Open the user manual). The camera is a new generation of the successful ALGE-TIMING photo finish series OPTI. It fulfills the highest expectations and is at the same time very user friendly. The OPITc3 can be upgraded with various features and allows scan rates between 3,000, and 30,000 frames per second (fps). -
Page 9: Optic3-Pro - System Components
OPTIc3-PRO – System Components • photo finish camera OPTIc3 (without lens) • ALGE-TIMING USB flash drive with OPTIc3.NET software and manual • Power over Ethernet POE+ (power supply for camera) • Wi-Fi USB flash drive (for wireless use of camera) •... -
Page 10: Function
Manual Photo Finish OPTIc3 Function The photo finish camera has a CMOS area scan sensor as used e.g. for photo cameras. The 2D picture is only used to adjust the finish line. In the photo finish recording mode it records one vertical line per picture. -
Page 11: Layout Of The Software Optic3Net
Manual Photo Finish OPTIc3 Layout of the Software OPTIc3NET The layout of the software is completely adjustable. You can dock-in or dock-out windows as you want. You can store your favourite layout(s) so that it takes just a click to go back to it. -
Page 12: Select Language Of Optic3.Net Software
If you send this translated file to ALGE-TIMING (office@alge-timing.com), we will integrate the new language in the standard installation so it is also available when installing the software anew after an update. -
Page 13: Connection Of Camera
Manual Photo Finish OPTIc3 Connection of Camera Please make sure the following three conditions are fulfilled in order to successfully connect the camera to a PC: • setup of the camera must fit to your network configuration • connection by Ethernet or Wi-Fi must work OK •... -
Page 14: Camera Connected To Ethernet With Poe+ Power Supply
Manual Photo Finish OPTIc3 Camera name: Serial number of the camera is used as standard camera name. You can change the camera name in the “Camera settings”. Wi-Fi password: The standard password for a Wi-Fi connection is “wireless”. You can change the password in the “Camera settings”. -
Page 15: Camera Communication By Wi-Fi
The OPTIc3 camera needs a power supply. There are two possible power supply solutions: • power supply by using the POE+ (Power over Ethernet) adapter Please make sure to use the adapter supplied by ALGE-TIMING. Not every POE works, it needs to be POE+. •... -
Page 16: Camera Position
Manual Photo Finish OPTIc3 Camera Position The camera of the photo finish system must be set exactly on a straight line with the finish line. Depending on the sport discipline it needs a different angle to the finish line (see 5.1 Lens Angle). -
Page 17: Lens Angle
The below table states the angles covered by the C-mount lenses available with ALGE-TIMING. Attention, the angles for the camera with 1360 vertical pixels differ from those for the camera with 2016 vertical pixels. -
Page 18: Focusing The Camera
Manual Photo Finish OPTIc3 Focusing the Camera An important factor for good quality photo finish images is to focus the camera. Only a good adjustment of the aperture (focus) guarantees good pictures. Additionally, it is important that you select the correct scan rate. - Page 19 Manual Photo Finish OPTIc3 OPTIc3-PRO: As reference value for the scan rate for different sports at a full vertical camera resolution of 2016 pixel, refer to below stated table (please note that the given values may vary extremely, if one of the above given parameter does not apply, values stated in lines per second).
-
Page 20: Camera Alignment On Finish Line
Manual Photo Finish OPTIc3 Camera Alignment on Finish Line The OPTIc3 camera can be adjusted in a 2-D mode. When you switch to the 2-D mode you have a video picture that allows making adjust- ments like focus, zoom and brightness easy. - Page 21 Manual Photo Finish OPTIc3 The red line on the picture above is what you want you will record. Therefore, position the red line exactly at position of the finish line that you want to record. -21-...
- Page 22 Manual Photo Finish OPTIc3 The <Preview mode> disappears and in <Cam preview> the scan mode preview appears. An automatic white balance is executed. -22-...
-
Page 23: Camera Adjustment From A Device With Wi-Fi
Manual Photo Finish OPTIc3 Camera Adjustment from a Device with Wi-Fi It is possible to view the live camera image via a mobile phone, tablet, PC or other Wi-Fi device. To do this, the supplied Wi-Fi thumb drive must be connected to one of the two USB sockets of the OPTIc3. -
Page 24: Photo Finish For Different Sports
Manual Photo Finish OPTIc3 Photo Finish for Different Sports It is possible to use the photo finish OPTIc3 for almost all sports. The software OPTIc3NET allows you to measure the start, finish and run time. Selection of Type of Sport The software OPTIc3NET has integrated the most common sports that use photo finish. -
Page 25: Dog Race
Manual Photo Finish OPTIc3 6.1.5 Dog Race For dog races, the unit should be “is fixed to 0.07”. 6.1.6 Rowing / Canoe You have several parameters you can select for this sport. 6.1.7 Cycling You have several parameters you can select for this sport. - Page 26 Manual Photo Finish OPTIc3 If you use the OPTIc3 with a Tripod STATIV6 with a height of 3.66 m for the camera, you should use a wide-angle lens for a track with 8 lanes. Otherwise, you do not cover all 8 lanes or you are too far away and have a very flat angle with the runners not being captured completely.
-
Page 27: Zero Control For Track And Field (Start Control)
Manual Photo Finish OPTIc3 6.3.1 Zero Control for Track and Field (Start Control) You can record the flame of the start gun fired on the start line (or flash of the e-Start). With this test, the referee can check the synchronization between time and picture recording. This mode also records the start sequence. -
Page 28: Horse Races
Manual Photo Finish OPTIc3 Horse Races It is essential to select <Horse Race> under <Type of sport>. Please read the description for track and field. For horse races, no painted finish line exists, but there might be a mirror that should be focused on. - Page 29 Manual Photo Finish OPTIc3 finisher than the gap in this field receives a new time, if he is within this gap time he is listed in the same group of riders. The factory setup for the Cycle Time (gap) is 1 second.
-
Page 30: Setting The Camera
Manual Photo Finish OPTIc3 Setting the Camera Camera Settings A Camera Name: You can give or change the name of the camera. Factory setting is camera serial number. B IP-Address of camera: The camera has an IP-address. In fac- tory setting the IP-address is assigned automatically. -
Page 31: Remote Control Camera Adjustment
Photo Finish OPTIc3 Remote Control Camera Adjustment If you have an ALGE-TIMING motor zoom and/or electronic gear head you can execute all cam- era adjustments directly from your OPTIc3.NET software on the PC. Please note that the adjustment of each function works very slowly (smooth adjustment) at the beginning and speeds up the longer you click on the button. -
Page 32: Recording And Picture Adjustments
Manual Photo Finish OPTIc3 Recording and Picture Adjustments For the best recording and picture results you can execute the following adjustments: Recording lines: It is possible to adjust the recorded lines before and after triggering when using a photocell. This adjustment is very important for many sports in order to obtain a picture of the whole competitor. -
Page 33: Wtn Radio Adjustments (Optic3-Pro)
The OPTIc3-PRO camera has a built in WTN radio system. WTN is a wireless timing network created by ALGE-TIMING with which you can receive start or finish impulses or control display boards. More information about the WTN functions are described in the WNT manual. -
Page 34: Picture Quality Adjustments
Manual Photo Finish OPTIc3 Picture Quality Adjustments These are advanced adjustments to improve the picture quality of the photo finish. Black Reference: Normally you do not have to execute a “Black reference”. In case your picture shows black background stripes, the <Black reference>... -
Page 35: Image Adjustment
Manual Photo Finish OPTIc3 Image Adjustment The camera is a line scan camera, which means it takes pictures by scanning the finish line not by taking a normal complete picture. But this camera also has a 2-D mode for easy adjustment of the camera. - Page 36 Manual Photo Finish OPTIc3 7.7.1.1 Aligning the Scan Line to the Finish Line The pixel array used for the scan line function of the OPTIc3 must be aligned to the finish line. This setting also must be executed in the 2-D preview.
-
Page 37: Image Adjustment With Manual Lens
Manual Photo Finish OPTIc3 7.7.2 Image Adjustment with manual Lens Connect OPTIc3 camera to PC. Connect external devices for start and finish. Check if the camera has power supply (LED „power“ must blink green). Start OPTIc3.NET software on PC. Check if the camera icon in the left lower corner is green ( ). -
Page 38: Brightness Adjustment
Manual Photo Finish OPTIc3 13. Adjust the zoom of the lens (c). 14. Adjust the focus with the focus buttons (a) or as described before with auto focus. 15. Adjust the camera to the finish line as described above. 16. Click on the button to exit the 2-D preview. -
Page 39: Scan Rate Doubling (Optic3-Pro)
Click here to execute the synchronization of the OP- TIc3 with other timing devices. For the synchronization of several ALGE-TIMING devices you have to connect the start channel C0 of all devices parallel. Input the time of day. This time is the time you start the device(s). - Page 40 Manual Photo Finish OPTIc3 Confirm the time of day <ENTER> on the PC key- board or click on Input the same time of day in the other devices you want to synchronize. As soon as you confirm the entered time of day the col- our changes from red to orange.
-
Page 41: Software Optic3.Net
Manual Photo Finish OPTIc3 Software OPTIc3.NET The software for the OPTIc3.NET runs with Windows 7, 8, and 10. If you record with the OPTIc3.NET software you should close all other programs. They could block tasks, processor power or use the hard disk. This could reduce the stability and recording time of the OPTIc3 system. -
Page 42: Footer
Manual Photo Finish OPTIc3 Footer The footer is a status bar that shows the connected devices of the system and some basic information. Example 1: track and field: camera, Windspeed WS2 Example 2: cycling: camera, IDCam OPTIc3 Camera This icon is green when a camera is connected and active. If the icon is red, there is no communication between PC and camera. -
Page 43: Menus Of The Software
Manual Photo Finish OPTIc3 Scan Rate: The adjusted scan rate is shown. It is possible to adjust the scan rate in the camera dialogue. F8 Rec Clicking on this icon, start the recording of a picture (it does not matter if the camera is ready for a heat or not, the recording will be in the meeting picture). -
Page 44: Menu
Manual Photo Finish OPTIc3 Load existing meet If you want to continue working in an existing meet (e.g. next day’s sessions) you have to open this meet. This also applies if you want to see results of this meet (e.g. after a protest when you are already in another meet). -
Page 45: Menu
Manual Photo Finish OPTIc3 The following recording and timing impulses can create a sound: • C0 ...start channel • C1 ...finish channel • C2 ...intermediate time channel • motion detection • transponder impulse All sounds are on: All sounds are off: 8.3.3... - Page 46 Manual Photo Finish OPTIc3 8.3.3.2 OPTIc3 devices Settings of the OPTIc3 camera ee 7 Setting the Camera) 8.3.3.3 Remote Control (OPTIc3-PRO – O3-2EVAL) This optional function is only active with the OPTIc3-PRO or after purchasing the O3-2EVAL license. With this license, the OPTIc3 can be used on two PCs at the same time.
- Page 47 Manual Photo Finish OPTIc3 • After changing the PC settings in the OPTIc3 software it is necessary to restart the OTPIc3 software. • The following icon is shown in red in the footer on both PCs: • If the OPTIc3 software is running on both PCs, the evaluation PC must automatically find the recording PC in the network.
- Page 48 Manual Photo Finish OPTIc3 8.3.3.8 Other Settings Heat List Setting Make adjustments for the heat list in this menu. Edit Heat List Header You can setup if you want to use the factory setting for the headers of the heat list and printed...
- Page 49 Manual Photo Finish OPTIc3 Factory Setup: The factory setup of the chosen language is used. List headers 1 - 5: Enter the test for the list headers. Fields with text are used; fields that have no text are taken from factory setup of chosen language Edit heat list texts (Disqualifications) In the heat list field <Disq.>...
-
Page 50: Menu
8.3.4.1 IDCam See point 16 Integration of IDCam. 8.3.4.2 ALGE-TIMING Display Board to activate different modes of the ALGE-TIMING display board (D-LINE or GAZ) Run time The running time of the active race is shown on the display board. Further adjustments are possible in the time window. -
Page 51: Menu
Log File If you activate the <Show message dialog> a log-file that records everything that happens to the system is shown. This file is very important for ALGE-TIMING in case of problems. Time Window A window opens that shows the net time of a race (marked with the evaluation line). - Page 52 Transponder Lines: You can show the transponder times in the photo finish but additional soft- ware is necessary for this. You can buy this software from ALGE-TIMING. You can adjust the colour of the lines in the picture. Large Icons on Toolbars: You can adjust the size of the icons.
-
Page 53: Menu
“Cam1 Software” version and the “Cam1 Hardware” version there might be a problem with the network connection. OPTIc3.NET Update: Always use the latest software of the OPTIc3. ALGE-TIMING constantly works on the software and improves the PC software OPTIc3.NET or firmware of the camera. It is possible to check for OPTIc3.NET soft- ware updates, if your PC has an internet con- nection. -
Page 54: Evaluation Windows
Manual Photo Finish OPTIc3 Evaluation Windows The software OPTIc3.NET allows you to see the photo finish picture in three different windows. Window <View 1> is the main picture in which you make the evaluation. Window <View 2> can be used e.g. as zoom window, where you see the part of the picture that you evaluate in a bigger scale. - Page 55 Manual Photo Finish OPTIc3 Drop down menu to adjust the zoom factor of <View 1>. It is also possible to zoom in and out with the scroll wheel of the mouse. menu to setup the lanes (see 11.3 Lane Evaluation).
-
Page 56: View 2
Manual Photo Finish OPTIc3 A part of the current image can be marked and exported as a picture (jpg, bmp). The image size is displayed in the centre of the marker (it displays as well when the ratio is 4: 3 or 16: 9). -
Page 57: Timing (Timing Window)
Display board (GAZ or D-LINE) is active for this heat. In the field <Display time> the time is shown like it is shown on the ALGE-TIMING display board. Display board (GAZ or D-LINE) is inactive for this race. If no other race is running the display is blank. - Page 58 Manual Photo Finish OPTIc3 Start time In this field the start time of the heat is shown. When you press on the left arrow the list of start impulses opens. In case you missed a start impulse or if you have to correct the start impulse you can select the correct start impulse in this list.
-
Page 59: Tool Bar Of The Timing Window
Manual Photo Finish OPTIc3 Display time The time also shown on the display board is output here (if you selected the running time and not the time of day in the tool bar). You can adjust three different modes: Standard: The display board stops after a stop impulse. - Page 60 Transponder If you activate the transponder (extra software from ALGE-TIMING necessary), the recording is also effected by transponder. This function is only available with the O3-TSP upgrade. Manual Start Impulse [F5]...
- Page 61 Manual Photo Finish OPTIc3 Adjustment for the Start Time Transmission from Mobile Timing MT1 To read the time stamp of a MT1 start impulse you need an internet connection of your OP- TIc3-PC. You have to start the program “MT1 Time.Net Connector”...
- Page 62 Manual Photo Finish OPTIc3 Adjustment for Timy3 You must adjust the “PORT” to the actu- ally used COM-Port (in this example COM2). To activate the RS232 interface, click “Timing Port” with the right mouse button and then “Connect”. When the interface is “connected” it must turn to green. Now you can check the interface by clicking on “Port Information”.
-
Page 63: Photo Finish Recording
Manual Photo Finish OPTIc3 10.2 Photo Finish Recording There are several possibilities to do the photo finish recording. It can be done manually by pressing the key <F8>, by clicking with the mouse on , with manual push button, a sensor (e.g. -
Page 64: Motion Detection (Optic3-Pro)
Manual Photo Finish OPTIc3 10.2.5 Motion Detection (OPTIc3-PRO) This feature is only available with the upgrade O3-MD for motion detection or the OPTIc3-PRO. The motion detection works with changes of the picture. The camera compares the pixels from pixel line to pixel line. As soon as it detects changes in the pixels it starts to record. -
Page 65: Evaluation Of Races
Manual Photo Finish OPTIc3 Evaluation of Races The photo finish picture is not a normal picture. The camera scans the finish line. The scan rate is adjustable. Each scan (each real pixel in horizontal direction) has a different time. If you scan e.g. -
Page 66: Manual Evaluation
Manual Photo Finish OPTIc3 11.2 Manual Evaluation You select the manual evaluation by clicking with the mouse on in the icon bar. Mark the competitor in the heat list that you want to evaluate by clicking on . The field of the competitor is marked in orange. -
Page 67: Bib Evaluation
Manual Photo Finish OPTIc3 After you set the lanes the configuration will be used for all heats that have no recording. Heats that have already recorded pictures will keep the old previous configuration. The lane number is green if it does not yet have a time. -
Page 68: Time Cursor
Manual Photo Finish OPTIc3 11.5.1 Time Cursor This line shows the time (net time and time of day). When you move it over the picture horizon- tally, the time in the time window changes. The color of the time cursor is adjustable in the menu <Show>. -
Page 69: Heat List
Manual Photo Finish OPTIc3 Heat List The heat list is a flexible list that combines competitor data and results for each heat. Its layout is very flexible to give the operator possibilities to configure this list up to his wishes. The heat list can have headers different from those of the printed list (start list, result list). -
Page 70: Field Selector
Manual Photo Finish OPTIc3 12.1 Field Selector If you click on this icon the field selector for the heat list opens. In the <Field Selector> you can activate List Layout (Heat List) different headers for the list. You can edit the text shown (see 8.3.3.7 Active: to activate or deactivate a competitor or lane (e.g. -
Page 71: Class Mode
Manual Photo Finish OPTIc3 12.2 Class Mode If you click on , the heat list is shown sorted by class names. Of course, it is necessary to enter a class mode and bib and group with the evaluation (use <Bib evaluation>... -
Page 72: Start Time Of A Class
Manual Photo Finish OPTIc3 12.2.1 Start Time of a Class It is possible that each group starts at a different time. Therefore, it is important that you can import a start time for the complete group. To import the start time for the complete class you must first switch to the class mode with 12.2.1.1 Import a Start Time from the Impulse Log for a Class... -
Page 73: Insert Row(S)
Manual Photo Finish OPTIc3 12.3 Insert Row(s) If you click on the icon <Insert> a dropdown menu opens (see right). If you click <Insert row(s)> the number of rows (lines) are inserted that you ad- just in <Amount of rows> ( ). - Page 74 Manual Photo Finish OPTIc3 Click on to open the Excel import window. Click on <Import an Excel list>. Select the file that you want to import. Select the headers by clicking with the right mouse The imported list is shown.
-
Page 75: Export Excel List
Manual Photo Finish OPTIc3 12.6 Export Excel list • Click on to export the heat list to Excel. • Select where you want to store it on your PC and the file name. To adjust the export, you have to click on the icon in the meet browser. -
Page 76: Video Wall - Sponsors
Manual Photo Finish OPTIc3 12.13 Video Wall – Sponsors This function is only active if you activated the video wall function “ScreensClient”. When the button is clicked, the prepared ads are on the video wall browser displays. 12.14 Video Wall – Lists This function is only active if you activated the video wall function “ScreensClient”. -
Page 77: Meet Browser
Manual Photo Finish OPTIc3 Meet Browser The meet browser is an essential part of the software. You can determine the race structure and enter important information about meeting, session, event and heat. As soon as you <Create a new meet> you are asked to enter the <Meet name>. The meet name is used to store your meet. -
Page 78: Enter Race Structure Manually
Manual Photo Finish OPTIc3 13.1 Enter Race Structure manually If you have to build your own race structure you have to follow the steps as below: The default meet browser automatically shows Click on session and input the session name the meeting name that you created. -
Page 79: Import Race Structure
Manual Photo Finish OPTIc3 … • It is also possible to insert several heats at once. Move the mouse to the heat under which you want to add new heats and click with the right mouse button. A drop-down menu opens. -
Page 80: Post-Processing
Manual Photo Finish OPTIc3 Post-Processing You have the possibility to improve the images after recording. Especially changes to brightness, contract and gamma can result in considerably improved picture quality. Irrelevant pictures can be deleted from a heat. In case pictures are taken in the wrong heat or without allocation to any heat, you can copy them from the overview to the correct heat. -
Page 81: Insert Parts Of Event Picture In A Heat
Manual Photo Finish OPTIc3 14.4 Insert Parts of Event Picture in a Heat All pictures taken by the OPTIc3 are saved in an overview picture of the event. If you click on this icon changes to . Now the overview picture is displayed. If you have participants in the wrong heat, they are not visible in the run in which you are evaluating. -
Page 82: Export Of Images
Manual Photo Finish OPTIc3 14.5 Export of Images It is possible to export photo finish images as jpg-files or bmp-files. Such exported images can then be used e.g. to show a photo finish picture in the TV). The images can be exported from the three image windows (overview, view 1 and view 2). -
Page 83: Data Exchange Settings
Manual Photo Finish OPTIc3 Data Exchange Settings The data from a complete Meet or heat can be transferred between OPTIc3 and other Meet Management programs in various ways. The settings for the data exchange has to be done in the "ATL Exchange Settings". -
Page 84: Algedisplayoutput
Manual Photo Finish OPTIc3 15.1 AlgeDisplayOutput You can control numeric and alphanumeric displays with this interface By adding Ports you can send this data through several interfaces as shown below. Unter Ports kann eine neue Schnittstelle hinzugefügt werden. Adjust the interface and its settings as required. -
Page 85: Optic3-Xml-Dataformat
Manual Photo Finish OPTIc3 15.2 OPTIc3-XML-Dataformat The standard data exchange for the OPTIc3 is via XML. This data format makes it very easy to import and export racing data from another program (e.g. with SELTEC Track and Field 3 (TAF3)). -
Page 86: Settings For Data Exchange With Seltec Taf3
Manual Photo Finish OPTIc3 15.2.1 Settings for Data Exchange with SELTEC TAF3 15.2.1.1 Adjustment for OPTIc3 ALGEDisplayOutput Livetime – Running Time Make a new port Click on <Add> and then on <OK>: Configure the port: - 86-... - Page 87 Manual Photo Finish OPTIc3 AlgeVersatileExchangeProtocolOutput – Live Results For the „Local Port“ you must adjust another port as for „AlgeDisplayOutput“. This port settings must be identical as at the SELTC Timing Client. The yellow highlighted items have to be adjusted as shown.
-
Page 88: Adjustments For The Timing Client Of Seltec Taf3
Manual Photo Finish OPTIc3 ALGE XML – Exchange of Meeting Structure on a Database: Make sure that the „FinishLynxExport“ is not active. Activate the XML-Export: Precision of OPTIc3 The precision must be set to 1/100th in the menu <Timing>. 15.2.2 Adjustments for the Timing Client of SELTEC TAF3 Open SELTEC Track and Field 3 (TAF3 –... - Page 89 Manual Photo Finish OPTIc3 Alge D-Line Livetime –Running Time The connection of the running time is only necessary if you record intermediate times and / or have connected a video wall via the TimingClient. Alge Versatile – Liveresults, Wind and StartJudge2 Select a different port for the port than for the D-LINE.
- Page 90 Manual Photo Finish OPTIc3 ALGE XML – Exchange of the Meeting Structure With these files the competition structure for timing is sent. The files must be located in the network on a shared folder that is accessible to both computers (SELTEC Timing Client and OPTIc3).
-
Page 91: Execute Heats
Manual Photo Finish OPTIc3 15.2.3 Execute Heats Export the start lists to the exchange folder. All lists with the status "Official start list" are ex- ported. Before the start of the competition, the competition structure must be imported into OPTIc3 by loading the meeting file exported by the timing client. - Page 92 Manual Photo Finish OPTIc3 The status must now be set to "Finished" in the Timing Client. If this has happened in all heats of a competition, this competition is automatically set to “official” and removed from the list of relevant competitions.
-
Page 93: Data Format Of Finish Lynx
Manual Photo Finish OPTIc3 15.3 Data Format of Finish Lynx If you use a program that supports the Lynx data format (e.g. Hy-Tek), you have to make the following settings in the "ATL Exchange Settings": The following settings must be made for the Hy-Tek Meet Manager:... - Page 94 Manual Photo Finish OPTIc3 Check the directory when exporting the schedule and the start lists! You have to send the re- sults from OPTIx.NET to the same directory. - 94-...
-
Page 95: Import And Export Of Meets And Heats
Manual Photo Finish OPTIc3 Import and Export of Meets and Heats You can import or export entire meets or individual runs in the OPTIc.3NET program. This is important in order to transfer the data from one PC to another. 16.1 Import and Export Meet In the <File>... -
Page 96: Import Meet
Manual Photo Finish OPTIc3 16.1.2 Import Meet When importing from a meet, all data from this event including the images are imported. You can only import meets that were previously exported with the OPTIc3.NET software. If an im- ported meet is loaded, it can be used like a self-created meet, i.e. you can select it as <recording meet>. -
Page 97: Integration Of Idcam
The OPTIc3.NET software allows you to integrate the ALGE-TIMING IDCam. This has the ad- vantage that the recording of the IDCam is also controlled by the OPTIc3.NET software and that the picture of the IDCam moves synchronously with the photo finish picture. -
Page 98: Adjustment Of The Idcam
Manual Photo Finish OPTIc3 17.1 Adjustment of the IDCam The IDCam can work on the same PC (fast PC and a very fast hard disk required) or on a second PC that is connected with the PC of the OPTIc3 by Ethernet. -
Page 99: Integration Of The Idcam At The Same Pc
Manual Photo Finish OPTIc3 17.2 Integration of the IDCam at the same PC • Start the OPTIc3.NET software. • Make sure that the photo finish camera OPTIc3 works. You must see the picture of the camera. • Start the IDCam software. -
Page 100: Connection To Startjudge Sj2
Manual Photo Finish OPTIc3 Connection to StartJudge SJ2 This only has to be done if a false start system StartJudge SJ2 is used and the data are to be transferred from the false start system to the OPTIc3. Enter the IP of the PC of the StartJudge SJ2 under “Remote Port”... -
Page 101: Integration Of A Video Wall
• ranking list for a run • advertising The software "Screens" from ALGE-TIMING is required to operate the video wall. The settings for the video wall are made in the ATL Exchange Settings Settings: Yellow: General Settings as required! - Page 102 Manual Photo Finish OPTIc3 The settings in the ATL menu are made for an ALGE-TIMING video wall with a ration of 3x1. All the layouts for this are automatically installed with the Screens program. In screens you have to adjust the correct path for the layouts as following.
-
Page 103: Settings To Control A Video Screen
Manual Photo Finish OPTIc3 19.1 Settings to control a video screen • ClockLayout active layout for clock Standard: Clock.axml • Enabled to activate the screen control Standard: FalseIf you use a video screen adjust here True! • LiveLayout active layout for running time (sprint races) Standard: OPTI\Live.axml... -
Page 104: Integration Of A Timing Or Transponder System
Photo Finish OPTIc3 Integration of a Timing or Transponder System ALGE-TIMING offers upgrade software to integrate timing devices or transponder systems into the OPTIc3.NET software. You can obtain this upgrade together with your OPTIc3. List of Devices that can be used together with the OPTIc3.NET software: •... -
Page 105: Race Result
Manual Photo Finish OPTIc3 Adjust the correct system at <Timing Port>: • channel for recording o STA or BOX for Chrone- lec/Tag Heuer o C1 for others • Click on the arrow left of <Tim- ing>. • Click on <Device> (it is four lines below <Timing>). -
Page 106: Mylaps
Manual Photo Finish OPTIc3 20.1.2 Mylaps Device: MyLaps Orbits connected via network: TCP Client: IP Adresse von PC + Port 50000 You must activate the output of display on the computer. connected via RS232 interface with 9600/n/8/1 connection on serial port of computer You must activate the output of display on the computer. -
Page 107: Excel File To Import The Transponder Mapping
Manual Photo Finish OPTIc3 20.3 Excel file to import the transponder mapping: The first row shows the transponder ID and the second row the bib. No header is needed. You can also export the transponder mapping to Excel by clicking 20.4... -
Page 108: Recording Using Data From External Devices
Manual Photo Finish OPTIc3 Image stream delay time [ms]: If the data from the transponder system arrives at the OPTIc3 with a delay, the time must be set, that all transponder impulses always arrives before the image of the OPTIc3 is output. Tran- sponder data that arrive after the image output are lost in the OPTIc3 system. - Page 109 Manual Photo Finish OPTIc3 • If bib and position of the transponder line are OK, click the right mouse button and select OK to change tran- sponder time to official race time of the photo finish. • Transponder Times Integration This function is only active if you have the O3-TSP transponder upgrade.
-
Page 110: Technical Data
Manual Photo Finish OPTIc3 Technical Data Measuring Range: 23 hours, 59 minutes, 59.9999 seconds Quartz Frequency: TCXO 20,000 MHz (temperature compensated quartz oscillator) Frequency Deviation: temperature: +/- 2.5 ppm at -10 °C to 70 °C (+/-0.009 sec/h) ageing: +/- 1 ppm per year frequency adjustment: +/- 0.1 ppm at 25 °C... -
Page 111: Display Board Interface "Display Board
Manual Photo Finish OPTIc3 3 ..motor zoom pin 1 .... empty pin 2 .... empty pin 3 .... zoom in pin 4 .... iris close pin 5 .... focus near pin 6 .... iris open pin 7 .... zoom out pin 8 .... -
Page 112: Data Format
Manual Photo Finish OPTIc3 21.2.3 Data Format The data format has 24 ASCII characters. The 24th character is carriage return. Every 1/10 second it sends one data string. For running times, the fourth character is a point, for zero times a blank, and for stopped time (run time) a C. -
Page 113: Update Of The Optic3 System
The OPTIc3 system consists of the camera with firmware and the PC software (OPTIc3.NET). Both should always be kept up to date in order to benefit from optimal performance. ALGE-TIMING offers its customers a free update service. Please use this service to download innovations and solve known problems in the software. -
Page 114: Camera Firmware
Sometimes there is also a "beta version" that you can download. A beta version is untested software and we recommend using it only when you carry out tests with OPTIc3. Do not use a beta version for races. You can download the latest software on the ALGE-TIMING website: ALGE-TIMING website: www.alge-timing.com direct download link: https://alge-timing.com/alge/download/software/OPTIc3NETSetup.exe... - Page 115 Manual Photo Finish OPTIc3 • If the OPTIc3 camera is found, it is displayed after a few seconds. If several cameras are connected, all are displayed. If no camera is found, you have to enter the IP address of the camera.
-
Page 116: Accessories For Photo Finish
Cable reel with 90 m patch cable KT-RJ45G90 23.2 Lenses for the OPTIc3 The OPTIc3 includes no lens as each sport has different requirements. ALGE-TIMING offers dif- ferent lenses ideally suited to the camera. Universal Lens Z75: • manual zoom lens •... -
Page 117: Tripod And Gear Head
Manual Photo Finish OPTIc3 23.3 Tripod and Gear Head Tripod TRIMAN: professional tripod (max. height 2.27 m or 89.4 in) Tripod STATIV6: very stable and high tripod with a max. height of 3.66 m Clamp with 3/8” Thread CLAMP3/8: clamp to mount gear head with camera on a bar Gear Head 410: manual gear head to adjust the camera easily to the finish line;... - Page 118 Manual Photo Finish OPTIc3 - 118-...
- Page 119 Manual Photo Finish OPTIc3 - 119-...
- Page 120 Manual Photo Finish OPTIc3 - 120-...
- Page 121 Manual Photo Finish OPTIc3 Subject to errors and misprints. Copyright by ALGE-TIMING GmbH Rotkreuzstr. 39 6890 Lustenau / Austria https://www.alge-timing.com - 121-...
Need help?
Do you have a question about the Photo Finish OPTIc3 and is the answer not in the manual?
Questions and answers