Table of Contents
Advertisement
Quick Links
Advertisement
Table of Contents

Related Manuals for ALGE-Timing OPTIc3

Summary of Contents for ALGE-Timing OPTIc3
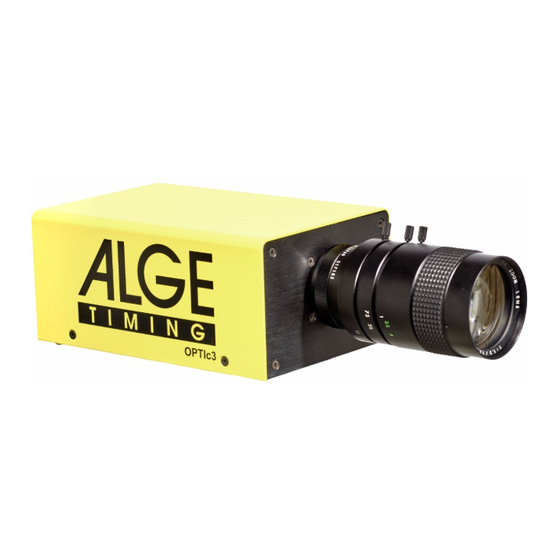
- Page 1 Version-E171204 Photo Finish OPTIc3 Manual...
-
Page 2: Important Information
Important Information General Before using your ALGE-TIMING device read the complete manual carefully. It is part of the device and contains important information about installation, safety and its intended use. This manual cannot cover all conceivable applications. For further information or in case of problems that are mentioned not at all or not sufficiently detailed, please contact your ALGE-TIMING representative. -
Page 3: Declaration Of Conformity
Photo Finish OPTIc3 Declaration of Conformity We declare that the following products comply with the requirements of the listed standards. ALGE-TIMING GmbH Rotkreuzstrasse 39 A-6890 Lustenau declare under our sole responsibility, that the photo finish camera of the type: OPTIc3 and OPTIc3-PRO... -
Page 4: Table Of Contents
Camera connected to Ethernet with external supply ............. 15 Camera communication by WIFI ................... 15 Connection of two or more cameras ..................16 Power Supply of the OPTIc3 ....................16 Camera Position ......................17 Lens Angle ..........................18 Focusing the Camera ......................19 5.2.1... - Page 5 Image Adjustment with a Motor Zoom Lens ..................40 7.7.4 Brightness Adjustment ........................40 7.7.5 eXtremLuX (L) (OPTIc3-PRO) ......................41 7.7.6 Scan Rate Doubling (OPTIc3-PRO) ....................41 Time Synchronization .................... 42 Software OPTIc3NET ....................44 Icon List ..........................44 Footer ............................ 45 Menus of the Software ......................
- Page 6 Photo Finish OPTIc3 14.1 Adjustment of the IDCam ...................... 76 14.1.1 OPTIc3-camera and IDCam are connected at the same PC ............76 14.1.2 OPTIc3-camera and IDCam are connected at different PCs ............76 14.1.3 Offset between photo finish and IDCam ..................77 14.2...
- Page 7 Photo Finish OPTIc3 1 ..Photocell Socket (2 x) 2 ..Gearhead Socket 3 ..Motor Zoom Socket 4 ..RJ45 Socket (Ethernet) 5 ..Input for External Power Supply (+9 to 13.4 VDC) 6 ..Banana Socket – Start Impulse (2 x) 7 ..
-
Page 8: Introduction
To connect the OPTIc3 camera with a PC is very easy, since it uses Ethernet. A CAT5 cable will allow Gigabit transfer and power over Ethernet. Alternative you can also use a wireless connection with WLAN. -
Page 9: Optic3-Pro - System Components
OPTIc3 update with communication per Voice over IP with starter O3-MD OPTIc3 update for motion detection (automatic recording) O3-MZ OPTIc3 update for motor zoom (controlling of focus, iris and zoom) O3-HSV OPTIc3 update for high speed video (100 frames per second) O3-TSP OPTIc3 update for recording and evaluation with transponder systems 1.1.2... -
Page 10: Requirements For Pc (Desktop Or Notebook)
Monitor Resolution: minimum Full HD (1920 x 1080) Interfaces: Gigabit Ethernet and/or WLAN Accessory For the all OPTIc3 models we can offer several additional products. Please contact your ALGE- dealer for further details: • Camera tripod TRIMAN (max. height 2.27 m) •... -
Page 11: Function
2D-picture, but only one vertical line. The recording speed for this vertical line is adjustable until up to 3000 fps (OPTIc3) and 15,000 fps (OPTIc3-PRO). Each line is stored on the hard disk and is shown on the screen in chronological order. If something moves in front of the camera (e.g. -
Page 12: Layout Of The Software Optic3Net
Photo Finish OPTIc3 Layout of the Software OPTIc3NET The layout of the software is completely adjustable. You can dock-in or dock-out windows as you want. You can store your favorite layout(s) so that it takes just a click to go back to it. -
Page 13: Select Language Of Optic3.Net Software
If you send this translated file to ALGE-TIMING (office@alge-timing.com) we will integrate the new language in the standard installation so it is also available when installing the software anew after an update. -
Page 14: Connection Of The Camera
Power supply of the camera must be OK Network connection The OPTIc3 camera you connect by Ethernet or WLAN to a PC. The camera has a pread- justed DHCP-network setup. Make sure that the camera setup is suitable to your network setup, otherwise the camera will not be found and visible in your network. -
Page 15: Camera Connected To Ethernet With Power Supply By Poe
POE+ (Power Over Ethernet). At the POE+ the PC (with a short Ethernet cable (e.g. 3 m), the OPTIc3 (with the long Ethernet cable - power out) and the mains (100 – 240 VAC) is con- nected. The maximum cable length of the Ethernet cable is 100 m. -
Page 16: Connection Of Two Or More Cameras
Example: Two cameras OPTIc3 are connected with Ethernet through a Switch with inte- grated POE+ Power Supply of the OPTIc3 The OPTIc3 camera needs a power supply. There are two possible power supply solutions: • Power supply by using the POE+ (Power over Ethernet) adapter. Please make sure to use the adapter supplied by ALGE-TIMING. -
Page 17: Camera Position
Photo Finish OPTIc3 Camera Position The camera of the photo finish system must be set exactly on a straight line with the finish line. Depending on the sport discipline it needs a different angle to the finish line (5.1 Lens Angle). -
Page 18: Lens Angle
Our most commonly used C-Mount zoom lenses are the Models Z75 or MZ75C. For the OPTIc3 with 1360 pixels it has an adjustable camera angle from 5.5° (75 mm) to 30° (12.5 mm). -
Page 19: Focusing The Camera
The scan rate must be adjusted different for the OPTIc3 (vertical resolution 1360 pixel) and the OPTIc3-PRO (vertical resolution 2016 pixel). OPTIc3:... - Page 20 Photo Finish OPTIc3 OPTIc3-PRO: As reference value for the scan rate for different sports at a full vertical camera resolution of 2016 pixel, refer to below stated table (please note that the given values may vary extremely, if one of the above given parameter does not apply, values stated in lines per second).
-
Page 21: Camera Alignment On Finish Line
Photo Finish OPTIc3 Camera Alignment on Finish Line The OPTIc3 camera can be adjusted in a 2D mode. When you switch to the 2D mode you have a video picture that allows you to make adjustments like focus, zoom and brightness easy. - Page 22 Photo Finish OPTIc3 The red line on the picture above is what you want you will record. Therefore, position the red line exactly at position of the finish line that you want to record. -22-...
- Page 23 Photo Finish OPTIc3 The <Preview mode> will disappear and you will see in <Cam preview> now scan mode. In order to get the correct colors of the picture (e.g. a white finish line) click on <White bal- ance>. -23-...
-
Page 24: Photo Finish For Different Sports
Photo Finish OPTIc3 Photo Finish for Different Sports It is possible to use the photo finish OPTIc3 for almost all sports. The software OPTIc3NET allows you to measure the start time, finish time and run time. Selection of the Type of Sport The software OPTIc3NET has integrated the most common sports that use photo finish. -
Page 25: Dog Race
Photo Finish OPTIc3 6.1.5 Dog Race You can adjust the time for a dog length. 6.1.6 Rowing / Canoe You have several parameters that you can adjust to get the country specific results. 6.1.7 Cycling You have several parameters that you can adjust to get the country specific results. - Page 26 Photo Finish OPTIc3 If you use the OPTIc3 with a Tripod F-STATIV6 with a height of 3.66 m for the camera, you might have to use a wide-angle lens for a track with 8 lanes. Otherwise you do not cover all 8...
-
Page 27: Zero Control For Athletics (Start Control)
Photo Finish OPTIc3 6.3.1 Zero Control for Athletics (Start Control) There is the possibility to record the flame of the start gun fired on the start line (or flash of the e-Start). With this test, the referee can see that the time in the picture is correct without any delay. -
Page 28: Horse Races
Photo Finish OPTIc3 Horse Races We recommend using the selection <Horse Race> under <Type of sport>. Please read the description for track and field. For horse races, no painted finish line exists, but there might be a mirror that should be focused on. - Page 29 Photo Finish OPTIc3 With this gap, you set the time difference for the group. A rider that has more delay to the previous finisher than the gap in this field will have a new time, if he is within this gap time he will be listed in the same group of riders.
-
Page 30: Setting Of The Camera
(settings between 100 and 30,000 fps, depending on the model). E Scan rate doubling (OPTIc3-PRO): If you activate this feature the scan rate will double by interpolate a line between two actual lines. This feature helps you to use the camera at dark conditions. -
Page 31: Remote Control Camera Adjustment
Motorzoom MZ75C or MZ160R: The adjustment with the motorzoom works only when using a ALGE-TIMING motorzoom. The function must be switched on by ALGE-TIMING. Motorzoom that are identical, but not from ALGE- TIMING need a software update that you can by from ALGE-TIMING. -
Page 32: Recording And Picture Adjustments
Photo Finish OPTIc3 Electronic Gearhead 410-E3 Adjustment: The electronic Gearhead has a big advantage, if the camera is far away from the PC or very difficult to reach (e.g. fix mounted under the roof) Please consider that the motor of the gearhead starts always very slow. If you keep pressing the button for a longer time the motor moves faster. - Page 33 (e.g. spectators or flags that move). The sensor has 2016 vertical pixels (OPTIc3-PRO). The counting starts with pixel 1 on the bottom and ends with pixel 2016 (OPTIc3-PRO) or 1360 (OPTIc3) on the top.
-
Page 34: Wtn Radio Adjustments (Optic3-Pro)
WTN Radio Adjustments (OPTIc3-PRO) The OPTIc3-PRO camera has a built in WTN radio system. WTN is a wireless timing network created by ALGE-TIMING. Using the WTN radio you can get start impulses or finish impulses wireless or run display board wireless. -
Page 35: Voice Communication - Voip (Optic3-Pro)
It is possible to use the PC for communication with the starter or other timing people out on the track. When using e.g. at the start a ALGE-TIMING headset HS3-2 with speech amplifier SV4-S or Start Unit SU3 it is possible to communicate direct by setting a Voice over IP connection to the camera. -
Page 36: Picture Quality Adjustments
Photo Finish OPTIc3 Picture Quality Adjustments This are advanced adjustments to improve the picture quality of the photo finish. WLAN-Mode: When you not activated the <WLAN-Mode> (u), it will record the preview picture in a very high frame rate (100 frames per seconds). This can cause problems because the of the data volume sent by the camera to the PC, especially when using WIFI. -
Page 37: Image Adjustment
Settings in the Preview mode: The OPTIc3 is very comfortable and easy to adjust. The best comfort you will get with a mo- tor zoom and motor gear head. This will allow you to adjust everything direct from the PC. - Page 38 7.7.1.1 Aligning the Scan Line to the Finish Line The scan line of the OPTIc3 photo finish camera must be aligned to the finish line, so the scanning pixel array of the camera does record correct. This alignment you do as well in the 2D picture.
-
Page 39: Image Adjustment With A Manal Lens
Photo Finish OPTIc3 7.7.2 Image Adjustment with a Manal Lens Connect OPTIc3 camera to PC. Connect external devices for start and finish. Check if the camera has power supply (LED „power“ must blink green). Start OPTIc3NET software on PC. Check if the camera icon in the left, lower corner is green ( ). -
Page 40: Image Adjustment With A Motor Zoom Lens
Photo Finish OPTIc3 7.7.3 Image Adjustment with a Motor Zoom Lens Connect OPTIc3 camera to PC. Connect external devices for start and finish. Check if the camera has power supply (LED „power“ must blink green). Start OPTIc3NET software on PC. -
Page 41: Extremlux (L) (Optic3-Pro)
(L) (OPTIc3-PRO) eXtremLuX will help you to improve the picture quality at bad light conditions. This function you can also get as upgrade for the OPTIc3. 7.7.5.1 Night mode (OPTIc3-PRO) <Night mode> will make the picture about 50% brighter by using a special technology. The picture quality will be slightly go back when <Night mode>... -
Page 42: Time Synchronization
Photo Finish OPTIc3 Time Synchronization When using the OPTIc3 camera it should work in time of day. Every start and stop signal is stored with this time of day to calculate the actual run time. This makes it possible to get a missed start time out of the log file and activate the start with this time. - Page 43 Photo Finish OPTIc3 When the synchronization is successful the back- ground color of the window will change to green. Af- ter a few seconds, it will than show also the new time of day. If you click on the icon (Take time from PC) the time of the PC will be taken as time of day.
-
Page 44: Software Optic3Net
OPTIc3 system. If the OPTIc3 PC is not operated in a network we also recommend closing the antivirus soft- ware. Make sure that at least such software should not start an automatic check of the hard disk during the photo finish operation. -
Page 45: Footer
Photo Finish OPTIc3 Footer The footer is a status bar that shows the connected devices of the system and some basic information. Example 1: Athletics: Camera, Windspeed WS2 Example 2: Cycling: Camera, IDCam OPTIc3 Camera This icon must be green for confirming a working communication with the camera. - Page 46 (no recording is possible). Time of Day: It is possible to synchronize the OPTIc3 camera with the accurate time of day. If there is no synchronization it takes automatically the time of the PC.
-
Page 47: Menus Of The Software
Photo Finish OPTIc3 Menus of the Software The OPTIc3 software has sub menus as is usual for Windows software. 8.3.1 Menu <File> The menu <File> includes as in most Windows programs tools to open, save, print, etc. Select recording meet It shows all open files in the OPTIc3NET program and you can select in which meeting you can record races. -
Page 48: Menu
Photo Finish OPTIc3 Print You can print lists for the race (heat). The list can e.g. be a start list, bib list or result list. Each list can have an integrated picture. Save Save the currently open meet. Exit Exit the OPTIc3NET software. -
Page 49: Menu
OPTIc3NET. 8.3.3.2 OPTIc3 devices Here you can adjust the OPTIc3 hardware such as the camera OPTIc3 or the distribution box OCD2. Camera See “Setting the Camera”. - 49-... - Page 50 Photo Finish OPTIc3 8.3.3.3 Screen Layout The layout of the screen is completely adjustable. You can dock-in or dock-out windows as you want. You can store your favorite layout(s) so that it takes just a click to go back to it.
- Page 51 Photo Finish OPTIc3 Factory Setup: The factory setup of the chosen language is used Setup I: your setup for fields with text is used; fields that have no text are taken from factory setup of chosen language Setup II: your setup for fields with text is used; fields that have no text are taken from...
-
Page 52: Menu
The factory setup for the Cycle Time (gap) is 1 second. 8.3.3.6 Download License File If you use an OPTIc3 and buy a software upgrade (e.g. eXtrem LuX) you have to update the license file in order to use the new function. -
Page 53: Menu
Display Windows Log File If you activate the <Show message dialog> a log-file that records everything that hap- pens to the system is shown. This file is very important for ALGE-TIMING in case of problems. Time Window A window opens that shows the net time of a race (it is marked with the evaluation line) - Page 54 It is possible to show the transponder times in the photo finish, but a separate additional software is necessary to read the transponder times. This software upgrade you can get from ALGE-TIMING. It is pos- sible to adjust the color of the transponder time lines in the picture.
-
Page 55: Menu
In the menu <Help> you can see the current version number of the software and you get to the manual for the OPTIc3. The manual will be shown as a pdf-file. You can also open the manual by pressing the key <F1>. -
Page 56: Evaluation Windows
Photo Finish OPTIc3 Evaluation Windows The software OPTIc3NET allows you to see the photo finish picture in three different windows. The window <View 1> is the main picture in which you make the evaluation. The window <View 2> can be used e.g. as zoom window, where you see the part of the picture that you evaluate in a bigger scale. -
Page 57: View 2
Photo Finish OPTIc3 If you activate this icon the latest recording is always shown immedi- ately. This function is used if the photo finish system is used as backup without a person that will evaluate a picture without any certain reason (e.g. -
Page 58: Timing (Timing Window)
Photo Finish OPTIc3 Timing (Timing Window) Before you start a race, you should start the timing window with the heat that you want to start and execute the timing. It is possible to start several heats in the timing window (e.g. for rowing events when more races are on the water at the same time). - Page 59 Photo Finish OPTIc3 REC (Record Photo finish) It is possible to allocate more than one heat to the recording focus (this means it can record photo finish pictures at the same time to different heats). • When the button shows , the camera records as soon as it gets a recording impulse (photocell, push button, F8-key, motion detection).
-
Page 60: Tool Bar Of The Timing Window
Photo Finish OPTIc3 Distance In this field you can input the distance in meters. This is important for some calculations (e.g. average speed). Intermediate time: No function yet! Display time It shows the time that is also shown on the display board (if you selected in tool bar the running time and not the time of day). -
Page 61: Photo Finish Recording
If it is transmitted by cable there is no delay. If you transmit it by radio it has a delay. When using an ALGE-TIMING radio (TED or WTN) there is an exact delay of 0.1 seconds. If you activate the <Radio start> it automatically corrects the 0.1 delay of the radio impulse. -
Page 62: 10.2.2 Push Button Recording
Photo Finish OPTIc3 10.2.2 Push Button Recording It is possible to connect a push button at the camera (red and black banana socket - stop) or Distribution Box OCD2 (red and black banana socket – C1-A) for manual recording. 10.2.3 Sensor Recording (Photocell) It is possible to connect a photocell at the camera (red and black banana socket –... -
Page 63: Manual Evaluation
Photo Finish OPTIc3 11.2 Manual Evaluation You select the manual evaluation by clicking with the mouse on the button in the icon bar. Mark the competitor in the heat list that you want to evaluate by clicking on The field of the competitor is marked in orange color. Press the left mouse button and move the time line to the competitor that you want to evaluate. -
Page 64: Bib Evaluation
Photo Finish OPTIc3 11.4 BIB Evaluation Make the evaluation with bib numbers (ID-number) e.g. for events with a mass arrival at the finish. In this evaluation each competitor needs a bib number that is good visible. • Move the <Time Curser> to the correct position for the evaluated competitor •... -
Page 65: 11.5.1 Time Cursor
Photo Finish OPTIc3 11.5.1 Time Cursor The “Line Cursor” is the line that shows the time (net time and time of day of the race). When you move the “Time Cursor” over the picture in horizontal direction the run time will change in the time window. -
Page 66: Heat List
Photo Finish OPTIc3 Heat List The heat list is a flexible list that combines competitor data and results for each heat. Its layout is very flexible to give the operator possibilities to configure this list up to his wishes. The heat... -
Page 67: Class Mode
Photo Finish OPTIc3 12.2 Class Mode If you click on this icon the heat list is shown separated by class names. Of course it is necessary to input a class mode and to input bib and group with the evaluation (use <Bib evaluation>... -
Page 68: 12.2.1 Start Time Of A Class
Photo Finish OPTIc3 12.2.1 Start Time of a Class It is possible that each group start at a different time. Therefore, it is important that you can import a start time for the complete group. To import the start time for the complete class you must first switch to the class mode by clicking on the icon 12.2.1.1 Import a Start Time from the Impulse Log for a Class... -
Page 69: Insert Row(S)
Photo Finish OPTIc3 12.3 Insert Row(s) If you click on the Icon <Insert Lines> it opens a pulldown menu (see right side). If you click on <Insert row(s)> it will open the amount of rows (lines) that you adjust below in <Amount of rows>... - Page 70 Photo Finish OPTIc3 Click on to open the Excel import window Click on <Import an Excel list> Select the file that you want to import Select the headers by clicking with the right mouse the imported list is shown button on the header that you want to change The possible headers are shown.
-
Page 71: Export An Excel List
Photo Finish OPTIc3 12.6 Export an Excel list • Click on the icon to export the heat list to Excel. • Select were you want to store it on your PC and the file name. To adjust the export, you have to click on the icon in the meet browser. -
Page 72: Meet Browser
Photo Finish OPTIc3 Meet Browser The meet browser is the center of the software. Here you handle the race structure and input important information about the meeting, session, event and heat. As soon as you <Create a new meet> you are asked to input a <Meet name>. The meet name is used to store your meet. - Page 73 Photo Finish OPTIc3 Click on event and input the event name For athletics events you have to select the on the right side (e.g. Men Quali 100 m) distance for the automatic use of the anemometer Click on heat and input the heat name on the right side (e.g.
- Page 74 Photo Finish OPTIc3 • It is also possible to insert several heats at once. Move the mouse to the heat where you want to add below new heats and click with the right mouse button. A pull-down menu opens and you click on <Insert new heat>.
-
Page 75: Integration Of Idcam
The OPTIc3.NET software allows you to integrate the ALGE IDCam. This has the advantage that the recording of the IDCam is also controlled by the OPTIc3.NET software and also that the picture of the IDCam moves synchronous with the movement of the photo finish picture. -
Page 76: Adjustment Of The Idcam
The IDCam can work on the same PC (you need a fast PC and a very fast hard disk) or on a second PC that is connected with the PC of the OPTIc3 by Ethernet. To adjust the IDCam Ethernet connections do the following adjustment: •... -
Page 77: 14.1.3 Offset Between Photo Finish And Idcam
14.2 Integration of the IDCam at the same PC • Start the OPTIc3.NET software. • Make sure that the photo finish camera OPTIc3 works. You must see the picture of the camera. • Start the IDCam software • Make sure that the IDCam works. You must see the picture of the camera on the monitor. -
Page 78: Integration Of A Timing- Or Transponder-System
Photo Finish OPTIc3 Integration of a Timing- or Transponder-System ALGE-TIMING offers an upgrade software to integrate timing or transponder systems into the OPTIc3NET software. The software O3-TSP comes with a memory stick with a certain number that you have to plug to the OPTIc3NET PC (USB), or can be updated to integrate it in the OPTIc3NET software. - Page 79 Photo Finish OPTIc3 Adjust the correct system at <Timing>: • Channel for recording o STA or BOX for Chronelec/Tag Heuer o C1 for others • Click on the arrow to the left of <Timing> • Click on <Device> (it is four lines below <Timing>) •...
-
Page 80: 15.1.1 Race Result
Photo Finish OPTIc3 • Layer o Serial for Chronelec (19200 Baud, LineEnds 13) o TcpClient for others 15.1.1 Race Result: Device: RaceResult_RaceResultSytem TCP Client: IP Adresse von Leser + Port 3601 Line End Delimiter: 13+10 +Programm neu starten 15.1.2 Mylaps:... -
Page 81: Transponder Mapping
Photo Finish OPTIc3 15.2 Transponder Mapping The transponder mapping is necessary to match the transponder ID with the competitor ID (bib). Each transponder has a unique ID-code. This ID-code must be matched in the transponder mapping with the bib of a competitor that carries this transponder. -
Page 82: Recording Using Data From External Devices
Photo Finish OPTIc3 15.3 Recording Using Data from External Devices If you use external devices with the OPTIc3NET as described before (e.g. transponder systems), it is possible to activate the recording of the camera though these devices. For each data string a vertical hashed time line is created in the photo finish picture and in the heat list it will insert to the bib of the competitor a transponder time. -
Page 83: Technical Data Of The Optic3
Photo Finish OPTIc3 Technical Data of the OPTIc3 All technical data is the same for the camera OPTIc3 and OPTIc3o, but the OPTIc3n has differ- ent connections: Measuring Range: 23 hours, 59 minutes, 59.9999 seconds Quartz Frequency: TCXO 20,000 MHz (temperature compensated quartz oscillator) Frequency Deviation: Temperature: +/-2.5 ppm at -10 to 70°C (+/-0.009 sec. -
Page 84: Minimum Requirements For The Pc (Desktop Or Notebook)
Photo Finish OPTIc3 3 ..motor zoom 1..empty 2..empty 3..Zoom in 4..Iris close 5..Focus near 6..Iris open 7..Zoom out 8..Focus far 4 ..start input (banana socket) (2x) Green ..input channel 0 (start) Black .. -
Page 85: Data Format
Photo Finish OPTIc3 16.4 Data Format The data format has 24 ASCII characters. The 24th character is carriage return. It sends every 1/10 second one data string. The fourth character is a point for the running time (running time), a blank for a zero time, or a C for a stop time (run time). For a standing time (run time) you can have, depending on the adjusted precision, 1/10, 1/100, 1/1000, or 1/10.000 seconds. -
Page 86: Accessories For Photo Finish
Cable reel with 90 m patch cable KT-RJ45G90 17.2 Lenses for the OPTIc3 The photo finish includes no lens as each sport has different requirements. ALGE-TIMING offers different lenses that suit optimal to the camera. Universal Lens Z75: • manual zoom lens •... -
Page 87: Tripod And Gear Head
Electrical gear head to adjust the camera easily to the finish line. The gear head allows a three-dimensional adjustment of the cam- era from the software of the OPTIc3. It is ideal for a camera that is mounted out of reach of the operator (e. g. on a high tripod, ceiling). -
Page 88: Further Accessory
Case with foam insert for protective storage and transportation of an OPTIc3 system Power over Ethernet POE POE to supply the OPTIc3 camera via the Ethernet cable as well with power Gigabit Switch POE Gigabit switch with 8 connectors (RJ45 sockets) and integrated power over Ethernet.
Need help?
Do you have a question about the OPTIc3 and is the answer not in the manual?
Questions and answers