
Related Manuals for Wexiodisk WD-100GR


Summary of Contents for Wexiodisk WD-100GR
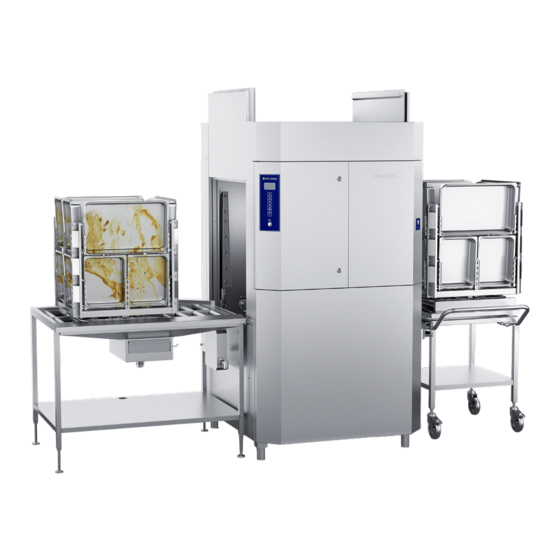
- Page 1 POTWASHER WITH GRANULATE WD-100GR (translation of the original documentation) Read the manual before using the machine! Installation and user manual S/N: En Valid from: 202207 Rev.: 5.0...
-
Page 3: Table Of Contents
WD-100GR Rev. 5.0 (202207) 1. General instructions ................ 1 1.1 Symbols used ....................2 1.2 Machine rating ....................3 1.3 Checking that the machine and manual correspond ........3 1.4 EU Declaration of Conformity ................4 2. Safety instructions ................5 2.1 General information .................. - Page 4 WD-100GR Rev. 5.0 (202207) 3.5 Connections ....................13 3.5.1 Power supply ..................14 3.5.2 Water connections, regardless of any options ........14 3.5.3 Ventilation ....................14 3.5.4 Steam (optional) ..................15 3.5.5 Condensation water (option) ..............15 3.5.6 Drain/waste pipe connection ..............15 3.5.7 Detergent and drying agent ..............
-
Page 5: General Instructions
WD-100GR Rev. 5.0 (202207) General instructions 1. General instructions Read the instructions in this manual carefully as they contain important informa- tion regarding the correct, effective and safe installation, use and servicing of the machine. Service personnel should have access to all documentation for the ma- chine. -
Page 6: Symbols Used
WD-100GR Rev. 5.0 (202207) General instructions 1.1 Symbols used This symbol warns of situations where a safety risk may arise. The instructions given should be followed in order to prevent injury. This symbol on a machine part warns of electrical equipment. The machine must be entirely non-live during servicing, turn off the power at the power switch and if required, the switch should be locked to prevent unintentional operation. -
Page 7: Machine Rating
WD-100GR Rev. 5.0 (202207) General instructions 1.2 Machine rating The machine has two rating plates, one of which is placed at the bottom of one side of the machine and the other in the electrical cabinet. The technical informa- tion on the plates is also included on the machine’s wiring diagram. The various... -
Page 8: Eu Declaration Of Conformity
WD-100GR Rev. 5.0 (202207) General instructions 1.4 EU Declaration of Conformity A so-called EU Declaration of Conformity is provided on delivery of the machine. CE_16_2 Contact details of the manufacturer (Wexiödisk AB, Mårdvägen 4, SE- 35245 Växjö, SWEDEN, Tel.: +46 470 771200, Fax: +46 470 23752, E- mail: wexiodisk@wexiodisk.com). -
Page 9: Safety Instructions
WD-100GR Rev. 5.0 (202207) Safety instructions 2. Safety instructions Read the chapter GENERAL INSTRUCTIONS carefully before starting work. 2.1 General information The machine is CE marked, which means that it complies with the requirements of the EU Machinery Directive with regard to product safety. Product safety means that the design of the machine will prevent personal injury or damage to property. -
Page 10: Transport
Warranty repairs must be performed by an authorised company. Contact an authorised service company to draw up a programme of preventive care and maintenance. For authorised service companies, please see www.wexiodisk.com or contact Wexiödisk AB. • The regular checks described in the manual must be carried out in accord- ance with the instructions. -
Page 11: Operation
WD-100GR Rev. 5.0 (202207) Safety instructions 2.5 Operation Be very careful around the machine when it is in operation. 2.5.1 High temperatures • The temperature of the washing and rinsing water is 60° C and 85°C. Do not open the machine until the washing and rinsing phases have finished. -
Page 12: Installation Instructions
WD-100GR Rev. 5.0 (202207) Installation instructions 3. Installation instructions Read the chapters GENERAL INSTRUCTIONS and SAFETY INSTRUCTIONS carefully before starting work. 3.1 General information Read these instructions carefully, as they contain important information regarding the correct installation method. • The instructions should be used together with the machine’s wiring dia- gram and flow diagram for water and steam, located in the machine’s elec-... -
Page 13: Rust On Industrial Dishwashers
WD-100GR Rev. 5.0 (202207) Installation instructions 3.1.1 Rust on industrial dishwashers • Large-scale industrial dishwashers in general as well as our dishwashers are made of stainless materials, but despite this, there are still situations where rust can occur on “stainless” materials. -
Page 14: Requirements For The Installation Site
WD-100GR Rev. 5.0 (202207) Installation instructions 3.2 Requirements for the installation site 3.2.1 Lighting In order to ensure the best possible working conditions during installation, opera- tion, servicing and maintenance, make sure that the machine is installed in a well- lit room. -
Page 15: Transport And Storage
WD-100GR Rev. 5.0 (202207) Installation instructions 3.3 Transport and storage Always transport the machine in an upright position. Take care during transport, as there is a risk of tipping. N.B.! The machine must not be transported without a pallet or other support. A packing notice will have been applied to the packaging where the latter covers the front of the machine. -
Page 16: Installation
WD-100GR Rev. 5.0 (202207) Installation instructions 3.4 Installation 3.4.1 Preparing for the installation The height of the machine during transport is 2300 mm. Check that there is suffi- cient room for the machine at the installation location. • Check that correct connections are available for water, electricity, drainage and possibly steam at the installation location. -
Page 17: Connections
WD-100GR Rev. 5.0 (202207) Installation instructions 3.5 Connections Machine installed for feeding Left - Right *) The heat recovery unit runs for 10 seconds at the start of the wash cycle and for 50 seconds from 10 seconds after the final rinse has started. -
Page 18: Power Supply
WD-100GR Rev. 5.0 (202207) Installation instructions 3.5.1 Power supply Information about electrical connections is available on the machine’s wiring dia- gram which is provided on delivery. Store the diagrams in the plastic pocket, lo- cated in the electrical cabinet, even after installation. -
Page 19: Steam (Optional)
WD-100GR Rev. 5.0 (202207) Installation instructions 3.5.4 Steam (optional) A shut-off cock must be installed on the incoming pipe (4). The required steam pressure can be found in the TECHNICAL SPECIFICATIONS. 3.5.5 Condensation water (option) A condensation connection (5) is only provided on steam-heated machines. The pipe is connected to the system’s steam boiler. - Page 20 WD-100GR Rev. 5.0 (202207) Installation instructions Drainpump (option) This needs to be mounted and the parts are packed inside the machine. Machine seen from below with the emptying pump mounted 303826_R2_438...
-
Page 21: Detergent And Drying Agent
WD-100GR Rev. 5.0 (202207) Installation instructions 3.5.7 Detergent and drying agent • The dishwasher is preconfigured for connection of detergent and drying agent equipment. The detergent and drying agent equipment is not includ- ed in delivery of the dishwasher. Contact your detergent supplier! •... -
Page 22: Bleeding The Booster Pump
WD-100GR Rev. 5.0 (202207) Installation instructions Electrical connection of the equipment • Remove the cover plate beneath the electrical cabinet. The panel is fixed with screws on the bottom edge under the stand. • The terminal block for connecting the dosing equipment is in the junction box (C) inside the cover plate. -
Page 23: Installing Auxiliary Equipment
WD-100GR Rev. 5.0 (202207) Installation instructions 3.6 Installing auxiliary equipment Once the machine is in place and adjusted horizontally and vertically, the periph- eral equipment can be fitted. • The loading bench (A) and extension bench (B) can be put in place. The height of the extension bench (B) can be adjusted where it connects to the machine. -
Page 24: Trial Operation
WD-100GR Rev. 5.0 (202207) Installation instructions 3.7 Trial operation Prepare the machine for trial operation by following the OPERATION INSTRUC- TIONS. The instructions describe the measures that must be taken to prepare the machine for operation. 3.7.1 Start-up schedule This should be completed and signed by the customer on start-up. -
Page 25: Documentation
WD-100GR Rev. 5.0 (202207) Installation instructions 4. Run a number of washes complete with loads and check: • There are no water leaks • The hood switch works • The anti-crushing mechanism functions • The water temperatures are maintained •... -
Page 26: Operating Instructions
WD-100GR Rev. 5.0 (202207) Operating instructions 4. Operating instructions Read the chapters GENERAL INSTRUCTIONS and SAFETY INSTRUCTIONS carefully before starting work. This chapter describes what must be done with the machine: • Before washing • How washing should be performed •... - Page 27 WD-100GR Rev. 5.0 (202207) Operating instructions Display LEDs which indicate the choice of programme LED which indicates that the diagnostics function is activated LED for the alarm function (flashes in the case of an alarm that can be re- set) LED which lights when the power is switched on.
-
Page 28: Preparations Before Filling
WD-100GR Rev. 5.0 (202207) Operating instructions 4.1.2 Preparations before filling The dishware must not be soaked if granules are to be used during washing. To avoid the wash nozzles getting blocked, it is important to remove all large piec- es of food from the items to be washed before putting them in the machine. -
Page 29: Filling And Heating The Machine
WD-100GR Rev. 5.0 (202207) Operating instructions 4.1.3 Filling and heating the machine When filling the machine with water, you should not have any items in the ma- chine. Water which is hotter than for normal washing is flushed into the wash com- partment when the machine is being filled. -
Page 30: Positioning The Items In The Cassette
WD-100GR Rev. 5.0 (202207) Operating instructions 4.1.5 Positioning the items in the cassette Put the cassette on the loading bench. Use the bench as a sorting area. Scrape away all loose food remnants. We recommend using our separating spatula WD209.7261 for this. If you rinse the items, you must only use water to do so. - Page 31 WD-100GR Rev. 5.0 (202207) Operating instructions Positioning gastronorm canteens The canteens must be pushed down into the guides in the cassette. If smaller canteens are being washed, the dividers (B) must be fitted and locked into the frame. Fixed guides (A) for large canteens. Dividers (B) for smaller canteens.
- Page 32 WD-100GR Rev. 5.0 (202207) Operating instructions Example of the position of smaller canteens. Alternative position for a 1/1 canteen Using accessories A number of accessories are available for washing different types of items. It is important to use the correct accessories in order to obtain the best washing re- sults.
- Page 33 WD-100GR Rev. 5.0 (202207) Operating instructions Loading bench (in / out) with connecting track The loading bench is provided upon delivery of the through-feed machine and can also be equipped with “Cleaning pistol sprayer with hose” (WD209.7290). The cleaning pistol sprayer is fitted to the side of the loading bench and is used for rinsing items before they are washed.
- Page 34 WD-100GR Rev. 5.0 (202207) Operating instructions 209.7375 Connection line (WD209.7375) WD209.7372 med WD209.7290 Loading bench with cleaning pistol sprayer (WD209.7290) installed...
- Page 35 WD-100GR Rev. 5.0 (202207) Operating instructions Trolley The trolley is used for moving clean and/or dirty items. Trolley (WD209.7362)
- Page 36 WD-100GR Rev. 5.0 (202207) Operating instructions Combination cassette Cassette with supporting sides for all types of washing. The items are positioned in the cassette so that they do not move during the wash cycle. 2 combination cassettes are included upon delivery of feed-through machine.
- Page 37 WD-100GR Rev. 5.0 (202207) Operating instructions Support partition and side holders (option) The support partition, which is placed in the bottom of the cassette, is used for washing lids, chopping boards with a length of 600 mm, baking trays 600 x 400/ 450 x 20/40 mm in size and other shallow items with a maximum size of 600 x 600 The items are placed between the supporting sides (A).
- Page 38 WD-100GR Rev. 5.0 (202207) Operating instructions Long guides These double the machine's capacity when washing 1/2 canteens. Long guides (WD209.7342) Short guides These are used to wash canteens smaller than 1/1 in size. Short guides (WD209.7343)
- Page 39 WD-100GR Rev. 5.0 (202207) Operating instructions Granules and separating spatula The granules are used for the wash programmes with granules P1, P2 and P3. Only use granules which are approved by the machine's manufacturer. The spat- ula is used to scrape off loose dirt.
- Page 40 WD-100GR Rev. 5.0 (202207) Operating instructions Grid for 500 x 500 wash basket (option) This grid is used with standard wash baskets, together with the cassette. Grid for 500 x 500 wash basket (WD209.7365) All-round holder (option) The all-round holder is used for washing ABC canteens and pots and pans. Pots and pans can be hung from the top part of the holder.
- Page 41 WD-100GR Rev. 5.0 (202207) Operating instructions Flexible insert (option) Bowls, small saucepans, baking tins and other items which are hard to position in other holders can be washed in the flexible insert. The maximum size is 500 x 300 mm. The items are clamped in position between the two sides of the insert which are held together with a lock mechanism (A).
- Page 42 WD-100GR Rev. 5.0 (202207) Operating instructions Canteen holder GN 1/3, 1/6, 1/9 (option) The holder is suitable for washing 1/3, 1/6 and 1/9 canteens. Holder for 1/3, 1/6 and 1/9 canteens (WD209.7366) Canteen holder GN 2/8 (option) The holder is suitable for washing 2/8 canteens.
- Page 43 WD-100GR Rev. 5.0 (202207) Operating instructions Pan holder (option) This holder is used for bowls and pans. Pan holder (WD209.7352) Utensil holder (option) The utensil holder is used for washing utensils, such as ladles and whisks etc. (Maximum height 600 mm).
- Page 44 WD-100GR Rev. 5.0 (202207) Operating instructions Cutlery holder (option) The cutlery holder is used for washing all types of cutlery. Cutlery holder (WD209.7367) Mesh basket (option) Small utensils can be placed in the mesh basket. They should be put loose in the basket for the best washing results.
- Page 45 WD-100GR Rev. 5.0 (202207) Operating instructions Wall-mounted holder - guide rails (option) The wall-mounted holder provides convenient storage for both short and long guide rails when not in use. Wall-mounted holder - guide rails (WD209.7358) Wall-mounted holder - side holder (option) The wall mounted holder provides convenient storage for side holders when not in use.
-
Page 46: Goods Location In Ppe Version (Option)
WD-100GR Rev. 5.0 (202207) Operating instructions Holder - accessories (option) The holder provides convenient storage for various accessories when not in use. Holder - accessories (WD209.7360) 4.1.6 Goods location in PPE version (option) Machines in PPE version are equipped with a special basket (WD209.735006) and a special stand for masks and tubes. -
Page 47: Washing
WD-100GR Rev. 5.0 (202207) Operating instructions 4.2 Washing To reduce the risk of damage, the dishware should be stacked in the cassette which is conveniently positioned on the loading bench or the trolley. 4.2.1 Selecting a programme WD-100GR 27246 Display... - Page 48 WD-100GR Rev. 5.0 (202207) Operating instructions The machine has six wash programmes (P1-P6) which can be selected using the three programme selection buttons (11) P1, P2 and P3. Each programme button can be used to select two programmes. By pressing a programme button repeat- edly, you can switch between the two wash programmes and pause mode.
- Page 49 WD-100GR Rev. 5.0 (202207) Operating instructions Wash programmes without granules The display (1) shows which programme has been selected. These programmes are used for items which cannot be washed using granules, such as perforated canteens, perforated containers and plastic containers.
-
Page 50: Starting Washing
WD-100GR Rev. 5.0 (202207) Operating instructions 4.2.2 Starting washing Take care to select the correct program for the items which are to be washed. This is what you should do: Select the programme (11). Close the doors and start the wash programme by pressing button (6). -
Page 51: Interrupting A Wash Program
WD-100GR Rev. 5.0 (202207) Operating instructions The locking arm (A) must hold the cassette in place. Lift the lever (B) up when you want to turn the table on the trolley. • Always check the wash result when wash cycle has finished. -
Page 52: Checking The Wash Result
WD-100GR Rev. 5.0 (202207) Operating instructions 4.2.4 Checking the wash result The wash result should be checked after each wash. Check that: Check: • there is no discolouration, spots, misting, food residue or deposits visible on the items. • no deposits at all are visible on the washed items. - Page 53 WD-100GR Rev. 5.0 (202207) Operating instructions Scraping off – it is important that as much food residue as possible is scraped off the items before putting them in the machine. Proper scraping off will mean the water in the washer tank will not need changing as often.
-
Page 54: Guaranteed Final Rinse
WD-100GR Rev. 5.0 (202207) Operating instructions 4.2.5 Guaranteed final rinse The temperature of the final rinse water is always correct and the right amount of rinse water is always used. If the rinse temperature is too low, an alarm is triggered on the control panel. The machine continues washing until the right temperature is reached. -
Page 55: Changing The Water
WD-100GR Rev. 5.0 (202207) Operating instructions 4.2.6 Changing the water The water in the washer tank should be changed daily. More frequent changes of water are needed if: • significant amounts of foam build up in the machine; e.g. if you can see foam coming out of the waste pipe, or the filter in the machine’s tank is cov-... -
Page 56: After Use - Cleaning
WD-100GR Rev. 5.0 (202207) Operating instructions 4.3 After use – Cleaning HACCP is a preventive inspection system to ensure hygiene requirements are met during the washing process and cleaning of the machine. As a result of its design, the machine meets strict hygiene requirements. Regular, thorough clean- ing is also important from a hygiene perspective. -
Page 57: Care And Maintenance
WD-100GR Rev. 5.0 (202207) Operating instructions 4.3.2 Care and maintenance To obtain a good wash result when washing and to get the best possible benefit from the dishwasher, it needs to be looked after and maintained at given intervals. Much of the care and maintenance can be performed by the dishwash room staff, while other maintenance will require trained service personnel to perform the work. -
Page 58: Draining And Cleaning The Machine
WD-100GR Rev. 5.0 (202207) Operating instructions 4.3.3 Draining and cleaning the machine The machine should be cleaned at least once a day when in normal operation. Once a week, more thorough cleaning of the machine should be carried out, where the initial rinse pipes and granules are also properly cleaned and a check performed on the amount of granules. - Page 59 WD-100GR Rev. 5.0 (202207) Operating instructions Cleaning the wash nozzles and the wash arms Undo the quick release lock (A). Take out the wash arms. Check and clean the wash nozzles (B). • Take out the wash arms (12). Undo the quick release lock and pull the wash arms straight up.
- Page 60 WD-100GR Rev. 5.0 (202207) Operating instructions Cleaning other equipment • Clean the extension track (D) between the loading bench (B) and the ma- chine. • Remove and clean the roller cassettes (C) and filters (A) on the loading bench. Clean the bench and refit the filters (A) and roller cassettes (C).
-
Page 61: Weekly Cleaning Or As Required
WD-100GR Rev. 5.0 (202207) Operating instructions 4.3.4 Weekly cleaning or as required Collecting the granules The granules must be collected and cleaned once a week. This is done before the machine is emptied and turned off. To collect the granules, replace the filters with the connector plates (A) and the granule collectors (B). - Page 62 WD-100GR Rev. 5.0 (202207) Operating instructions Monthly cleaning of granules (or as required) • Collect the granules and tip it into a bucket. • Place the bucket containing the granules in the sink. Take the hand shower and move it around in the granules, rinsing the granules carefully.
-
Page 63: Periodic Servicing
WD-100GR Rev. 5.0 (202207) Operating instructions 4.3.5 Periodic servicing Long intervals between using the machine If the machine is not being used for a long period, the granules and the machine should be disinfected with chlorine. You can store the granules in the freezer dur- ing this period. - Page 64 WD-100GR Rev. 5.0 (202207) Operating instructions PROBLEM CAUSE ACTION The display indicates that the Object preventing one door from Remove the object. anti-crushing mechanism closing. has been triggered. The machine does not start The door / doors are open. Close the door.
- Page 65 WD-100GR Rev. 5.0 (202207) Operating instructions Machine faults and user errors If a fault occurs on the machine, an alarm appears on the panel display. Some alarm texts warn when something is wrong, whereas others just provide informa- tion. Some alarms only occur if the machine has certain additional options, such as e.g.
- Page 66 WD-100GR Rev. 5.0 (202207) Operating instructions ALARM MESSAGE ACTION Switch off the machine and restart it. PLATFORM ERROR (63) POWER SUPPLY Switch off the machine and restart it. FAILURE CHECK THE EMERGENCY SWITCH (98) HARDWARE ERROR Switch off the machine and restart it.
- Page 67 WD-100GR Rev. 5.0 (202207) Operating instructions ALARM MESSAGE ACTION (11) HACCP ALARM Contact service personnel! PUMP DEFECT MACHINE LOCKED CALL SERVICE (12) WASHING STOPPED Contact service personnel! LOWER DOOR SENSOR OFF AT DIRTY SIDE DURING WASHING (13) WASHING STOPPED Contact service personnel!
- Page 68 WD-100GR Rev. 5.0 (202207) Operating instructions ALARM MESSAGE ACTION (26) Check that nothing is preventing the doors from closing. Reset the alarm by DOOR SAFETY pressing button (8). PROTECTION ACTIVATED ON CLEAN SIDE (27) TIMEOUT WHEN Check that no granules have become lodged in the slide bars of the doors. Re- OPENING DOOR set the alarm by pressing button (8).
- Page 69 WD-100GR Rev. 5.0 (202207) Operating instructions ALARM MESSAGE ACTION (40) The alarm can be reset with the reset button, but a check should be made on HACCP ALARM the water flow in the machine (to ensure the water taps to the machine’s water FINAL RINSE DEFECT connection are open), and on the wash result after a completed wash cycle.
- Page 70 WD-100GR Rev. 5.0 (202207) Operating instructions ALARM MESSAGE ACTION (52) HACCP ALARM Check whether the machine is out of detergent – add detergent. Reset the WASHING DETERGENT alarm by pressing the reset button. Contact service personnel if the alarm re- DEFECT.
-
Page 71: Technical Specifications
WD-100GR Rev. 5.0 (202207) Technical specifications 5. Technical specifications The manufacturer reserves the right to make changes to the technical data. TECHNICAL DATA Granules pump (kW) 2 x 2.2 Chemical wash pump (kW) Booster pump (kW) * 0.58 Rotating table motor (kW) 0.55... - Page 72 WD-100GR Rev. 5.0 (202207) Technical specifications CAPACITY AND OPERATING DATA Total washing time programme 1 (min.) * 5 / 13 ** Total washing time programme 2 (min.) * 8 / 16 ** Total washing time programme 3 (min.) * 10.3 / 19 ** Total washing time programme 4 (min.) *...
- Page 73 WD-100GR Rev. 5.0 (202207) Technical specifications CONNECTION, STEAM-HEATED MACHINE 50-250 kPa Total connected load (kW) Main fuse 400 V 3N~(A) * Max. connection area 400 V 3N~ (L1-L3, N, PE) Cu (mm²) Steam connection (internal thread) R1" Condensing water connection (internal thread) R½"...
Need help?
Do you have a question about the WD-100GR and is the answer not in the manual?
Questions and answers