Table of Contents
Advertisement
Quick Links
Advertisement
Table of Contents

Related Manuals for Perlight Solar PLM-OM Series

Summary of Contents for Perlight Solar PLM-OM Series
- Page 1 Perlight Solar PLM-OM Series Installation Manual...
-
Page 2: Table Of Contents
4. Warning and Notes ..........5-9 5. Identification ..............9 6. Module Structure ............10 7. Mounting and Notes ........... 11-13 8. Grounding..............14 9. Module Wiring .............15 10. Maintenance ............16-17 11. Recycling ...............18 Perlight Solar PLM-OM Series Installation Manual www.perlight.com V.01.2022 A1.0... -
Page 3: Introduction
DC or AC. Please refer to the relevant local laws and regulations. Installation and maintenance of Perlight Solar modules may only be carried out by trained and qualified personnel. If you require further information, contact your supplier or local Perlight Service Centre. -
Page 4: Applicable Modules
The electrical performance parameters of the module were measured under standard test conditions (irradiance of 1000 W / m², AM 1.5 spectra, ambient temperature of 25 ° C) with a test uncertainty of ± 3%. The maximum system module voltage is 1500V. Perlight Solar PLM-OM Series Installation Manual www.perlight.com V.01.2022 A1.0... -
Page 5: Warning And Notes
Do not touch live terminals with bare hands. Use insulated tools for electrical connections. Each Perlight Solar module has a pair of male and female waterproof connectors. For a series electrical connection, connect positive (+) connector of first solar module to negative (-) connector of the following module. - Page 6 Do not open the box until it reaches the installation location. Keep the package dry and in a dry place. Please refer to the Unpacking manual of standard packaging of Perlight Solar photovoltaic modules. During all handling procedures, make sure that the modules are not subject to large vibrations, that the modules fall to the floor or that objects fall on the module, as this will damage the modules or solar cell.
- Page 7 Modules can’t be used to replace the roof and wall materials, partial replacement is not allowed. Any part (including nameplate) of modules supplied by Perlight Solar Co., Ltd can’t be dismantled without permission. Perlight Solar PLM-OM Series Installation Manual www.perlight.com...
- Page 8 Installation conditions Working environment Perlight Solar’s solar module should operate in the following environmental conditions: Ambient temperature: -20⁰C to +45⁰C Operating temperature of the module: -40⁰C to +85⁰C Humidity: 85%RH Mechanical load bearing capacity: the modules have passed the mechanical load test of wind pressure of 2400Pa and snow pressure of 5400Pa;...
-
Page 9: Identification
The bar code is permanently encapsulated inside the module, as can be seen clearly from the top right corner of the module. The bar code number allows you to trace information about the module production process. Perlight Solar PLM-OM Series Installation Manual www.perlight.com V.01.2022 A1.0... -
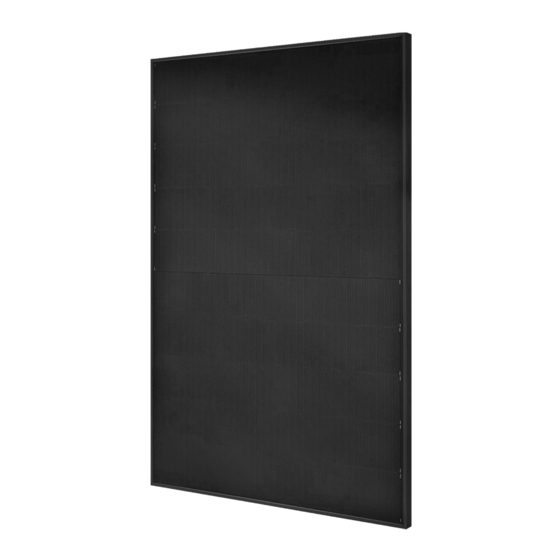
Page 10: Module Structure
6. Module Structure Module Front & Side (mm): Module Rear (mm): Frame size (mm): Mounting hole (mm): Perlight Solar PLM-OM Series Installation Manual www.perlight.com V.01.2022 A1.0... -
Page 11: Mounting And Notes
PV module frame and support structure to prevent this type of corrosion. Module support structures that are to be used to support Perlight Solar modules at the correct tilt angles should be wind and snow load rated for use by the appropriate local and civil codes prior to installation. - Page 12 Clearance between the module frame and mounting surface may be required to prevent the junction box from touching the surface, and to circulate cooling air around the back of the module. Perlight Solar PLM-OM Series Installation Manual www.perlight.com V.01.2022 A1.0...
- Page 13 Solar module in such way that the drain holes of the module are intended to block up. Roof-integrated (in-roof) systems must comply with local and national regulations, including fire test certification where necessary. Perlight Solar PLM-OM Series Installation Manual www.perlight.com V.01.2022 A1.0...
-
Page 14: Grounding
The rack must also be grounded unless they are mechanically connected by nuts and bolts to the grounded Perlight Solar modules. The array frame shall be grounded in accordance with local and national guidelines. -
Page 15: Module Wiring
Have a Rated Average Forward Current [IF(AV)] above maximum system current at highest module operating temperature. Have a Rated Repetitive Peak Reverse Voltage [VRRM] above maximum system voltage at lowest module operating temperature. Perlight Solar PLM-OM Series Installation Manual www.perlight.com V.01.2022 A1.0... -
Page 16: Maintenance
When cleaning the rear of the module, avoid piercing backsheet. It is recommended that modules be cleaned in the early morning or late afternoon when light is low and the module temperature is low, especially for areas with high temperatures. Perlight Solar PLM-OM Series Installation Manual www.perlight.com V.01.2022 A1.0... - Page 17 Also, check to ensure the mounting hardware is tight and secure. Loose connections will result in damage to the array. Changed Perlight Solar modules must be of the same kind and type. Do not touch live parts of cables and connectors. Use appropriate safety equipment when working (insulated tools, insulating gloves, etc.).
-
Page 18: Recycling
End of Life Disposal and Recycling Perlight solar modules are designed to produce electricity for a minimum of 25 years, however the panels may continue to offer useful energy for years to come after this point. Once the panels reach the end of their useful life, they should be recycled in accordance with local guidelines and regulations. - Page 19 Perlight Solar Co.,Ltd. Address: Oufeng Road, Muyu, Zeguo Town, Wenling City, Zhejiang Province, 317521, China Tel: 0086-576-86477920 www.perlight.com enquiry@perlight.com...