
Related Manuals for Dahua Technology D-LCH75-MC410-B


Summary of Contents for Dahua Technology D-LCH75-MC410-B
- Page 1 Smart Interactive Whiteboard User's Manual ZHEJIANG DAHUA VISION TECHNOLOGY CO., LTD. V1.1.0...
-
Page 2: Foreword
User's Manual Foreword General This manual introduces the installation, functions and operations of the smart interactive whiteboard (hereinafter referred to as "the whiteboard"). Read carefully before using the device, and keep the manual safe for future reference. Safety Instructions The following signal words might appear in the manual. Signal Words Meaning Indicates a high potential hazard which, if not avoided, will result in... - Page 3 User's Manual the electronic version and the paper version. ● All designs and software are subject to change without prior written notice. Product updates might result in some differences appearing between the actual product and the manual. Please contact customer service for the latest program and supplementary documentation. ●...
-
Page 4: Important Safeguards And Warnings
User's Manual Important Safeguards and Warnings This section introduces content covering the proper handling of the whiteboard, hazard prevention, and prevention of property damage. Read carefully before using the whiteboard, and comply with the guidelines when using it. Storage Requirements ●... - Page 5 User's Manual with liquid on the whiteboard to prevent liquid from flowing into it. ● Operate the whiteboard within the rated range of power input and output. ● Do not disassemble the whiteboard without professional instruction. ● Use the whiteboard under allowed humidity and temperature (0 °C to 40 °C, or –4 °F to +140 °F) conditions.
-
Page 6: Table Of Contents
User's Manual Table of Contents Foreword .........................................I Important Safeguards and Warnings ............................. III 1 Overview ........................................1 1.1 Introduction ....................................1 1.2 Packing List ....................................1 1.3 Structure ......................................2 1.3.1 Appearance ..................................2 1.3.2 Dimensions ..................................4 1.3.2.1 Dimensions (55-inch) ............................4 1.3.2.2 Dimensions (65-inch) ............................ - Page 7 User's Manual Appendix 2 Cybersecurity Recommendations ......................... 30...
-
Page 8: Overview
User's Manual 1 Overview 1.1 Introduction The smart interactive whiteboard is an integrated multimedia device, which integrates large-screen HD display, computer, TV, electronic whiteboard, audio amplifier, application, and central control system. The whiteboard supports the following functions and features: ● 4K HD LCD display. ●... -
Page 9: Structure
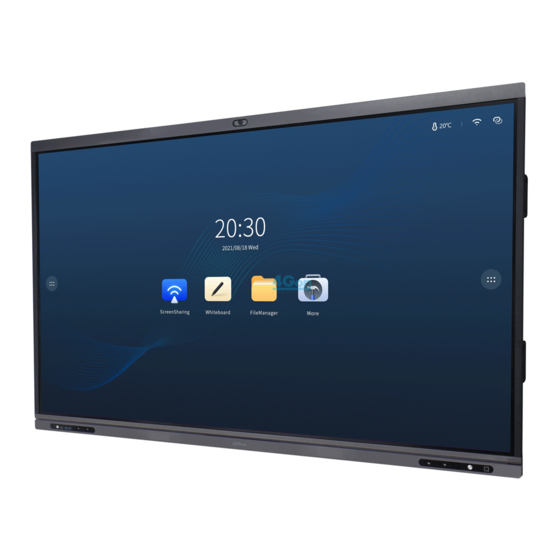
User's Manual 1.3 Structure 1.3.1 Appearance Figure 1-1 Appearance (55-inch series) Figure 1-2 Appearance (65/75/86-inch series) - Page 10 User's Manual Table 1-2 Appearance description Description LCD. Power input port. Inputs 100–240 VAC power. After connecting to power supply, press the rocker switch to turn on the whiteboard. USB 3.0 port. Magnetic stylus pen attach area. Speaker. Plays multimedia sound. Indicator light.
-
Page 11: Dimensions
User's Manual 1.3.2 Dimensions 1.3.2.1 Dimensions (55-inch) Figure 1-3 Dimensions (mm [inch]) VESA pattern: 400 mm × 400 mm (15.75'' × 15.75''). -
Page 12: Dimensions (65-Inch)
User's Manual 1.3.2.2 Dimensions (65-inch) Figure 1-4 Dimensions (mm [inch]) VESA pattern: 500 mm × 400 mm (19.69'' × 15.75''). -
Page 13: Dimensions (75-Inch)
User's Manual 1.3.2.3 Dimensions (75-inch) Figure 1-5 Dimensions (mm [inch]) VESA pattern: 600 mm × 400 mm (23.62'' × 15.75''). -
Page 14: Dimensions (86-Inch)
User's Manual 1.3.2.4 Dimensions (86-inch) Figure 1-6 Dimensions (mm [inch]) VESA pattern: 750 mm × 400 mm (29.53'' × 15.75''). 1.3.3 Ports Figure 1-7 Ports (55-inch) - Page 15 User's Manual Figure 1-8 Ports (65/75/86-inch) Table 1-3 Port description Name Description Micro USB Used for debugging Android system. HD audio and video signal input port. Connects to the computer, HDMI IN set-top box, and other video devices with HDMI output ports. Connects to USB devices such as mobile hard disk, USB flash drive, USB keyboard, and USB mouse.
-
Page 16: Turning On Or Off The Screen
User's Manual 2 Turning on or off the Screen 2.1 Turning on the Screen Prerequisites ● Before starting the whiteboard, check whether the input voltage is correct against the power supply requirements. ● To ensure the stable work of the whiteboard and the external devices connected to the whiteboard and to prolong the service life, we recommend you refer to the national related standard to use the power source that provides stable voltage with less interference from ripples. -
Page 17: Turning Off The Screen
User's Manual Description to bring up the navigation bar, See "3.1.1 Bringing up the 4 Navigation Bar" for details. Input source. Supports HDMI and Windows. Function area. Tap a function icon to go to the corresponding operation screen. For a third-party app, you can tap and hold the corresponding icon to uninstall the app. -
Page 18: Basic Operations
User's Manual 3 Basic Operations The whiteboard can act as a computer, TV or electronic whiteboard. This chapter introduces the basic operations of those functions. We recommend using the stylus pen to interact with the screen. For details on touch control, see "Appendix 1 Touch Operation". 3.1 Quick Operations You can use the navigation bar or compass to quickly use basic functions. - Page 19 User's Manual General Settings". Figure 3-2 Compass Table 3-2 Description of compass menu Icon Description Go back to the home screen. Go back to the previous screen. Go to the electronic whiteboard screen. For details, see "3.2 Electronic Whiteboard". After you insert the computer module, tap the icon to switch to the Windows system.
-
Page 20: Common Tools
User's Manual Figure 3-3 Annotation 3.1.3 Common Tools Step 1 on the left and right sides of the home screen to bring up the navigation bar. Step 2 to display the common tools. Figure 3-4 Common tools... - Page 21 User's Manual Table 3-3 Description of common tools Function Description Settings Go to the Settings page. For details, see "3.5 System Settings". Turn on the annotation mode. ● Tap to select the type of pen and the size of the brush. ●...
- Page 22 User's Manual Function Description Tap the icon, and then select the files that you want to share. You can select different types of files but cannot select folders. The size of a single file must not exceed 200 MB. Tap OK to compress 2 or more files into a zip file for transmission.
-
Page 23: Electronic Whiteboard
User's Manual Function Description Tap the icon to take a picture. ● The built-in camera supports mirroring. ● Supports countdown settings, including: off, 3 s (default), 5 s, and 10 s. ● Tap Import Whiteboard, and then you can import the screenshot to the Camera whiteboard with one tap. - Page 24 User's Manual Figure 3-5 Electronic whiteboard Table 3-4 Description of whiteboard icons Icon Description Adjust the location of the whiteboard tool bar. Select or customize the color of the pen. Select the type of pen and the size of the brush. Erase content.
-
Page 25: File Management
User's Manual Icon Description to preview the saved file list. Tap the file to edit. When you have created several files, tap to switch to the previous file and the next file. You can browse the thumbnail of the switch page. Tap the icon, and then you can perform the following operations. -
Page 26: Screen Sharing
User's Manual Figure 3-6 File management Table 3-5 File management icons Icon Description View local file on the previous or next screen. Enter file names to search for. Display files in thumbnail or list format. Sort Sort files in the ascending or descending order by name, size and time. Multi-select You can select multiple files or all the files. -
Page 27: System Settings
User's Manual settings. Figure 3-7 Screen sharing After you connect the client app with the whiteboard, you can: ● Share images, audio and video files, and documents to the whiteboard. ● Share screen to the whiteboard. You can share screens of multiple devices installed with the client to the whiteboard at the same time. -
Page 28: Configuring General Settings
User's Manual Figure 3-8 Network Table 3-6 Network parameters Parameter Description Enable Wireless Network, and then the whiteboard can connect to an available Wi-Fi network in the area. To add a wireless network, tap Add Network, enter the SSID network name and password, and then configure advanced settings as needed. -
Page 29: Configuring Advanced Parameters
User's Manual Figure 3-9 General settings Table 3-7 General settings description Parameter Description Set the background image, and you can enable Carousel to play the selected background images in turn and customize the boot screen. ● The system provides 8 wallpapers by default. Personalise ●... -
Page 30: Configuring System Parameters
User's Manual Figure 3-10 Advanced parameters Table 3-8 Description of advanced parameters Parameter Description ● Startup Channel: Customize the channels to be enabled at startup. ● Startup Application: Select any application that is on the whiteboard to be opened every time the system starts. ●... - Page 31 User's Manual Figure 3-11 System parameters Table 3-9 System parameter description Parameter Description Set the date and time automatically or manually. You can configure the format of the time, date and time zone. Date & Time With Auto Sync enabled, the system time is synchronized with the server time.
- Page 32 User's Manual Parameter Description ● Passcode: After enabling Passcode, you can unlock the whiteboard with digital password. ● Pattern: After enabling Pattern, you can unlock the whiteboard by drawing a pattern. ● Lock Screen: Tap Lock screen, and then select a screen lock option, including no operation after 1 min, 5 min and 10 min, and custom configuration.
-
Page 33: Shutdown
User's Manual 4 Shutdown After the whiteboard is turned on, press and hold the power button for 5 s, and then the system will prompt you whether to shut down the whiteboard. Tap OK to shut down the whiteboard. The whiteboard provides power-off protection to the computer module. After you shut down the whiteboard, the computer module will shut down a little while afterwards. -
Page 34: System Update
User's Manual 5 System Update You can update the system online or through USB. Please be advised that downgrading to a lower version will make the whiteboard vulnerable to security attacks. 5.1 Online Update After the whiteboard is registered to the cloud management platform, the platform can send the update package to the whiteboard. -
Page 35: Faq
User's Manual 6 FAQ 1. The whiteboard shuts down automatically. ● Check whether you have enabled the sleep function. You can refer to the regular computer troubleshooting procedure. ● Check the channel of the input source. If there is no signal, the whiteboard will shut down automatically. -
Page 36: Appendix 1 Touch Operation
User's Manual Appendix 1 Touch Operation You can use the stylus pen or directly use your fingers to operate the device screen. This section uses operation with stylus pen as an example. Appendix Table 1-1 Touch operations Operation Description Tap the screen once with the stylus pen. Tap the screen twice with the stylus pen (The time gap between the taps is Double-tap around 0.5 s). - Page 37 User's Manual Appendix 2 Cybersecurity Recommendations Cybersecurity is more than just a buzzword: it’s something that pertains to every device that is connected to the internet. IP video surveillance is not immune to cyber risks, but taking basic steps toward protecting and strengthening networks and networked appliances will make them less susceptible to attacks.
- Page 38 User's Manual 1024–65535, reducing the risk of outsiders being able to guess which ports you are using. 6. Enable HTTPS We suggest you to enable HTTPS, so that you visit Web service through a secure communication channel. 7. MAC Address Binding We recommend you to bind the IP and MAC address of the gateway to the device, thus reducing the risk of ARP spoofing.
- Page 39 User's Manual device. More information Please visit Dahua official website security emergency response center for security announcements and the latest security recommendations.
- Page 40 User's Manual...
Need help?
Do you have a question about the D-LCH75-MC410-B and is the answer not in the manual?
Questions and answers