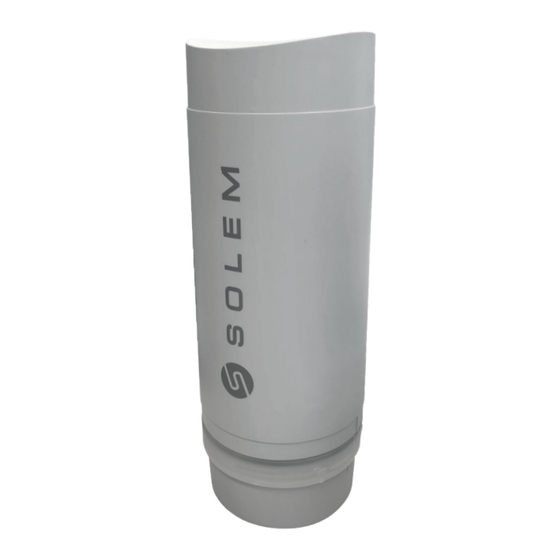
Summary of Contents for Solem LoRa LR-BST-25
- Page 1 THE CONNECTED IRRIGATION EXPERT more range LR-BST-25 T H E L o R a I R R I G AT I O N S TAT I O N INSTALLATION GUIDE...
-
Page 2: Installation
Step 1 INSTALLATION LR-BST-25 1. LR-BST-25 ELECTRICAL WIRING For all power supplies (AC, solar panel or battery) please follow the same wiring process. The power cable connection is ensured by 2 conductor’s cable with no need of polarity. • Remove the LR-BST-25 upper and bottom part by rotating them. -
Page 3: Solar Panel Connection
Power transformer connection 230V 230V Electrical connection recommendations for the power transformer: • Use the power transformer supplied with the product. • Connect the 230Vac input of the transformer to the lectrical network by protecting it with a 2A circuit breaker. •... - Page 4 230V 230V 230V 230V 230V...
-
Page 5: Connecting The Battery
1.1.1 Connecting the battery • Connect the battery. • Set the switch to ON. When starting the LR-BST-25 connects to the in- ternet and thus to the MySOLEM platform. The LEDs will be green for one hour after startup to signal that the product is operational. 1.2 Reassemble the LR-BST-25 •... - Page 6 1.3 Closing the LR-BST-25 lid. • Close the bottom and upper parts by helping you with the pictographs.
- Page 7 Step 2 FIXATION ON POLE • Prepare the bracket with the 2 collars. • Prepare the 2 BST supports with the 2 collars. • First fix the racket on the pole. • Then fix the 2 BST supports on the pole with the 2 collars.
- Page 8 • Place the LR-BST-25 on the bracket and fix it with the collars. If necessary readjust the height of the 2 plastic supports as well as the position of the bracket. • Once well positioned, tighten all the collars correctly. Cut the excess collar. NOTE : the LR-BST-25 can also be installed on a wall.
-
Page 9: Solar Panel
Step 3 SOLAR PANEL INSTALLATION The solar panel can be fixed either on a wall or a 40 to 60 mm diameter pole. It can also be fixed on a 60 to 120 mm pole with jaws addiction. FOR MORE DETAILS ABOUT POLE AND FLANGES FIXINGS PLEASE READ THE NOTICE IN THE FIXING BOX. - Page 10 BATTERY RECOMMANDATION CHARGE THE LR-BST-25 BATTERY DURING 24 HOURS BEFORE THE INSTALLATION • In order to do that please wire the LR-BST-25 to the provided power supply 230V/24V DC. Follow the 1.1 paragraphs steps. • The battery is delivered disconnected so as to preserve its service life. It is advised to keep the LR-BST-25 at ambient temperature of about 20°C.
- Page 11 INFORMATION 3G / 2G data communication periodicity: The LR-BST-25 communicate with the MySOLEM platform on a perio- dic base in order to: • Transmit the information to the LR-IP / LR-FL / LR-MS. (e.g.: irrigation programs, manual controls, ON/OFF, etc...) •...
- Page 12 Périodicity Power Battery state LoRa Internet Fully charged Power supply 3 minutes (230V adapter or solar panel) Charging Power supply 24 minutes (230V adapter or solar panel) Communication corresponding to the 24 minutes Batterie Battery SIM chosen subscription: 2, 12 or 24 connexion per day 24 minutes Battery...
- Page 13 INFORMATION LED’S STATE At the LR-BST-25 LEDs are functional for one hour. After this period the LR-BST-25 goes into standby mode. • LED Green: normal functioning. • Blinking green LED: LoRa communication. • 3 times blinking red LED: GSM network lost •...
-
Page 14: Pairing Mode
PAIRING MODE In order to associate the LR-IP / LR-FL / LR-MS t / LR-IS / LR-IPFL to the LR-BST-25, please select the pairing mode in the «setting» that will be active for one hour. You will be able to make your pairings or test your LoRa range. - Page 15 TECHNICAL FEATURES Use: Permitted humidity: 90% (relative humidity) Ambient temperature: -20°C à 60°C Guarantee: 2 years Dimension: Diameter 115mm x Height 307mm Power supply: Power pack: INPUT: 100-240V 50/60Hz OUTPUT: 24Vdc 0.6A Used frequency band: Bluetooth®: [2400-2483.5]Mhz LoRa™ [868-868.6]Mhz 3G: [900-2100]Mhz V151119...


Need help?
Do you have a question about the LoRa LR-BST-25 and is the answer not in the manual?
Questions and answers