
Subscribe to Our Youtube Channel
Related Manuals for Mueller Professional Series


Summary of Contents for Mueller Professional Series
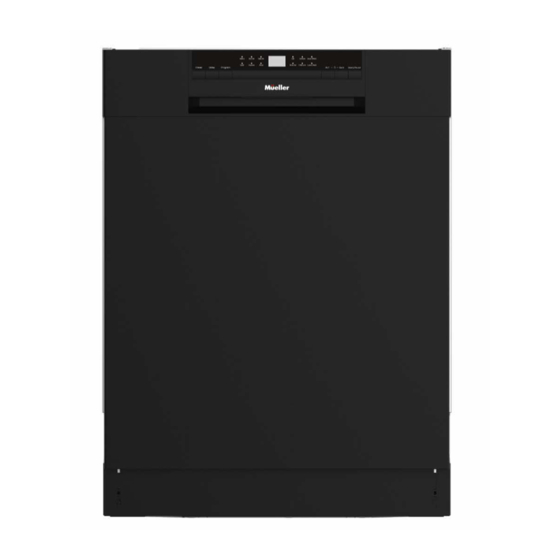
- Page 1 Professional Series 24” Built-In Dishwasher Model DW-2400 U S E R M A N U A L HOUSEHOLD USE ONLY...
-
Page 2: Table Of Contents
Your satisfaction is guaranteed. If you are not completely satisfied with our Professional Series 24" Built-In Dishwasher, please let us know. We’ll help make it work for you, or we’ll refund your money. CONTENTS IMPORTANT SAFEGUARDS ___________ __________________________________ pg 2... -
Page 3: Important Safeguards
WASHER FOR THE FIRST TIME. FAILURE TO ADHERE TO THESE INSTRUCTIONS AND PRECAUTIONS WILL VOID THE MANUFACTURER’S WARRANTY. To reduce the risk of personal injury or damage to your PROFESSIONAL SERIES 24” BUILT-IN DISHWASHER or other property when using this product, basic safety... -
Page 4: Children
CHILDREN • Never allow children to play in, on, or with the appliance. To reduce risk of injury, close supervision and observation of children is needed around the dishwasher. • Never allow children to sit or stand on any part of the appliance, including the door. •... - Page 5 • This appliance must be grounded. In the event of a malfunction or breakdown, grounding will reduce the risk of electric shock by providing a path of least resistance for electric current. This appliance is equipped with a cord having an equip- ment-grounding conductor and a grounding plug.
-
Page 6: Operational Safety
OPERATIONAL SAFETY • Do not operate your appliance in the presence of explosive fumes. • Do not add or mix any flammable or explosive substances to wash. • Do not operate your appliance when parts are missing or broken. • Do not abuse, sit on it, or stand on the door or the dishwasher rack. - Page 7 • Never use harsh chemicals or abrasive cleaners to clean your dishwasher. Some chloride-containing products can damage your dishwasher and may present health hazards. • Never use steam cleaning products to clean your dishwasher. The manufacturer will not be responsible for possible damages or consequences. •...
-
Page 8: Dishwasher Components
DISHWASHER COMPONENTS REFER TO ‘OPERATING THE DISHWASHER’ FOR FURTHER DESCRIPTION Description Additional Features Time Remaining Indicator Indicates the cycle time remaining. 49dBA Sound Level Quiet washing. Start of a cycle can be delayed in 1-hour increments up to Delay Start 24 hours. -
Page 9: Product Diagram
PRODUCT DIAGRAM Top Rack Fork/Knife Shelf Spray Arms Upper Rack Lower rack Spray Arms Water Softener Compartment Filters Cutlery Basket, with Cutlery Guide Lower Rack Rinse Detergent Dispenser Dispenser Funnel - For Water Softener Compartment... -
Page 10: Installation
INSTALLATION REFER TO THE ‘INSTALLATION INSTRUCTIONS’ BOOKLET INCLUDED WITH YOUR APPLIANCE FOR COMPLETE INFORMATION ON INSTALLING YOUR APPLIANCE. IMPORTANT: The installation of the pipes and electrical components of this appli- ance should be carried out by a service professional. WARNING: ELECTRICAL SHOCK HAZARD Disconnect electrical power before installing the dishwasher. - Page 11 Adjusting the settings: The amount of salt dispensed can be set from H0 to H7. Salt is not required at the set value H0. 1. Find out about the hardness value of your tap water. Your water utility company may help you with this. 2.
-
Page 12: Adding The Salt Into The Water Softener
B) ADDING THE SALT INTO THE WATER SOFTENER: Always use salt intended for use with the dishwasher. ATTENTION! Only use salt specifically designed for use in dishwashers! All other types of salt not specifically designed for use in a dishwasher, especially table salt, will damage the water softener. -
Page 13: Fill The Rinse Aid Dispenser
C) FILL THE RINSE AID DISPENSER: Rinse aid function: The rinse aid is released during the final rinse to prevent water from forming droplets on your dishes that can leave spots and streaks. It also improves drying by allowing water to ‘sheet’ off the dishes. The rinse aid dispenser is located on the interior side of the door next to the detergent dispenser. -
Page 14: Fill The Detergent Dispenser
1. To open the dispenser, turn the cap to the "open" position (left arrow) and lift it out. 2. Pour the rinse aid into the dispenser, be careful not to overfill. The volume of the rinse aid container is about 4.7 oz / 140ml. ATTENTION! Do not overfill and clean up any rinse aid spilled during filling with an absorbent cloth to avoid excess foaming during the next wash. - Page 15 The use of the "Normal" washing program in conjunction with concentrated deter- gents reduces pollution and is good for your dishes; these washing programs are specially matched to the soil-dissolving properties of the enzymes of the concentrat- ed detergent. For this reason, the "Normal" washing program in which concentrated detergents are used can achieve the same results that can otherwise only be achieved using an "intensive"...
- Page 16 To fill the Detergent dispenser with detergent: 1. Press the release button located on the lid of the Detergent dispenser. The lid will open. 2. Add one tablespoon of the detergent powder, or one tablet/pod. 3. If the dishes are heavily soiled, place an additional detergent dose in the pre-wash detergent chamber.
-
Page 17: Dishware Materials
DISHWARE MATERIALS NOTE: Before using your dishwasher for the first time, check the information in this section. Some items are not dishwasher safe and should be hand-washed; others require special loading. Notes Prior to Dishwashing Aluminum: Colored anodized aluminum may fade over time. Minerals in your water may cause the aluminum to darken or spot. -
Page 18: Loading The Dishwasher
LOADING THE DISHWASHER For the best performance of the dishwasher, follow these loading guidelines. Features and the appearance of rack and silverware baskets may vary from your model. Before Loading the Dishwasher racks: Scrape off any large amounts of leftover food. It is not necessary to rinse the dishes under running water. - Page 19 Adjusting the Upper rack: If required, the upper rack's height can be adjusted to create more space for large dish- ware or utensils either in the upper or lower racks. The upper rack can be adjusted by pulling out to remove, and repositioning the rail between the different wheel heights.
- Page 20 Upper and Lower rack Folding racks Folding racks consisting of three/two parts in the upper/lower rack of your dishwash- er are designed to allow you to place large items such as pots, pans, etc. If requested, each part can be folded separately, or all of them can be folded to create more space in the racks.
-
Page 21: Dishwasher Cycles And Options
Removing the Dishes ATTENTION: The dishes are hot and easily breakable immediately after washing cycle. Please allow 30 minutes for dishes to cool off before unloading the dishwasher. To prevent water from dripping from the upper basket into the lower basket, we recommend that you empty the lower rack first and then the upper rack. -
Page 22: Wash Cycle Information
WASH CYCLE INFORMATION The cycle’s time duration is based on average soil loads and 120˚F water intake temperature and will vary based on the actual conditions. WASH CYCLE INFORMATION 175min 144min 70min 50-53 122-127 180min 154min 50-53 122-127 175min 144min 70min 50-53 122-127... -
Page 23: Operating The Dishwasher
OPERATING THE DISHWASHER NOTE: Buttons are sensitive and should be touched gently. Avoid any grease or food particles resting on the buttons as they could activate the dishwasher. Wiping and cleaning can also activate the dishwasher. For best results, use bare, clean hands when touching the buttons. -
Page 24: Turning On The Appliance
12. Upper Wash indicator light: The light illuminates when the Upper layer feature is selected, and the upper spray arm is in motion. 13. Rinse aid refill indicator: The indicator light turns ON when the rinse aid dispenser needs a refill. 14. -
Page 25: Adding A Dish During Wash Cycle
The 6 program lights show the state of the dishwasher: a) One of the program lights illuminated --> cycle running b) One of the program lights blinking -->pause NOTE: If all the lights begin to glimmer, that indicates the machine is out of order; please turn off the main power and water supply before calling an authorized service provider. -
Page 26: Maintenance And Cleaning
MAINTENANCE AND CLEANING Prior to initial use it is recommended to fill the Water Softener Compartment, Deter- gent Dispenser and Rinse Aid Dispenser and run an empty program cycle to remove any foreign manufacturing testing residue. Any yellow-colored water initially is normal and will dissipate with use. - Page 27 2. For thorough cleaning, rotate the Micro 3. Remove the Flat Filter by lifting up. Filter (with Coarse Filter still inserted) counterclockwise to release and lift out of the base of the dishwasher. Remove Coarse Filter as per Step 1 above. 4.
- Page 28 Wash the arms under running warm water and use a soft brush to clean the jets. Ensure there are no blockages in the jet holes. Carefully reinstall the spray arms, making sure the rotary movement is in no way impeded. INTERIOR To remove spots or stains from the interior surfaces, use a water dampened cloth and a little white vinegar, or a cleaning product made specifically for dishwashers.
-
Page 29: Troubleshooting Tips
GENERAL CARE RECOMMENDATIONS • After every wash, turn off the water supply to the appliance and leave the door slightly ajar so that moisture and odors are not trapped inside. • Never use harsh chemicals to clean your dishwasher. Some chloride-containing products can damage your dishwasher and may present health hazards! •... - Page 30 PROBLEM POSSIBLE CAUSES WHAT TO DO Fuse blown, or the Replace fuse or reset circuit breaker. Remove any circuit breaker acted other appliances sharing the same circuit with the dishwasher. Dishwasher Power supply is not Make sure the dishwasher is turned on and the door is doesn’t run turned on closed securely.
-
Page 31: Specifications
PROBLEM POSSIBLE CAUSES WHAT TO DO Tea or coffee stains Use a solution of 1/2 cup of bleach and 3 cups of warm water to remove the stains by hand. Wear cleaning gloves. Yellow or WARNING: Wait for 20 minutes after a cycle to let the brown film heating elements cool down before cleaning the on inside... - Page 32 Your purchase comes with a 100% satisfaction guarantee from Müeller If you are not happy with the product for any reason, please contact us at support@muellerdirect.com or 888-632-9981 with your feedback or questions, and we will do our best to make things right for you! Müeller USA 168 Mason Way Unit #4A,...
Need help?
Do you have a question about the Professional Series and is the answer not in the manual?
Questions and answers