Table of Contents
Advertisement
Quick Links
UltraCompact
Portable Countertop
Dishwashwer
MODEL: DW-600
USER MANUAL
Your satisfaction is guaranteed. If you are not completely satisfied
with our Ultra Compact and the results it brings, we insist that you let
us know. We'll help you make the countertop dishwasher work for you,
or we'll refund your money.
Advertisement
Table of Contents

Subscribe to Our Youtube Channel
Related Manuals for Mueller DW-600


Summary of Contents for Mueller DW-600
- Page 1 UltraCompact Portable Countertop Dishwashwer MODEL: DW-600 USER MANUAL Your satisfaction is guaranteed. If you are not completely satisfied with our Ultra Compact and the results it brings, we insist that you let us know. We’ll help you make the countertop dishwasher work for you,...
-
Page 2: Table Of Contents
CONTENTS IMPORTANT SAFETY INSTRUCTIONS……………………………..…………..…...……1 Important safeguards…………………………………………………………...…………..…………1 Electrical requirements……………....……………………………………...………....3 PARTS AND FEATURES……………………………......………………………..…4 Packaging content………………………………………………………………………………………....4 Features…………………......…………………………………………………………………………4 Parts………………………....………………………………………………………………………………5 INSTALLATION…………………………………………………………………………………………..6 Unpacking and proper placement…………………………………………......…………7 Built-in installation diagram……………………………………………………....…………..……7 Countertop layout diagrams………………………………………......……………………7 Inlet hose connection………………………………………….........………………………8 Drain hose connection……………………………………………......……………………10 Level and secure the dishwasher……………………….....………………………………10 USING YOUR ULTRA COMPACT………...………….......……………………………11 Prior to use…………………….…………………………......……………………………………11 Loading the dishwasher…………………………….......………………………………11 Detergent dispenser…………………………………………......…………………………13... -
Page 3: Important Safety Instructions
• IMPORTANT SAFETY INSTRUCTIONS Inside you will find helpful information on how to use and maintain your dishwasher properly. Following these guidelines can save you a great deal of time and money over the life of your dishwasher. Additional answers to common prob- lems can be found in the chart of Troubleshooting Tips. - Page 4 • Position the appliance in the desired location. Confirm that the machine has been leveled. • Do not use extension cords or adapters to connect the unit to any electrical power source. • Do not unplug your appliance by pulling on the power cord. Always grasp the plug firmly and pull it straight out from the outlet.
-
Page 5: Electrical Requirements
appliance to rust. • This dishwasher is an automatic appliance, do not add water manually when the appliance is working. It will cause overflow and is dangerous. • To reduce the risk of injury, immediately replace work power cords, loose plugs and/or power outlets. -
Page 6: Parts And Features
Avoid the use of an extension cord because it may overheat and cause a risk of fire. However, if it is necessary to use an extension cord: A) Use only a 3-prong extension cord with a 3-prong grounding plug. B) The marked rating of the extension cord must be equal to or greater than the rating of this appliance. -
Page 7: Parts
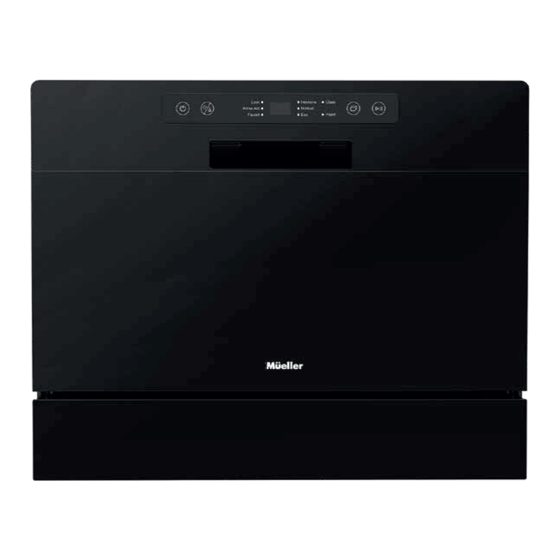
PARTS: Shell Panel Baseboard Spray arms Filter assembly Bottom seal of the door Detergent dispenser Rinse aid dispenser Cup holder Rack Cutlery basket ACCESSORIES: Clamping band Screws Drain hose Inlet water hose... -
Page 8: Installation
INSTALLATION UNPACKING AND PROPER PLACEMENT UNPACKING: WARNING: Ensure that any packing material, including any plastic bags or film, are disposed of safely and kept out of the reach of children. 1. Inspect and remove any remains of packaging, tape, or printed materials before powering on your appliance. -
Page 9: Built-In Installation Diagram
BUILT-IN INSTALLATION DIAGRAM: The direction of perforation 2.4 x 2.4in (60x60mm) according to the position of the sewer sink 21.9in Hole size: 555mm 2.4x2.4in 60x60mm 17.9in 455mm 15.8in 400mm 17.7in Dishwasher 17.7in 450mm 450mm 19.7in The counter 21.7in 500mm 550mm Dishwasher side Dishwasher side 17.7in... -
Page 10: Inlet Hose Connection
INLET WATER HOSE CONNECTION: Connecting the Inlet water hose to the Tap: Inlet water Quick Inlet water hose connector connector Connect Inlet water hose to the Inlet hose connector 1. Connect the Quick connector to the Tap. 2. Connect one end of the Inlet water hose to the Quick connector. 3. - Page 11 Connecting the Inlet water hose to the Water supply pipe: Water supply hose Valve Angle valve Inlet water Inlet water hose connector Attach inlet water hose to the Inlet hose connector...
-
Page 12: Drain Hose Connection
DRAIN HOSE CONNECTION: Drain hose connector Drain hose 1.6 in Counter 40mm Drain hose Sewer Dishwasher 15.7in 400mm Water supply valve 0.4in Water Inlet hose 10mm Power outlet LEVEL AND SECURE THE DISHWASHER: Ensure that the appliance is leveled before operation; otherwise, it may cause an overflow and electric leakage. -
Page 13: Using Your Ultra Compact
If the dishwasher is to be built-in, after the dishwash- er has been balanced, use the two screws provided to screw into the allocated area on both sides of the dishwasher to secure it to the cabinet. Then put on the side safety caps. - Page 14 1. Scrape off any large amounts of leftover food. Soak burnt food in pans to loosen. It is not necessary to rinse the dishes under running water. 2. Place items such as cups, glasses, pots/pans etc. face down so that water will not collect in them.
-
Page 15: Detergent Dispenser
WARNING: DO NOT allow any item to stick out below the dish rack as that may interfere with the spray arm and damage the dishwasher. WARNING: DO NOT load any sharp objects point up. Place them point down or lay them horizontally in the rack. ALWAYS position the dishes and cookware in a manner that will prevent them from being moved by spraying water. -
Page 16: Filling The Rinse Aid Dispenser
FILLING THE RINSE AID DISPENSER: The rinse aid is released during the final rinse to prevent water droplets that can leave spots and streaks from forming on your dishes. It also improves drying by allowing water to ‘sheet’ and drain off the dishes. Your dishwasher is designed to use liquid rinse aids. -
Page 17: Wash Cycle Table
WASH CYCLE TABLE: CONSUMPTION OF TIME DETERGENT PROGRAM TYPE OF SOILING CYCLE WASHING POWDER Part dried, common household 0.4 + 0.4 oz / 2:25 food remnants 11.5 +11.5 g Little dried, normal household Normal 0.8oz / 23g 1:10 food remnants Very adhesive burned-on or Intensive 0.8oz / 23g... -
Page 18: Care And Maintenance
Press button, the display repeatedly Steps: shows H:00 H:01...H:24. Select delay start time. If press for 3 seconds, the screen will be reset to H:00, which means no preselection. Start the appliance The display shows the delay time Select suitable Press button to delay the Delay start... -
Page 19: Cleaning The Spray Arms
1. Rotate the filter assembly counterclockwise, then lift upward. 2. Remove the stainless steel filter from the filter assembly. 3. Rinse the filter assembly and stainless steel filter with running water. 4. After cleaning, position the stainless steel filter back to its place. Insert the filter assembly back into the stainless steel filter, and turn clockwise to lock in place. -
Page 20: Preparation For Storage
PREPARATION FOR STORAGE: It is recommended you run a wash cycle with the dishwasher empty. Disconnect from power and turn off the water supply. Remove any water remaining in the sump area with a sponge. Leave the door slightly open, this will help the door seals to last longer and prevent odors from forming inside the dishwasher. - Page 21 Problem Possible Causes Solution Replace fuse or reset circuit breaker. Remove Fuse blown or any other appliances sharing the same circuit breaker circuit with the dishwasher. tripped. Dishwasher Make sure the dishwasher is turned on and does not Power supply not the door is closed securely.
- Page 22 Problem Possible Causes Solution Dishes not loaded Make sure dishes are loaded correctly per correctly. the “Loading the Dishwasher” section. Improper wash Select a more intensive program. Refer to program selected. “Wash Cycle Table”. The dishes are Use more detergent, or change your Not enough detergent not clean detergent.
-
Page 23: Technical Specifications
TECHNICAL SPECIFICATIONS: Outline Size W 21.6 x H 17.7 x D 21.6 in Water Pressure 5.8 – 145PSI Inlet Water Temperature ≤ 120°F Nominal Voltage 120V Frequency 60Hz Rated Power 870W Waterproof IPX1 Capacity 6 Place Settings + 6 Serving Pieces CIRCUIT DIAGRAM POWER PLUG: 10A 250V~... - Page 24 Your purchase comes with a 100% satisfaction guarantee from Müeller If you are not happy with the product for any reason, please contact us at support@muellerdirect.com or 888-632-9981 with your feedback or questions, and we will do our best to make things right for you! Müeller USA 168 Mason Way Unit #4A,...
Need help?
Do you have a question about the DW-600 and is the answer not in the manual?
Questions and answers