Table of Contents
Advertisement
Quick Links
Advertisement
Table of Contents

Related Manuals for Planet DKVM-1708

Summary of Contents for Planet DKVM-1708
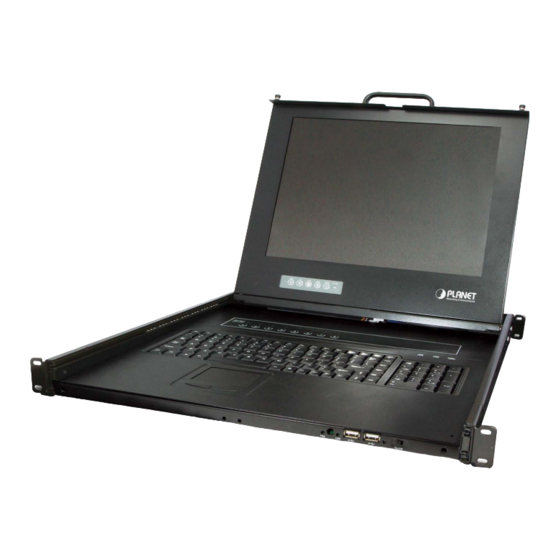
- Page 1 17" LCD Drawer KVM Console with 8/16 Port Combo-Free Module DKVM-1708/1716 ...
- Page 2 PLANET. PLANET assumes no responsibility for any inaccuracies that may be contained in this User’s Manual. PLANET makes no commitment to update or keep current the information in this User’s Manual, nd reserves the right to make improvements to this User’s Manual and/or to the products described in this User’s Manual, at any time without...
-
Page 3: Safety Instructions
User’s Manual of DKVM-1708/1716 Safety Instructions 1. Please disconnect this equipment from AC outlet before cleaning. Don’t use liquid or sprayed detergent for cleaning. Use moisture sheet or clothe for cleaning. 2. For pluggable equipment, the socked-outlet shall be installed near the equipment and shall be easily accessible. -
Page 4: Table Of Contents
User’s Manual of DKVM-1708/1716 Index of Contents Safety Instructions............................III Index of Contents ............................IV General Infor mation ..........................1 1.1 Packing List............................ 1 1.2 Product Feature..........................2 1.3 Features ............................2 2. Installation ............................2.1 Before I nstallation .......................... -
Page 5: General Infor Mation
User’s Manual of DKVM-1708/1716 1. General Informat The PLANET DKVM-1708 / DKVM-1716 is the drawer KVM with single-rail console design offering industrial level input solution, which optimizes your space utilization by controlling your systems in just 1U space on the rack. The arate rail design helps users install the KVM console more easily. -
Page 6: Product Feature
User’s Manual of DKVM-1708/1716 1.2 Product Feature Hardware Heavy-Duty Electroplate Steel Supports high resolution up to 1280 x 1024 @ 75Hz Complies with EIA RS-310C 19” Rack Mount standard System Supports Combo KVM module to connect servers / KVM via USB & PS/2 connection... - Page 7 User’s Manual of DKVM-1708/1716 odular KVM switches The user can use DKVM-1708/1716 as single port console or through some simple action and few screws to be 8/16 ports KVM switch.
- Page 8 User’s Manual of DKVM-1708/1716 Various keyboard language support DKVM-1708/1716 provides multi-Language keyboard support English, Germany, rench, Italian,Spanish,Chinese. erful Mouse/Keyboard Support In the present computer applications, a mouse has become an indispensable device. The KVM fully supports various models of PS/2 mice manufactured by Logitech, Microsoft and IBM as well as compatible PS/2 mice of other brands.
- Page 9 User’s Manual of DKVM-1708/1716 1.4 Product Specification Model Name DKVM-1708 DKVM-1716 Display Size 17 inches Panel Type 2CCFL LCD Panel Resolution Capabilities Maximum Resolution up to 1280 x 1024 (SXGA) Pixel Pitch Supports 0.264(H)x0.264(V)/ 0.294(H)x0.294(V) Operating System Windows 98SE/ME/2000/XP/2003/Vista/7 Server,Linux, Mac OS9/OSX and Sun Microsystems.
-
Page 10: Before I Nstallation
User’s Manual of DKVM-1708/1716 2. Installation 2.1 Before Inst allation 1. Please check all p eripherals accord ing the list before installation. To make sure of the whole unit was not damaged and lost during shippi ng process. If you enc ountered an y problem, please contact your dealer. -
Page 11: Hardware Kits Contents
User’s Manual of DKVM-1708/1716 2.2 Hardware Kits C ontents 1. Adjust rail with pull or p ush to fit your cabinet . Install front and rear bracket on cabinet. . Repeat step 1~2 for the other side. 4. Pull the console until rails automatically are locked. When users hardly push the console and it can be unlocked by the power is over 4kg. - Page 12 User’s Manual of DKVM-1708/1716 6. Put the KVM module into the c onsole form the back. There are two ways to install the KVM module in suitable position, users can fix KVM module with the KVM accessories (Both sides) or the extra R ack- mounted Screws Bothsides).
-
Page 13: Lcd Components
User’s Manual of DKVM-1708/1716 2.3 LCD Components No. Component Function Description Handle Holder Pull to Slide the LCD console in or out LCD Display Panel Display LCD Panel OSD Buttons Controls Display Required Quality LED Indicators Switching Operation for KVM Module ( Optional ) -
Page 14: Connecting The Console
User’s Manual of DKVM-1708/1716 2.4 Connecting the Co nsole o connect an LCD console to a computer, perform the following steps 8 Port of KVM 16 Port of KVM 1. Turn off your computer. You should always turn off your computer before connecting or disc onnecting a device. -
Page 15: Osd Operation
User’s Manual of DKVM-1708/1716 3. OSD Operation 3.1 Panel Controls and LCD OSD Function Controls Description Soft power on/off button. Adjacent LED is lit when To access the main menu. This button also acts as Menu the “Enter” button. Auto-synchronize and scale down display to any Auto valid factory preset timings. - Page 16 User’s Manual of DKVM-1708/1716 “noise” on the screen COLOR Adjusts color temperatures for users METER Allows you to choose from among five languages as LANGUAGE English, French , German , Ital ia , Simplified Chinese, Espanola, and Nederland AKER Volume control...
-
Page 17: Kvm Osd Function
User’s Manual of DKVM-1708/1716 3.2 KVM OSD Function 3.2.1 Manual Key It is the simple swi tching method. You just need to press the Port Selection Switch on the front panel of the KVM. The Selection LED (Red) is on, indicating that you are switching to the corresponding port. - Page 18 User’s Manual of DKVM-1708/1716 tart Press the NumLoc k twice or the Port Selection Switches 1 and 2 on the panel enter the OSD. If you have modified the Hot Key for starting the OSD and are unable enter the OSD by pressing NumLock,...
- Page 19 User’s Manual of DKVM-1708/1716 Switch Menu Master List 03-04:Mail S er 4 LIST: MASTER NAME ● Admin ♁ ● Θ ● Mail Group Ο Press Enter Θ ● Peter ♁ ● Web Group Ο ● Data Group Ο Θ : Move...
- Page 20 (PC or KVM) conne cted to the CPU port. It shows the channel number; the DKVM-1708 will displa y 01~08 and the M-1716 will display 01~08; 09~16 (Since the screen ca nnot display al...
- Page 21 User’s Manual of DKVM-1708/1716 the board to move the selection bar, and the situated position indicates the selected target for giving instructions. For example, if the selection ba r points at #05 and you press Enter, then the system will switch to that particular PC or press the “Space BAR”...
- Page 22 User’s Manual of DKVM-1708/1716 ‧System Setting Menu System Setting Channel Display Full Mode Channel Display Tim 5 Sec Auto Scan Time 5 Sec OSD Entry Hot Key Number Lock Hot Key Switching Mouse Clicking Beeper Sound Offline Skip Manual OSD Language...
- Page 23 User’s Manual of DKVM-1708/1716 Turn on/o ff the “Ctrl” hot keys on Hot Ke the keyboard for switching Switching mputer functions. rn on/off the keys of t ouse C licking mouse for switching computer functio urn on/off the beeper sound...
- Page 24 User’s Manual of DKVM-1708/1716 uto Scan e: You can start the OSD first and press “F4” to enter the Auto Scan Mode. If y ou want to scan the PC, yo u must us e the S mart V iew S...
Need help?
Do you have a question about the DKVM-1708 and is the answer not in the manual?
Questions and answers