
Subscribe to Our Youtube Channel
Related Manuals for Garage Smart GS100


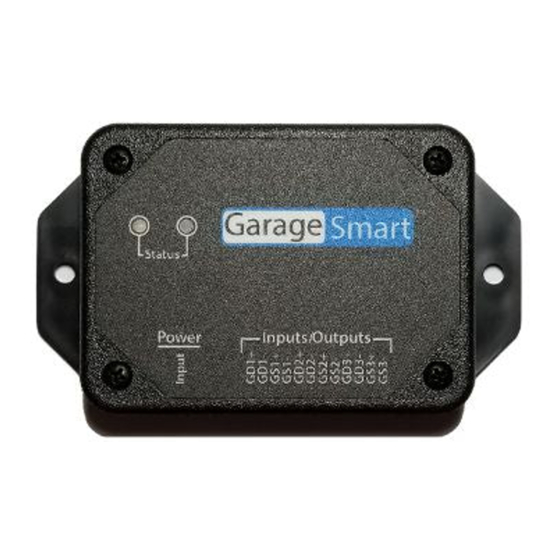
Summary of Contents for Garage Smart GS100
- Page 1 User’s Manual English (US) For use with models: Version 1.5a GS100, GS200, GS300 Generation) S100N User’s Manual GarageSmart...
- Page 2 Do NOT return product back to store (Best Buy, EBay, Amazon, etc.) Please contact GarageSmart™ Customer Service directly for all matters including returns/exchanges, help with installation (including Wi-Fi configuration), or any questions or comments that you may have. User’s Manual GarageSmart...
- Page 3 The information contained herein may be changed at any time without prior notification. This manual nor any parts thereof may not be reproduced for any purpose whatsoever without the express written consent of GarageSmart. All technical specifications, drawings, etc., are subject to copyright law.
-
Page 4: Table Of Contents
Table of Contents Introduction ....................... 6 About this User Guide ........................6 List of nomenclature ........................6 List of definitions ........................6 List of icons ..........................6 Precautionary and Safety Information .................... 7 Legal notices ..........................8 Liability ............................8 Trademarks .......................... - Page 5 Troubleshooting & Help .................. 35 Finding your default gateway address ..................35 Most Common Problems ......................36 Frequently Asked Questions ................37 Maintenance ..................... 38 Cleaning ............................38 Adjustments ..........................38 Scheduled or Preventative Maintenance ..................38 Technical Specifications ................. 39 User’s Manual GarageSmart...
-
Page 6: Introduction
Introduction About this User Guide List of nomenclature Personal Computer Radio Frequency Internet Service Provider Daylight Savings Time GSX+ Garage Sense positive inputs (GS1+, GS2+, GS3+) GSX- Garage Sense negative inputs (GS1-, GS2-, GS3-) GDX+ Garage Drive positive outputs (GD1+, GD2+, GD3+) GDX+ Garage Drive negative outputs (GD1-, GD2-, GD3-) List of definitions... -
Page 7: Precautionary And Safety Information
Precautionary and Safety Information CAUTION: Internal circuit card components are extremely sensitive to electrostatic discharge. Be careful not to touch internal circuitry prior to discharging any static buildup on yourself. To discharge yourself, touch a grounded metal object such as conductor an earth- grounded metal enclosure. -
Page 8: Legal Notices
Legal notices Liability The software, websites, apps and the manual are subject to change without notice. ™ GarageSmart is not liable for the accuracy of the information contained in this manual, ™ on its websites, in its apps or for damages resulting from the use of the GarageSmart device, this manual, websites or apps. -
Page 9: Customer Service
Customer Service ™ Visit the GarageSmart website, www.garagesmart.net/support.html to view our support page. On this page you can: • Reset your account password. • Find warranty information. • Send an e-mail to GarageSmart™ customer service. • Faqs on the most asked questions and answers. E-mail To ensure a timely response, use e-mail at www.garagesmart.net/contact.html... -
Page 10: Welcome
Welcome Introducing Your GarageSmart™ Device Welcome to the exciting world of monitoring, opening and closing your garage doors. ™ With the use of a GarageSmart device, you can reliably monitor, open, close or stop your residential or commercial garage doors anywhere in the world from any flip-phone, smartphone, tablet, PC (basically any device that has internet or text message capabilities) anytime while receiving email and text alerts. -
Page 11: Getting Started
2. The number of Garage Door Sensor Kits (shipped with the GarageSmart™ device) is determined at time of order. GS100 includes one (1) sensor kit, GS200 includes two (2) sensor kits, and GS300 includes three (3) sensor kits. -
Page 12: Pre-Installation
Pre-Installation Creating a GarageSmart™ Account (Online Control Panel) Creating a GarageSmart™ account is required as this provides you with access to an Online Control Panel for setting up individual remote keys, custom schedules, and other configuration settings for controlling your GarageSmart™ device. 1. -
Page 13: Installation
Installation Residential Installation Residential installation is for residential garage door motors (typically found in homes), that have a single wall mounted pushbutton that opens and closes the garage door. Mounting the GarageSmart™ Device ™ The GarageSmart device has a mounting flange that contains two mounting holes. The two mounting holes are centered 3.875”... -
Page 14: Mounting And Connecting The Garagesmart™ Sensors
Mounting and connecting the GarageSmart™ Sensors 1. Verify that the garage door is fully closed. 2. Apply the supplied double sided tape to the bottom of the sensor (the one without screw terminals) as shown below. 3. Attach the sensor to the side of the garage door (near the top) making sure that the sensor doesn’t rub against the wall or interfere with any moving parts when the garage door is opening or closing as shown below Top of garage door... - Page 15 6. Apply the supplied double sided tape to the bottom of the sensor (the one with screw terminals) as shown below. 7. Mount the sensor (with screw terminals) to the wall directly next to the other sensor, making sure that the sensor doesn’t interfere with any moving parts when the garage door is opening or closing .
- Page 16 9. Attach and securely screw the wires to the sensor as shown below. Wires 10. Carefully put the protective cover back onto the sensor as shown below. Protective Cover ™ 11. Run the wire from the sensor to the GarageSmart device keeping free of all moving and mechanical parts by using the provided wire holders and tie wraps.
-
Page 17: Custom Mounting And Connecting The Garagesmart™ Sensors
15. For locations that have more than one garage door, repeat the above steps in this section for each garage door (if required). 16. Once all garage door sensors have been fully installed, use the section “Verifying Sensor Alignment” in this manual to test and verify that all sensors have been aligned properly. - Page 18 6. Re-attach the wire to the garage door motor by inserting or screwing in place as show below. Added wire Existing wire Added wire Existing wire 7. Strip the wires on the opposite end about ¼ inches long. 8. First determine what garage door (1, 2 or 3) is being controlled. Then using the table below, insert the two wires into the proper (bottom-circular) ports of the ™...
- Page 19 The plus (+) and minus (-) ports are not polarity sensitive and either wire can be inserted into either port. However, failure to insert wires into the proper GD1x, GD2x or GD3x ports of the GarageSmart™ pertaining to the same garage door number, will cause the garage doors not to open/close properly and may damage the motor or GarageSmart™...
-
Page 20: Commercial Installation
Commercial Installation Commercial installation is for commercial garage door motors (typically found in businesses or factories), that have a 3-button wall mounted pushbutton (in which each pushbutton individually opens, closes and stops the garage door). ™ The GarageSmart device is setup the same way as in the Residential Installation (refer to section if necessary), but with the following changes: ™... -
Page 21: Other Installation Applications
Other Installation Applications ™ The GarageSmart GS100 basically contains (3) internal switches that can be installed into other applications (such as gates, electronic door locks, etc.) that requires control signals to energize or de-energize a circuit. The wiring convention is straight forward and application dependent. -
Page 22: Wi-Fi Setup
Wi-Fi Setup Configure the GarageSmart™ Device to a secure Wi-Fi network The GarageSmart™ device can be connected to a secured Wi-Fi network using a “Static IP” or “DHCP”. (1) (2) When initially powered up, the GarageSmart™ device will become a Wi-Fi Access Point for device configuration purposes and will broadcast its unique SSID in the form of GarageSmart_80_xxxx. - Page 23 GarageSmart™ device that will be configured on your routers Wi-Fi network; otherwise see note below. 7. Click “Update”. 8. Within a few seconds the Status LED of the GarageSmart™ device will alternate between GREEN a few times, signaling the start of the Wi-Fi update process.
- Page 24 10. The Status LED will eventually blink a specific color and pattern. Using the table below, determine the Result and Solution to perform (if necessary). Status Number Result Solution Led Color of Blinks Solid Reboot started. Wait a few seconds for reboot process to start.
- Page 25 The “GarageSmart” Wi-Fi Network name (SSID) may contain extra characters at the end of the SSID. Whereas the first group (5 numbers) represents the Port that the GarageSmart™ device is currently assigned to and last group (4 letters or numbers) represents the last four characters of the GarageSmart™...
-
Page 26: Router Security Configuration
Router Security Configuration For the GarageSmart™ device to receive inbound commands (red arrows below) from the Internet and the GarageSmart™ Network, Port Forwarding must be setup properly within the router. Private Network Public Router or Access Point 1. Apply power to the GarageSmart™ device. 2. - Page 27 Login into your router as this is usually accomplished by typing the Gateway (3) (4) Address into your web browser. If you don’t know the default Gateway Address of your router, see Finding your default gateway address in the Troubleshooting & Help section of this manual.
- Page 28 The “GarageSmart” Wi-Fi Network name (SSID) may contain extra characters at the end of the SSID. Whereas the first group (5 numbers) represents the Port that the GarageSmart™ device is currently assigned to and last group (4 letters or numbers) represents the last four characters of the GarageSmart™...
-
Page 29: Controlling The Garagesmart™ Device
Controlling the GarageSmart™ Device ™ The GarageSmart GS100-CR device can Open, Close or Stop your garage door from anywhere using any smartphone, pc/laptop, tablet or any other device that has a connection to the internet. The GarageSmart™ App ™ GarageSmart provides a user-friendly app that allows users to Open, Close, Stop or Monitor ™... -
Page 30: App Setup
App Setup Because the GarageSmart™ app is designed to be used in both Residential and Commercial use, there are two modes that the GarageSmart™ app can run in, Classic mode or Advanced mode. ™ This section will show how to setup the GarageSmart app in Classic mode, using a Device ID and Remote Key. - Page 31 Function Options Description English Displays all text in English Language French Displays all text in French Spanish Displays all text in Spanish Displays each Residential or Commercial device on a separate page. Classic Must set to Classic if any Residential devices are installed.
-
Page 32: Controlling Garage Doors Using The Garagesmart™ App
5. Enter a Device Name (this can be anything such as Home, Work, etc.) 6. Enter the Device ID. 7. Enter the Remote Key. 8. Click Save Device, a message will appear Device has been saved. 9. Click the Exit button within the app. Controlling Garage Doors using the GarageSmart™... - Page 33 4. Closing multiple garage doors that are currently open: Press and hold, Hold here to close all garage doors (indicated by a blue box at the bottom of the screen) until the doors start to close 1. Device information will not be saved if the user does not click on “Save Device” before changing screens or exiting out of settings.
-
Page 34: Verify Garage Door Status Using The Garagesmart™ App
Verify Garage Door Status using the GarageSmart™ App Monitoring the Garage Doors requires that the GarageSmart™ App has already been installed and setup properly. 1. At any time, click the refresh icon to check and verify the status of the garage door that pertains to the device that is currently selected. -
Page 35: Troubleshooting & Help
Troubleshooting & Help The GarageSmart™ device is completely tested at the factory before being packaged and shipped. If installed properly and in accordance with the installation instructions in this manual, your GarageSmart™ devices should provide many years of trouble free service. If the device should not function or you need help, the following guides will assist in troubleshooting. -
Page 36: Most Common Problems
Most Common Problems Below is a complied list of the Most Common problems that can occur. Before contacting ™ GarageSmart for support, please review the list as one of the solutions may correct the issue that you may be experiencing. Problem Solutions ™... -
Page 37: Frequently Asked Questions
Frequently Asked Questions Question Answers Yes, GarageSmart™ device will show the real live Can I monitor all garage doors? status (Closed or Open) for each garage. Can GarageSmart™ close my garage Yes, the GarageSmart™ adds Auto Shut features door(s) automatically? that allow you to set your garage doors to close automatically from 10 minutes up to 2 hours after being left open, or have them close at a pre-... -
Page 38: Maintenance
Maintenance Cleaning No cleaning methods or procedures are required. Adjustments No direct hands on or field adjustments are required for the GarageSmart™ device. Scheduled or Preventative Maintenance No preventative or scheduled maintenance is required. User’s Manual GarageSmart... -
Page 39: Technical Specifications
Technical Specifications GarageSmart™ Device Input Voltage: 5VDC Input Current: 5mA (Normal Operation), 200mA (during worse-case TX events) Temperature Range: -20 degrees C to +55 degrees C Relative Humidity Range: 0 - 95% Non-Condensing Wi-Fi Radio 802.11 b/g/n/ac (2.4 GHz) TX Power 802.11b +20 dBm 802.11g +17 dBm 802.11n +14 dBm...
Need help?
Do you have a question about the GS100 and is the answer not in the manual?
Questions and answers