
Related Manuals for Garage Smart GS100


Summary of Contents for Garage Smart GS100
- Page 1 User’s Manual English (US) For use with models: Version 1.5 GS100, GS200, GS300 Generation) S100N GarageSmart User’s Manual...
- Page 2 Do NOT return product back to store (Best Buy, EBay, Amazon, etc.) Please contact GarageSmart™ Customer Service directly for all matters including returns/exchanges, help with installation (including Wi-Fi configuration), or any questions or comments that you may have. GarageSmart User’s Manual...
- Page 3 The information contained herein may be changed at any time without prior notification. This manual nor any parts thereof may not be reproduced for any purpose whatsoever without the express written consent of GarageSmart. All technical specifications, drawings, etc., are subject to copyright law.
-
Page 4: Table Of Contents
Table of Contents Introduction ......................6 About this User Guide ........................6 List of nomenclature ........................6 List of definitions ......................... 6 List of icons ..........................6 Precautionary and Safety Information ..................... 7 Legal notices ............................ 8 Liability ............................8 Trademarks .......................... - Page 5 Open/Close Garage Doors using the GarageSmart™ App ............32 Open and Closing Garage Doors using non-smartphones (via SMS text messaging) .... 34 Verify Garage Door Status Remotely .................... 35 Verify Garage Door Status through a Web Browser ..............35 Verify Garage Door Status using a Smartphone/Tablet Web Browser ........35 Verify Garage Door Status using the GarageSmart™...
-
Page 6: Introduction
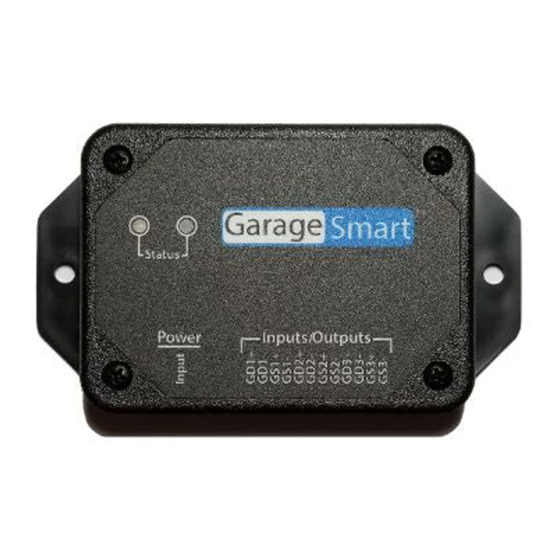
Introduction About this User Guide List of nomenclature Personal Computer Radio Frequency Internet Service Provider Daylight Savings Time GSX+ Garage Sense positive inputs (GS1+, GS2+, GS3+) GSX- Garage Sense negative inputs (GS1-, GS2-, GS3-) GDX+ Garage Drive positive outputs (GD1+, GD2+, GD3+) GDX+ Garage Drive negative outputs (GD1-, GD2-, GD3-) Federal Communications Commission... -
Page 7: Precautionary And Safety Information
Precautionary and Safety Information CAUTION: Internal circuit card components are extremely sensitive to electrostatic discharge. Be careful not to touch internal circuitry prior to discharging any static buildup on yourself. To discharge yourself, touch a grounded metal object such as conductor an earth-grounded metal enclosure. -
Page 8: Legal Notices
Legal notices Liability The software, websites, apps and the manual are subject to change without notice. GarageSmart ™ is not liable for the accuracy of the information contained in this manual, on its websites, in its apps or for damages resulting from the use of the GarageSmart ™... -
Page 9: Fcc Part 15 Class B Verification Statement
FCC Part 15 Class B Verification Statement GarageSmart ™ Model No: GS100, GS200, GS300 This device complies with Part 15 of the FCC Rules. Operation is subject to the following two conditions: this device may not cause harmful interference, and ... -
Page 10: Customer Service
Customer Service ™ Visit the GarageSmart website, www.garagesmart.net/support.html to view our support page. On this page you can: • Reset your account password. • Find warranty information. • Send an e-mail to GarageSmart™ customer service. • Faqs on the most asked questions and answers. E-mail To ensure a timely response, use e-mail at www.garagesmart.net/contact.html... -
Page 11: Welcome
Welcome Introducing Your GarageSmart™ Device Welcome to the exciting world of monitoring, opening and closing your garage doors. ™ With the use of a GarageSmart device, you can reliably monitor, open, close or stop your residential or commercial garage doors anywhere in the world from any flip-phone, smartphone, tablet, PC (basically any device that has internet or text message capabilities) anytime while receiving email and text alerts. -
Page 12: Getting Started
2. The number of Garage Door Sensor Kits (shipped with the GarageSmart™ device) is determined at time of order. GS100 includes one (1) sensor kit, GS200 includes two (2) sensor kits, and GS300 includes three (3) sensor kits. -
Page 13: Setup
Setup Setup and Verification Prior to mounting and installing the GarageSmart ™ device, it is important to fully read and understand all steps and notes in each section for proper setup of the GarageSmart device. ™ Activating and Registering the GarageSmart™ Device 1. - Page 14 4. When prompt for a password, enter the complete Mac Address of the GarageSmart device (no spaces and lowercase letters only). ™ 5. Once connected to the GarageSmart Wi-Fi network, open any web browser and type in the following address: http://192.168.4.1/wifisetup as the following screen should be shown below;...
- Page 15 10. The Status LED will then remain for at least 5 seconds while the GarageSmart™ device goes through a reboot process. 11. The Status LED will eventually blink a specific color and pattern. Using the table below, determine the Result and Solution to perform (if necessary). Status Number Result...
- Page 16 For international countries, plug the “AC Power Supply” into a power adapter. Then plug the power adapter into any power outlet. The “GarageSmart” Wi-Fi Network name (SSID) may contain extra characters at the end of the SSID. Whereas the first group (5 numbers) represents the Port that the GarageSmart™ device is currently assigned to and last group (4 letters or numbers) represents the last four characters of the GarageSmart™...
-
Page 17: Port Forwarding Setup
Port Forwarding Setup For the GarageSmart™ device to receive inbound commands from the Internet, Port Forwarding must be setup properly within the router. The GarageSmart™ device will also require a static (fixed) IP address, in which most routers have the ability to “reserve” or “assign”... - Page 18 10. Remove power from the GarageSmart ™ device for a few seconds, and then reapply power. 11. After a few seconds, the Status LED should be blinking GREEN. If so, then Port Forwarding has been successfully configured within the router and the GarageSmart ™...
- Page 19 Verify the GarageSmart™ Device is connected to your Wi-Fi network Option 1: 1. Make sure that your existing Wi-Fi network is fully working. 2. Visit http://www.garagesmart.net/tools/connected.html 3. Enter the Mac Address and Device ID of the GarageSmart device ™ 4. Click “Submit”. 5.
-
Page 20: Installation
Installation Residential Installation Residential installation is for residential garage door motors (typically found in homes), that have a single wall mounted pushbutton that opens and closes the garage door. Mounting the GarageSmart™ Device The GarageSmart ™ device has a mounting flange that contains two mounting holes. The two mounting holes are centered 3.875”... -
Page 21: Mounting And Connecting The Garagesmart™ Sensors
Mounting and connecting the GarageSmart™ Sensors 1. Verify that the garage door is fully closed. 2. Apply the supplied double sided tape to the bottom of the sensor (the one without screw terminals) as shown below. 3. Attach the sensor to the side of the garage door (near the top) making sure that the sensor doesn’t rub against the wall or interfere with any moving parts when the garage door is opening or closing as shown below Top of garage door... - Page 22 6. Apply the supplied double sided tape to the bottom of the sensor (the one with screw terminals) as shown below. 7. Mount the sensor (with screw terminals) to the wall directly next to the other sensor, making sure that the sensor doesn’t interfere with any moving parts when the garage door is opening or closing .
- Page 23 9. Attach and securely screw the wires to the sensor as shown below. Wires 10. Carefully put the protective cover back onto the sensor as shown below. Protective Cover 11. Run the wire from the sensor to the GarageSmart device keeping free of all ™...
-
Page 24: Custom Mounting And Connecting The Garagesmart™ Sensors
15. For locations that have more than one garage door, repeat the above steps in this section for each garage door (if required). 16. Once all garage door sensors have been fully installed, use the section “Verifying Sensor Alignment” in this manual to test and verify that all sensors have been aligned properly. - Page 25 6. Re-attach the wire to the garage door motor by inserting or screwing in place as show below. Added wire Existing wire Added wire Existing wire 7. Strip the wires on the opposite end about ¼ inches long. 8. First determine what garage door (1, 2 or 3) is being controlled. Then using the table below, insert the two wires into the proper (bottom-circular) ports of the GarageSmart ™...
- Page 26 The plus (+) and minus (-) ports are not polarity sensitive and either wire can be inserted into either port. However, failure to insert wires into the proper GD1x, GD2x or GD3x ports of the GarageSmart™ pertaining to the same garage door number, will cause the garage doors not to open/close properly and may damage the motor or GarageSmart™...
-
Page 27: Commercial Installation
Commercial Installation Commercial installation is for commercial garage door motors (typically found in businesses or factories), that have a 3-button wall mounted pushbutton (in which each pushbutton individually opens, closes and stops the garage door). The GarageSmart ™ device is setup the same way as in the Residential Installation (refer to section if necessary), but with the following changes: 1. - Page 28 Existing “STOP” wire GD1- GD2- Existing “STOP” wire GD3- GD1+ GD2+ GD3+ 10 11 12 GD3+ GD3- GD1+ GD1- GD2+ GD2- GarageSmart User’s Manual...
-
Page 29: Verification Of Installation
Verification of Installation Verification and Alignment The following sections will verify if the sensors were installed and aligned properly for all garage doors and if the garage doors open/close by use of the GarageSmart device. ™ Verifying Sensor Alignment 1. Verify that all garage doors are closed. 2. -
Page 30: Verifying Garage Door Control
Verifying Garage Door Control 1. Verify that all garage doors are closed. 2. From any cell phone, laptop, tablet or PC visit www.garagesmart.net/tools/doors.html 3. Enter the Mac Address and Device ID of the GarageSmart ™ device (this information can also found on the bottom of the GarageSmart ™... -
Page 31: Controlling The Garagesmart™ Device
Controlling the GarageSmart™ Device Open and Closing Garage Doors Remotely The GarageSmart ™ device can Open and Close any garage door from anywhere using any phone (including non-smartphones as in flip-phones), smartphone, pc/laptop, tablet or any other device that has a connection to the internet or sms/text messaging. Open/Close Garage Doors through a Web Browser 1. -
Page 32: Open/Close Garage Doors Using The Garagesmart™ App
4. Enter the Remote Key that you assigned to the GarageSmart ™ device 5. Select “Open” or “Close” for each Garage Door (1, 2 or 3) to be controlled 6. Click on “Send”. Remote keys are assigned within the control panel of your account. Please see the “Online Control Panel Guide”... - Page 33 2. Opening a garage door that is currently closed: Select the Garage Door number at the bottom of the screen that needs to be opened (indicated by a small GREEN circle next to the door number). Press and hold the Closed Garage Door symbol (indicated by a GREEN glowing ring) until the door starts to open.
-
Page 34: Open And Closing Garage Doors Using Non-Smartphones (Via Sms Text Messaging)
Open and Closing Garage Doors using non-smartphones (via SMS text messaging) Any device (including flip-phones) can also open or close garage doors as long as the device has SMS text messaging capabilities and is active through your cell phone carrier 1. -
Page 35: Verify Garage Door Status Remotely
Verify Garage Door Status Remotely The GarageSmart ™ device can report if the garage doors are open or closed from anywhere using any phone (including non-smartphones as in flip-phones), smartphones, pc/laptops, tablets or any other device that has a connection to the internet or sms/text messaging. Verify Garage Door Status through a Web Browser 1. -
Page 36: Verify Garage Door Status Using The Garagesmart™ App
Remote keys are assigned within the control panel of your account. Please see the “Online Control Panel Guide” for more information on creating and changing Remote Keys for your GarageSmart™ device. Verify Garage Door Status using the GarageSmart™ App Monitoring the Garage Doors requires that the App has already been installed and setup properly (see above section if needed). -
Page 37: Maintenance
Maintenance Cleaning No cleaning methods or procedures are required. Adjustments No direct hands on or field adjustments are required for the GarageSmart™ device. Scheduled or Preventative Maintenance No preventative or scheduled maintenance is required. GarageSmart User’s Manual... -
Page 38: Troubleshooting
Troubleshooting The GarageSmart™ device is completely tested at the factory before being packaged and shipped. If installed properly and in accordance with the installation instructions in this manual, your GarageSmart™ devices should provide many years of trouble free service. If the device should not function, the following guide will assist in troubleshooting. - Page 39 The website, mobile site or Check for any broken or detach wires that connect app is showing the wrong to the GSX+ port(s), GSX- port(s) and sensor(s). status or always shows Open for my garage door(s). Visual inspect the sensor(s) and make sure that they are aligned properly, then perform the ...
- Page 40 Selecting the wrong Time Zone or Daylight Savings Time (DST) settings will affect real-time operation, notification and logging. Free Account holders will only receive email notifications (if enabled in email settings) to the primary account holder’s email address that is shown within the online control. Premium Account holders may specify unlimited email addresses to receive the email alerts.
-
Page 41: Frequently Asked Questions
Frequently Asked Questions Question Answers Do I need a smartphone or tablet to No, GarageSmart™ device works with any device work with the GarageSmart™ device? that has internet or text messaging capabilities Can I monitor all garage doors at the Yes, GarageSmart™... -
Page 42: Technical Specifications
Technical Specifications GarageSmart™ Device Input Voltage: 5VDC Input Current: 5mA (Normal Operation), 200mA (during worse-case TX events) Temperature Range: -20 degrees C to +55 degrees C Relative Humidity Range: 0 - 95% Non-Condensing Wi-Fi Radio 802.11 b/g/n/ac (2.4 GHz) TX Power 802.11b +20 dBm 802.11g +17 dBm 802.11n +14 dBm...
Need help?
Do you have a question about the GS100 and is the answer not in the manual?
Questions and answers