Advertisement
Quick Links
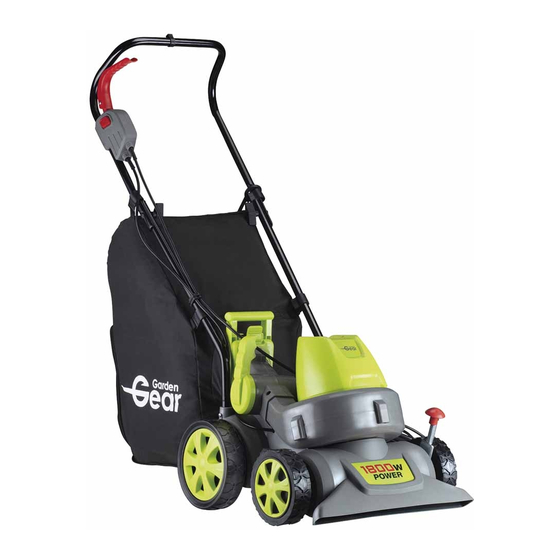
1800-Watt Push Garden Leaf Blower & Vacuum
After Sales Support
Call 0871 911 7031
Email
customerservice@gardengearonline.
co.uk
Product Code G4080
For correct usage, please read these instructions carefully before use and
keep in a safe place for future reference.
Instruction Manual
Thank you for purchasing this
product, which has been made to
demanding high quality standards
and is guaranteed for domestic use
against manufacturing faults for a
period of 12 months from date of
purchase
1
Advertisement

Related Manuals for Garden Gear G4080


Summary of Contents for Garden Gear G4080
- Page 1 12 months from date of Product Code G4080 purchase For correct usage, please read these instructions carefully before use and keep in a safe place for future reference.
- Page 2 INTRODUCTION Congratulations You have made an excellent choice with the purchase of this quality Garden Gear product. By doing so you now have the assurance and peace of mind which comes from purchasing a product that has been manufactured to the highest standards, performance and safety.
- Page 3 Safety information and general warnings • Ensure that you read and understand all instructions. Failure to follow all instructions listed below may result in electric shock, fire and/or serious injury. All the warnings below refer to your mains operated (corded) blower vacuum.
- Page 4 • Disconnect the plug from the power source before cleaning or removing parts or storing garden machinery. Such preventive safety measures reduce the risk of starting the garden machinery accidentally. • Store garden machinery out of the reach of children and do not allow persons unfamiliar with the garden machinery or these instructions to operate the garden machinery.
- Page 5 Safety symbols and their meaning WARNING! The following warning symbols are displayed on the tool to remind you of the safety precautions you should take when operating the tool. Read the instruction manual completely before using the garden machinery Make sure bystanders do not get injured by thrown-off items.
- Page 6 Parts Description Housing and power control Handle locking bolts and handle wing nuts Extension handle tubes Power cable positioning clip Handle positioning screws Leaf collection bag...
- Page 7 Assembly Remove all parts from the packaging and check that all are present and there is no sign of damage. Familiarise yourself with all parts. Attach the extension handle tubes (2) into the housing as shown below using the 2 screws supplied (3), tighten with a screwdriver.
- Page 8 Position the power control handle on (1) using the locking bolts and wing nuts (4), turn clockwise to secure. Push the power cable positioning clip (5) onto the extension handle tubes (2) securing the cable against the tube as shown below.
- Page 9 Attach the leaf collection bag (6) following the 2 steps shown below. Attach the bottom first arrowed 1 and then the upper part arrowed 2, depress the locking clip indicated by the padlock symbol at 2. Attach the leaf collection bag (6) to the upper and lower tubes using the fitted 4 plastic clips.
- Page 10 Instructions for use Choose a dry day and preferably where leaves have been allowed to dry out. It helps if the leaves are turned over a couple of times prior to operation, using a rake the day before you intend to clear them allowing them to dry on both sides.
- Page 11 Starting and stopping the motor Plug the blower vacuum into a suitable power supply and if an extension cable is used should be fitted with a suitable Residual Current Device (RCD). With one finger depress the button arrowed 1 and then pull the trigger arrowed 2.
- Page 12 Blowing To blow push the selection lever in the direction shown below and the leaves will be blown to the desired location. Make sure you are in the correct position to both vacuum and blow leaves during use as indicated by the ticks below and as a safety precaution ensure nobody is in your path.
- Page 13 Care and maintenance Make sure that all nuts, bolts and screws are tight and are fitted correctly before and after each use. All damaged and worn parts should be replaced to maintain the blower vacuum in a safe working condition. After use the leaf blower vacuum should disconnected from the power supply and any leaves in the collection bag removed.
- Page 14 Technical specifications Mains voltage 230-240 Volts Mains frequency 50 Hz Safety class Type of protection IP X4 Motor power(P1) 1800 W Engine speed 13.400 min¹ Air speed 270km/h Chaff rate 10:1 Air volume flow rate 840m³/h Collection bag capacity Net gross weight 9.5/11kg Noise detail Sound pressure level LрA ¹)
- Page 15 Plug Wiring These safety instructions should be read carefully and kept in safe place for future reference. This appliance is fitted with a plug that complies with BS 1363. Only high quality 13A (square pin) plugs that comply with this standard should be fitted. Wires are coloured as follows: Brown –...
- Page 16 Equipment 1600W PUSH GARDEN BLOWER Model number G4080 / CXD1800 is in conformity with the applicable requirements of the following documents Ref. No. EN 60335-1:2012+A11:2014; EN 50636-2-100:2014; EN 62233:2008; EN 55014-1:2006+A1:2009+A2:2011; EN 55014-2:2015; EN 61000-3-2:2014; EN 61000-3-3:2013; EN 61000-3-11:2000; AfPS GS 2014:01 PAK; IEC 62321 Noise measurements have been made in accordance with EN ISO11680-1 with internal control of production (Schedule 8 / Annex V).
- Page 17 GUARANTEE IMPORTANT Please do not return this product without first calling the Customer Service number below: 0871 911 7031* Thank you for purchasing this product, which has been made to demanding high quality standards and is guaranteed for domestic use against manufacturing faults for a period of 12 months from the date of purchase.
Need help?
Do you have a question about the G4080 and is the answer not in the manual?
Questions and answers