Table of Contents

Related Manuals for Fronius MagicCleaner 150


Summary of Contents for Fronius MagicCleaner 150
- Page 1 / Perfect Charging / Perfect Welding / Solar Energy Operating instructions MagicCleaner 150 42,0426,0395,EA 002-17012022 Fronius prints on elemental chlorine free paper (ECF) sourced from certified sustainable forests (FSC).
-
Page 3: Table Of Contents
Table of contents Safety Instructions Explanation of Safety Instructions General Intended use Environmental conditions Obligations of the Operating Company Obligations of Personnel Personal protection and protection of others Notes on the correct handling of the cleaning and Print electrolytes Risks from grid current and cleaning current EMC measures Particular hazard areas Safety measures at the setup location and during transport... - Page 4 Preparing the workstation for Printing Printing After the Print process Service, maintenance and disposal General At every start-up At the end of each shift Disposal Technical data MagicCleaner 150 /EF 150 /CN 150 /np MagicCleaner 150 MV/B 150 MV/np...
-
Page 5: Safety Instructions
Safety Instructions Explanation of DANGER! Safety Instruc- tions Indicates an immediate danger. ▶ Death or serious injury may result if appropriate precautions are not taken. WARNING! Indicates a possibly dangerous situation. ▶ Death or serious injury may result if appropriate precautions are not taken. CAUTION! Indicates a situation where damage or injury could occur. -
Page 6: Environmental Conditions
Intended use also means Carefully reading and adhering to these Operating Instructions Following all instructions, safety and hazard warnings Carrying out all the specified inspection and maintenance work. The device is designed for operation in industry and business. The manufacturer shall not be liable for any damage resulting from use in a living area. -
Page 7: Notes On The Correct Handling Of The Cleaning And Print Electrolytes
Irritation or burning of the skin due to contact with cleaning electrolyte or Print elec- trolyte Danger of serious eye damage due to contact with cleaning electrolyte or Print elec- trolyte General hazards when handling chemicals Observe the safety data sheets of the cleaning and Print electrolytes! Electrical risks from grid current and cleaning current Harmful vapors Individuals working on the workpiece during the cleaning process must wear suitable... -
Page 8: Risks From Grid Current And Cleaning Current
First aid measures After inhalation provide fresh air. Consult a physician if complaints persist. After skin contact, wash immediately with soap and water, and rinse thoroughly. Consult a physician if skin irritation persists. If swallowed, do not induce vomiting, rinse mouth and drink plenty of water, seek medical advice immediately. -
Page 9: Emc Measures
Ensure suitable personal protection with dry temporary backing or cover with sufficient insulation against the ground potential. The temporary backing or cover must completely cover the entire area between the body and the ground potential. All cables and leads must be secured, undamaged, insulated, and adequately dimen- sioned. -
Page 10: Particular Hazard Areas
Particular hazard Special regulations apply in areas at risk of fire or explosion areas Follow the appropriate national and international regulations. Devices for work in areas with increased electrical hazard (such as boilers) must be labeled with the symbol [S] (Safety). Measurements of toxic emissions when working with the device showed values below permissible "average workplace concentrations"... -
Page 11: Commissioning, Maintenance And Repair
Copyright Copyright of these Operating Instructions remains with the manufacturer. Text and illustrations were accurate at the time of printing. Fronius reserves the right to make changes. The contents of the Operating Instructions shall not provide the basis for any claims whatsoever on the part of the purchaser. If you have any suggestions for im- provement, or can point out any mistakes that you have found in the Operating Instruc- tions, we will be most grateful for your comments. -
Page 12: General Information
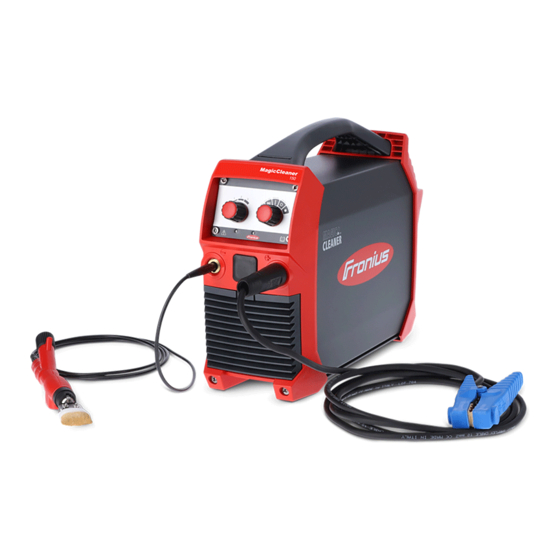
MagicCleaner 150 Intended use The MagicCleaner 150 is intended exclusively for the electrochemical cleaning of stain- less steel. Any other use is deemed to be "not in accordance with the intended purpose." The manufacturer shall not be liable for any damage resulting from such improper use. -
Page 13: Scope Of Supply
(12) (8) (9) (10) Brush insert Cleaning torch Cleaning torch holder Cleaning torch cable MagicCleaner 150 Grounding cable with bayonet connector Cleaning electrode 10 mm / 0.39 inch 3 x cleaning felt 10 mm / 0.39 inch Cleaning electrode 22 mm / 0.87 inch... -
Page 14: Options
Options (10) (13) (14) (11) (12) (15) Adapter for cleaning brush 10 x cleaning felt 42,0510,0531 22 mm / 0.87 inch / 70° 42,0510,0503 5 x cleaning brush 42,0510,0510 Cleaning electrode 10 mm / 0.39 inch / 70° Cleaning electrode 42,0510,0508 22 mm / 0.87 inch 42,0510,0500... - Page 15 (13) 6 x cleaning electrolyte blue 0.1 l 42,0510,0381 (14) 6 x cleaning electrolyte red 0.1 l 42,0510,0380 (15) Neutralizer 1 l spray bottle ...42,0510,0385 5 l canister ... 42,0510,0386...
-
Page 16: Transport Information
5 x O-ring (for attaching the Print felt to the Print electrode) (25) 20 x Print felt (26) Print film (option, to be ordered separately from Fronius) Transport inform- IMPORTANT! Before transport: ation Unscrew the cleaning electrolyte Empty hand pump... -
Page 17: Setup Regulations
L2 = 0 to 15A IP23 P1max = 450W Duty (%) = 0 to 80% FRONIUS INTERNATIONAL GMBH Froniusplatz 1, A-4600 Wels, Austria Phone: +43 (0)7242 241-0 Rating plate and warnings on the device Use eye protection / safety goggles... -
Page 18: Operating Controls, Connections And Mechanical Components
Operating controls, connections and mechanical components Safety WARNING! Danger due to incorrect operation. This can result in severe personal injury and damage to property. ▶ Do not use the functions described here until you have fully read and understood the Operating Instructions. - Page 19 Controller operating mode AC ... CLEAN - for cleaning welds DC ... POLISH - for polishing welds I ... BRUSH - to use the cleaning brush (for example with narrow or difficult to access components) • ... PRINT - dark print o ...
-
Page 20: Safety Instructions For Commissioning, Operation, And Maintenance
Safety Instructions for commissioning, operation, and maintenance Read and follow The following Safety Instructions provide information about dangers that occur when the Safety In- working with and on the device. structions! IMPORTANT! Read and follow these Safety Instructions carefully before and during all installation, cleaning, polishing, printing, and maintenance activities! Follow the safety rules below when carrying out all tasks described in this docu- ment! - Page 21 Damage to the workpiece and cleaning electrode or Print electrode may result. As soon as the mains cable of the MagicCleaner 150 is connected to the grid and the device is switched on, current flows through the cleaning electrode, cleaning brush or Print electrode.
- Page 22 NOTE! A short circuit between the bare cleaning or print electrode and the workpiece can impair the cleaning result, the print result, and/or the surface of the workpiece! ▶ Make sure that the cleaning or Print felt does not have any holes or chafed areas ▶...
-
Page 23: Mounting The Cleaning Electrode
Mounting the cleaning electrode Overview The following cleaning electrodes are available for cleaning and polishing: 10 mm / 0.39 inch / 70° 10 mm / 0.39 inch 22 mm / 0.87 inch 22 mm / 0.87 inch / 70° 35 mm / 1.38 inch... -
Page 24: Mounting The Cleaning Electrode
Mounting the cleaning elec- trode IMPORTANT! When inserting the cleaning electrode, make sure that the plastic tube (*) is inserted into the hole (**) on the cleaning torch. 2,5 Nm 1.84 lb-ft... -
Page 25: Attaching The Supplied Cleaning Felt To The Cleaning Electrode
Attaching the The MagicCleaner 150 is supplied with 3 cleaning felts each for the two cleaning elec- supplied cleaning trodes in sizes 10 mm / 0.39 inch and 22 mm / 0.87 inch. felt to the clean- These cleaning felts are manufactured in the form of a pocket and are slid over the ing electrode cleaning electrodes. -
Page 26: Mounting The Optionally Available Cleaning Felt
Alternative mounting option if cleaning felt other than the felt supplied is used for the 22 ing felt by means mm / 0.87 inch cleaning electrode. of torch holder - 22 mm / 0.87 inch cleaning elec- trode Other cleaning felt, O-rings, and wide rub- ber rings are optionally available from Fronius. -
Page 27: Mounting Cleaning Felt By Means Of Torch Holder - 10 Mm / 0.39 Inch Cleaning Electrode
Alternative mounting option if cleaning felt other than the felt supplied is used for the 10 ing felt by means mm / 0.39 inch cleaning electrode. of torch holder - 10 mm / 0.39 inch cleaning elec- trode Other cleaning felt, O-rings, and wide rub- ber rings are optionally available from Fronius. -
Page 28: Mounting Cleaning Felt By Means Of O-Ring - 35 Mm / 1.38 Inch Cleaning Electrode
Mounting option of the cleaning felt for the 35 mm / 1.38 inch cleaning electrode. ing felt by means of O-ring - 35 mm / 1.38 inch cleaning elec- trode Other cleaning felt, O-rings, and wide rubber rings are optionally available from Fronius. -
Page 29: Mounting The Cleaning Brush
Mounting the cleaning brush Mounting the cleaning brush IMPORTANT! When inserting the cleaning brush, make sure that the plastic tube (*) is inserted into the hole (**) on the cleaning torch. IMPORTANT! The fibers of the cleaning brush must not protrude more than 15 mm / 0.59 inch from the brush housing. -
Page 30: Readjusting The Cleaning Brush
Readjusting the NOTE! cleaning brush If the fibers are worn or short, push the brush housing towards the cleaning torch. ▶ Only push the brush housing back when the cleaning brush is mounted on the cleaning torch. ▶ The first few times you push the brush housing back this may require more force. -
Page 31: Preparing The Workstation
Preparing the workstation Connecting the grounding cable and cleaning torch cable Preparing the NOTE! workstation Prepare the workstation in such a way that the cleaning, polishing or Print process and the final operations do not have to be interrupted. ▶ Prepare an acid-resistant collection tray for excess or dripping cleaning or Print elec- trolyte ▶... -
Page 32: Before Using The Cleaning Torch For The First Time
Before using the NOTE! cleaning torch for the first time The cleaning torches are tested and filled with glycol before delivery. ▶ Before using for the first time, pump out the cleaning torch well with the hand pump to remove any glycol residues. -
Page 33: Cleaning
Cleaning Screwing the WARNING! cleaning electro- lyte onto the Danger due to improper use! cleaning torch This can result in serious personal injury, damage to property and the environment. ▶ Observe the safety data sheets of the cleaning electrolytes! ▶ Observe Safety Instructions from page 20! The following cleaning electrolytes are available for cleaning purposes: Cleaning electrolyte blue 0.1 l... -
Page 34: Placing The Cleaning Torch In The Cleaning Torch Holder
Placing the clean- Place the cleaning torch with mounted cleaning electrode in the cleaning torch holder ing torch in the cleaning torch holder Place cleaning torch with mounted cleaning brush in cleaning torch holder Cleaning... - Page 35 AC / CLEAN ... for cleaning by means of cleaning With increasing cleaning power, higher cleaning electrode speeds are possible. BRUSH ... for cleaning by means of a cleaning brush Press the hand pump 4 to 5 times at intervals of 2 to 3 seconds each time it is used for the first time 2 - 3 sec.
-
Page 36: After Cleaning
NOTE! Observe the following points for smooth cleaning operation: ▶ Press the hand pump every 2 to 3 seconds to deliver cleaning electrolyte. More cleaning electrolyte is required with a higher cleaning power, because the cleaning electrode and workpiece become hotter and the cleaning electrolyte evap- orates more quickly. - Page 37 IMPORTANT! For an optimal cleaning result, remove the excess cleaning electrolyte to avoid white spots due to cleaning electrolyte residues. Subsequently clean the surface with the neutralizer. * Excess cleaning electrolyte ** New microfiber cloth IMPORTANT! Do not dispose of cloths wetted with cleaning electrolyte in household waste! Dispose of cloths wetted with cleaning electrolyte in accordance with regional regu- lations! Observe the safety data sheets of the cleaning electrolytes!
-
Page 38: Polishing
Polishing General WARNING! Danger due to improper use! This can result in serious personal injury, damage to property and the environment. ▶ Observe the safety data sheets of the cleaning electrolytes! ▶ Observe Safety Instructions from page 20! Electrochemical polishing of welds is carried out with: Cleaning electrolyte red 0.1 l 42,0510,0380 Supply of the cleaning electrolyte via the cleaning torch and the hand pump. -
Page 39: Polishing
Polishing Requirement: Cleaning electrode and cleaning felt mounted on the cleaning torch (see from page 24) Cleaning electrolyte red 0.1 l screwed onto the cleaning torch (see from page 33) DC / POLISH ... Polishing Polishing with maximum power... -
Page 40: After Polishing
NOTE! ▶ When polishing with the cleaning elec- 2 - 3 sec. trode, apply slight pressure to the weld. After polishing Switching off the device IMPORTANT! For an optimal cleaning result, subsequently remove the excess cleaning electrolyte to avoid white spots due to cleaning electrolyte residues. Finally, clean the surface with the neutralizer. - Page 41 IMPORTANT! Do not dispose of cloths wetted with cleaning electrolyte in household waste! Dispose of cloths wetted with cleaning electrolyte in accordance with regional regu- lations! Observe the safety data sheets of the cleaning electrolytes!
-
Page 42: Printing
Observe the safety data sheets of the print electrolytes! ▶ Observe Safety Instructions from page 20! With the MagicCleaner 150, it is possible to apply electrochemical surface prints to stain- less steel. Logos, graphics, texts, numbers, etc. can be printed on the surface using a customizable Print film. -
Page 43: Mounting The Print Electrode And Print Felt
O-ring (10) 20 x Print felt (11) Print film (option, to be ordered separately from Fronius) Mounting the Print electrode and Print felt... -
Page 44: Preparing The Workstation For Printing
Preparing the For further preparation steps, see "Preparing the workstation" from page 31. workstation for Printing... -
Page 45: Printing
Printing Print - dark print Print - light print The power for the Print process is auto- matically preset by the device; the settings on the cleaning power control have no in- fluence on the Print process. IMPORTANT! Use the correct Print electrolyte depending on the Print process: Print electrolyte black 0.1 l ... -
Page 46: After The Print Process
NOTE! When using a new Print film or when changing the Print operating mode, carry out a test print! Position and secure the Print film on the workpiece to be printed Pass the Print electrode with Print felt sev- eral times over the Print film After the Print process... - Page 47 As an alternative to the neutralizer, a microfiber cloth moistened with clear water can be used. New, dry microfiber cloth...
- Page 48 New, dry microfiber cloth - clean both sides of the Print film; clear water can be used as an alternative to the neutralizer.
-
Page 49: Service, Maintenance And Disposal
Service, maintenance and disposal General The MagicCleaner 150 requires minimal service and maintenance under normal operat- ing conditions. However, several points must be observed in order for the device to re- main operational for years to come. WARNING! Danger due to improper use! This can result in serious personal injury, damage to property and the environment. - Page 50 collection and disposal system. Proper disposal of the used device promotes sustainable recycling of material resources. A failure to observe this may lead to potential health/ environmental impacts...
-
Page 51: Technical Data
Technical data MagicCleaner Grid voltage ~ 1 x 230 V 150 /EF Mains voltage tolerance -15 / +10% 150 /CN 150 /np Grid frequency 50 / 60 Hz Mains fuse protection 6.3 A slow-blow Max. primary power 500 VA Output current Max. -
Page 52: Magiccleaner 150 Mv/B 150 Mv/Np
MagicCleaner Grid voltage ~ 1 x 100 - 110 V 150 MV/B Mains voltage tolerance -15 / +10% 150 MV/np Grid frequency 50 / 60 Hz Mains fuse protection 6.3 A slow-blow Max. primary power 500 VA Output current Max. 15 A Output voltage 10 V 30 V... - Page 56 SPAREPARTS ONLINE Fronius International GmbH Froniusstraße 1 4643 Pettenbach Austria contact@fronius.com www.fronius.com Under www.fronius.com/contact you will find the adresses of all Fronius Sales & Service Partners and locations.
Need help?
Do you have a question about the MagicCleaner 150 and is the answer not in the manual?
Questions and answers