Advertisement
Quick Links
80 MIN
APPROXIMATE
ASSEMBLY TIME
Maintenance skills
1.Use a clean and soft cloth to remove dust regularly; do not use solvents;
2.If you are in a humid environment for a long time, you must ventilate
and exhaust moisture to avoid the furniture from being immersed in ater;
3.Keep away from high temperature sources such as stoves, radiators, etc.
to prevent the furniture from deforming.
Climbing Prohibit
2 PERSON ASSEMBLY
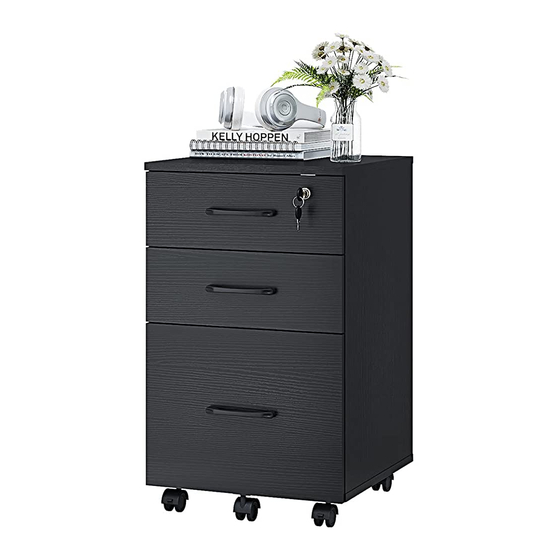
3-Drawer Wood Mobile File Cabinet
MWJG-9 Assembly Manual
MWJG-09 Assembly Manual
Number of
packages
2
1
01/26
REQUIRED
ASSEMBLY SPACE
FLOOR AREA1M x 2M
2
2 M
Tools needed:
Crosshead
Screwdriver
Hammer
Advertisement

Related Manuals for panana MWJG-09


Summary of Contents for panana MWJG-09
- Page 1 MWJG-09 Assembly Manual REQUIRED Number of ASSEMBLY SPACE packages 80 MIN FLOOR AREA1M x 2M APPROXIMATE ASSEMBLY TIME 2 PERSON ASSEMBLY Maintenance skills 1.Use a clean and soft cloth to remove dust regularly; do not use solvents; 2.If you are in a humid environment for a long time, you must ventilate and exhaust moisture to avoid the furniture from being immersed in ater;...
- Page 2 If you have any issue regarding the product, please contact us; The paper version is not clear, please contact customer service to obtain the electronic version. NOTE ① Safe carriage,multi-people are needed. Home&Garden ② Handle with care,protective layer is required. ③ In case of any doubts,contact Panana. 02/26...
-
Page 3: Exploded View
MWJG-09 Assembly Manual Exploded View ⑧ ⑩ ⑨ ② ⑦ ⑯ ④ ⑩ ⑧ ① ⑨ ⑦ ⑥ ③ ⑮ ⑬ ⑤ ⑭ ⑫ ⑪ It is recommended to install on soft pads such as carpets Note: The accessories list is classified by the smallest packaging unit, and the kit accessories represent the matching accessories and are packed in a separate package. -
Page 4: Panel List
MWJG-09 Assembly Manual Panel List Please check the panel list before installation. Item Item Reference Image Qty. Reference Image Qty. ① ⑨ ⑩ ② ⑪ ③ ⑫ ④ ⑬ ⑤ ⑭ ⑥ ⑮ ⑦ ⑯ ⑧ 04/26... -
Page 5: Accessories List
MWJG-09 Assembly Manual Accessories List Please check the Accessories list before installation. Item Item Reference Image Qty. Reference Image Qty. Cam Lock Nuts Kit Corner Guard Kit Cam Lock Nuts Lockable casters Mini Cam Lock Nuts 360°swivel casters WoodDowel File Lever... -
Page 6: Important Precautions
MWJG-09 Assembly Manual IMPORTANT PRECAUTIONS Use Accessory "N" 3-Section Ball Bearing Drawer Slide Rail Kit Drawer side panel Drawer side panel IMPORTANT PRECAUTIONS Match the pre-drilled lead holes, and then fix them with screws; (all accessory of our products can use this method) Drawer 12.7mm/0.5in... - Page 7 MWJG-09 Assembly Manual IMPORTANT PRECAUTIONS Use Accessory "E" Bottom-Mount Drawer Slide Kit Drawer side panel Drawer side panel Drawer 12.7mm/0.5in 12.7mm/0.5in Side Side panel panel E(A)R E(B)R E(A)L E(A) E(B)L Fixed on the side panel of the cabinet E(A) E(B)
- Page 8 MWJG-09 Assembly Manual IMPORTANT PRECAUTIONS Use Cam Screws 、 Cam Lock Nuts 、 Dowel Kit(a) Cam Screws .Screw the into the pre-drilled holes in the panel. Disassembly Pre-drilled Hole Cam Screws The thread is fully and vertically screwed in Panel A...
- Page 9 MWJG-09 Assembly Manual IMPORTANT PRECAUTIONS Use Cam Screws 、 Cam Lock Nuts 、 Dowel Kit(b) Join the panels:In the Panel B, insert and align the cam lock. and then Turn the cam lock. Cam Screws Hole Insert Cam Lock Nuts...
- Page 10 MWJG-09 Assembly Manual Pre-drilled ②x1 Direction mark 10/26...
- Page 11 MWJG-09 Assembly Manual Note: The direction is based on the normal placement of the product as a reference. F 18X E(A) 2X N(A) 1X Pre-drilled E(A)L When installing, please make sure that the screws are flat and not skewed; otherwise, the drawer will not be perfectly assembled.
- Page 12 MWJG-09 Assembly Manual IMPORTANT PRECAUTIONS After the previous step is completed, please check whether the accessories are in the position as shown in the figure, if not, please adjust them in time to prevent installation failure! E(A) 13th E(A) 13th Dimensions unit: mm (1in=1mm/25.4)
- Page 13 MWJG-09 Assembly Manual D 8X ③x1 ①x1 13/26...
- Page 14 MWJG-09 Assembly Manual B 4X ③x1 ①x1 Direction mark Notch alignment ②x1 14/26...
-
Page 15: Installation
MWJG-09 Assembly Manual Installation ④ ④x1 ③x1 ①x1 Note: The direction is based on the normal placement of the product as a reference. 15/26... - Page 16 MWJG-09 Assembly Manual GX4 QX4 Direction mark Notch alignment Note: The direction is based on the normal placement of the product as a reference. 16/26...
- Page 17 MWJG-09 Assembly Manual How to use "J" LX16 "OPEN" "LOCK" Note: The direction is based on the normal placement of the product as a reference. 17/26...
- Page 18 MWJG-09 Assembly Manual ⑧x1 ⑦x1 Drawer installation Drawer installation STEP 1 STEP 2 ⑯x1 ⑯x1 Drawer installation Drawer installation STEP 3 STEP 4 E(B)R ⑩x1 E(B)L ⑨x1 E(B)L PULLEY BEHIND 18/26...
- Page 19 MWJG-09 Assembly Manual ⑧x1 ⑦x1 Drawer installation Drawer installation STEP 1 STEP 2 ⑥x1 ⑥x1 Drawer installation Drawer installation STEP 3 STEP 4 E(B)R ⑩x1 E(B)L ⑨x1 E(B)L PULLEY BEHIND 19/26...
- Page 20 MWJG-09 Assembly Manual ⑬x1 ⑫x1 Drawer installation Drawer installation STEP 1 STEP 2 ⑪x1 ⑪x1 Drawer installation Drawer installation STEP 3 STEP 4 N(B)L ⑮x1 N(B)R ⑭x1 N(B)R 20/26...
- Page 21 MWJG-09 Assembly Manual ⑯x1 Drawer placement ⑥x1 Drawer placement ⑪x1 setp 1 setp 2 Drawer placement Lower 21/26...
- Page 22 MWJG-09 Assembly Manual Top & Middle drawer Assembly Take out the connection 22/26...
- Page 23 MWJG-09 Assembly Manual Lower drawer installation Effect After Assembly 23/26...
- Page 24 MWJG-09 Assembly Manual IMPORTANT PRECAUTIONS How to remove the drawer. 24/26...
- Page 25 MWJG-09 Assembly Manual IMPORTANT PRECAUTIONS How to fine-tuning the cabinet. After installing the drawer, it is found that the panels cannot be aligned. Gently push the top panel of the cabinet to move it left and right until the drawer panel is flush;...
- Page 26 MWJG-09 Assembly Manual Corner Guard installation I KitX8 I Kit I Kit I Kit I Kit I Kit I Kit I Kit I Kit 26/26...