Advertisement
Quick Links
Advertisement

Related Manuals for Ogawa ACTIVO TREK PRO T8-1


Summary of Contents for Ogawa ACTIVO TREK PRO T8-1
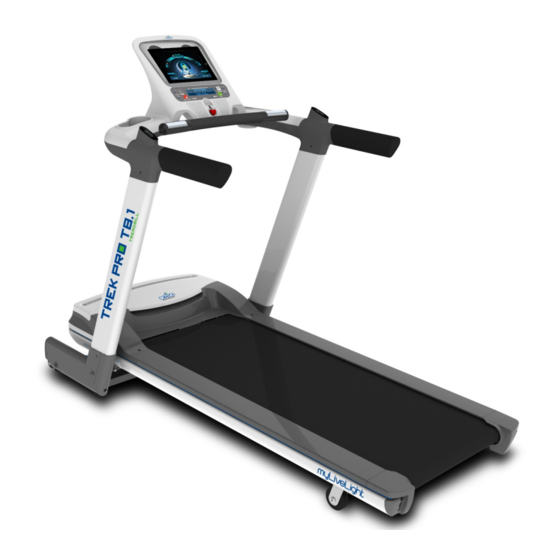
- Page 1 SERVICE MANUAL FOR: RUN 4.1-IWM-MP/AP Ogawa - ACTIVO_TREKPRO_T8-1...
- Page 2 Fold Up: Manual fold up with soft drop. Swing Arm Suspension: Yes Music Kit: Yes, MP3 input Bluetooth: Bluetooth 3.0+Bluetooth 4.0 BLE for AP type model Motion Control: Yes Hand Pulse Sensor: Yes Wireless Pulse Sensor: Polar 5.5KHz Receiver and chest belt transmitter not include/optional Power Requirement: 230vac ±...
-
Page 3: Parts List
Parts List Part No. Part name Quantity 101 Console housing‐upper 1 102 Console housing‐lower 1 103 Safety Key fix plate 1 104 Safety Key base 1 105 Safety Key 1 106 Loud speaker 2 107 Computer fixed frame 1 109 Pad soft cushion 1 110 iPad protection frame 1 112 Box holder‐upper‐Left 1 113 Box holder‐upper‐Right 1 114 Box holder‐lower‐Left 1 ... - Page 4 Part No. Part name Quantity 302 Elevation support Frame 1 303 Elevation support Frame cover‐Upper 2 304 Elevation support Frame cover‐Lower 2 ∮ 305 089 Spring 2.0X 14X4 1 306 Base Frame Rubber adjustment Cushion–Rear 36X10‐M8X25 2 307 Elevation support Frame ring cover‐Left 1 308 Transport wheel Bracket 1 309 Elevation support Frame ring cover‐Right 1 310 Transport wheel 3 311 Foot lock plastic cover 1 312 ...
- Page 5 Part No. Part name Quantity 404 Motor hood decorate strip‐Left 1 405 Motor hood decorate strip‐Right 1 406 Motor hood vent cover 1 408 Motor 1 409 Motor holder 1 410 Driving belt 1 412 Elevation motor gear sleeve assembly 1 416 Power switch board 1 501 Running belt 1 502 Running deck 1 503 Side rail 2 504 Side rail decorate strip 2 505 ...
- Page 6 Part No. Part name Quantity 604 Handle pluse sensor wire‐600mm 2 616 6PIN cable‐220mm 1 609 Motion control sensor wire‐red 600mm 1 608 Motion control sensor wire‐black 600mm 1 614 Grounding wire‐300mm 1 604 Elevation control board 1 605 Electric Protector 1 606 Electric Outlet 1 607 Power Switch 1 608 Computer assembly 1 701 Main frame 1 703 Rear Roller Tube+Shaft 1 704 Front Roller Tube+Shaft ...
- Page 7 Part No. Part name Quantity 809 Round head cross‐ screw M3X8 2 810 Button head inner hexagon M8X18 4 811 Button head inner hexagon M8X36 6 812 Locknut M10 6 ∮ 813 8X36 Bolt 1 814 M8 C‐clip 1 815 M5X14 screw/washer 2 817 Round head cross‐ screw M5X14 8 818 Inner hexagon M10X52 1 819 Button head inner hexagon M8X65 1 821 ...
- Page 8 Part No. Part name Quantity 836 Cross‐screw M8X25 4 837 Inner hexagon M6X70 1 838 Inner hexagon M6X55 2 ∮ 839 Washer 6X13X1.5 17 840 Button head inner hexagon M10X38X10 4 841 Shrapnel 21X13X0.7 2 844 M4X15 screw 10 845 M4X12 screw 27 848 Cross‐screw M8X30 10 849 4.2X16 Screw 2 852 ...
- Page 9 Parts Explosive Drawing 105 104 Page 4...
- Page 10 Page 5...
- Page 11 849 802...
-
Page 14: Wire Diagram
Wire Diagram... - Page 16 Tools require for service procedure Digitize display multi meter 17mm wrench 2pcs 13mm wrench 10mm wrench Phillips screwdriver 5mm Allen wrench 6mm Hex. L-Shape wrench 8mm Hex. L-Shape wrench 5mm Hex. wrench with T hand bar 10. 6mm Hex. wrench with T hand bar 11.
- Page 17 Remove Computer for RUN4.1 Step 1: Use Phillip screwdriver to open fix console PC board insert 2 screws. Step 2: Disconnect all connector on computer then remove the console PC board insert.
- Page 18 Remove Computer for RUN4.2 Step 1: Use Phillip screwdriver to open fix Step 2: Disconnect all connectors then remove console buttons panel 2 screws. buttons panel 2 screws. Step 2: Disconnect all connector on computer then remove the console display PC board insert.
- Page 19 Remove Motor Hood Step 2: Remove top motor hood Step 1: Use Phillip screwdriver to open top vent cover. motor hood vent cover 4 screws. Step 4: Use Phillip screwdriver to open 2 screws Step 3: Use Phillip screwdriver to open near both on the front motor botton cover.
- Page 20 Remove Main Control Board Step 1: Follow Remove Motor Hood instruction to remove the motor hood. Step 2: Use Phillip screwdriver to open fix low control board 2 screws then disconnect all connector on low control board. Step 3: Remove lower control board from frame.
- Page 21 Remove Drive Motor Step 1: Follow Remove Motor Hood instruction to remove the motor hood. Step 2: Use 17mm wrench to open drive motor Step 3: Remove the Drive Motor and motor bracket set. bracket tension nut, then remove washers and tension spring.
- Page 22 Remove Elevation Motor Step 1: Follow Remove Motor Hood instruction to remove the motor hood. Step 2: Use 17mm wrench and 6mm Allen wrench to open fix elevation bolt and nut on the frame then open bolt and nut on the elevation frame. Step 3: Remove elevation motor set.
- Page 23 Remove Front and Rear roller Step 1: Follow Remove Motor Hood instruction to remove the motor hood. Step 2: Use Phillip screwdriver to open both side rail Step 3: Remove both end covers. End covers then remove the cover. Step 3: Use 5mm Allen wrench to open fix rear roller Step 5: Use 5mm Allen wrench to open fix 2 bolts.
- Page 24 Remove Running Desk and Running Belt Step 1: Follow Remove Motor Hood instruction to remove the motor hood. Step 2: Follow Remove Front and Rear roller instruction to remove front and rear roller. Step 4: Use Phillip screwdriver to open fix running Step 3: Remove both side rail to frame end.
- Page 25 Lubricate Running belt and running desk ATTENTION: To lubricate between running belt and running desk in regular time and after running belt, running desk replacement, otherwise will cause driver DC motor and main control board burn out. Regular maintain lubricate: Every time maintain lubricate must additional silicon oil at least 20-25ml.
- Page 26 Lubricate after running desk replacement : After replace running belt must additional silicon oil at least 20-25ml. Before install new running desk, put new desk on the ground then pour down 20-25ml silicon oil by “S” track, then use a hairbrush to even wipe silicon oil on desk running face. Step 1: pour down 20-25ml silicon oil Step 2: Use hairbrush to even wipe silicon oil by “S”...
- Page 27 Install and adjust main control board When install a new main control board must adjust SPEED and AMP both VR at main control board before calibration SPEED from computer service set operation. Confirm the new control board voltage 230VAC correct. (see Fig.1 ). Before install a new main control board on unit frame, first adjust SPEED and AMP both VR (see Fig.2), all turn VR at middle.
- Page 28 Install and adjust elevation motor Before install a new elevation motor must confirm voltage and model correct from elevation motor label. (see Fig.1). When install a new elevation motor, first only fix new elevation motor rear body on unit main frame and connection all elevation motor wires on incline relay board.
- Page 29 Error Code Computer show “Err 2” while turn power on Switch power on and press INCLINE Up + INCLINE DOWN + STOP/ENTER button and hold them, then pull on emergency stop switch, computer show “1” blinking, use INCLINE UP and INCLINE DOWN to select computer show “2” blinking, then press START button to enter the Incline Calibration Procedure.
- Page 30 Engineer mode Setting Conversion console display in Metric(km) or English(ml) Switch the power on, press and hold START button and hold them, then pull up the safety key, console will display “KM” or “ML”, use START button to select between “KM”...
- Page 31 Speed Calibration Enter Engineer mode. Press INCLINE UP and DOWN button to select computer display shows “3” then press START button to enter the Speed Calibration Procedure. Speed display shows “0.5”mph or “0.8”kph. Press SPEED UP and DOWN button to adjust the actual speed and measure the belt speed by speed meter then press STOP/ENTER button to set the lowest speed.
- Page 32 SLEEP / DISPLAY Mode When the power is ON the computer will automatically enter SLEEP MODE if it is left idle for 3 minutes without receiving any input. Press any button to return to POWER ON status when the computer is in the SLEEP MODE. To cancel the SLEEP MODE feature using the DISPLAY MODE and always keep the console display on, pull out the safety key, press and hold the SPEED UP and DOWN buttons, insert the safety key to power on the treadmill.
- Page 33 Treadmill circuit Diagram RUN4.1-IWM-MP/AP Ground AC230V SOCKET AC IN 230v 5% Ground Model:GMD105-04-1B Count. 1.25H P / Peak 2.5H P DC 180v 4800rpm Motor BREAKER Elevation Motor Model: L2 10Amp AC 230V Model: EMO-J09-31-230 Switch ON/OFF Power DOWN B R W ACIN Transformer 220V...
- Page 34 RUN4.2-IWM-MP/AP Ground AC230V SOCKET AC IN 230v 5% Ground Model:GMD105-04-1B Count. 1.25H P / Peak 2.5H P DC 180v 4800rpm Motor BREAKER Elevation Motor Model: L2 10Amp AC 230V Model: EMO-J09-31-230 Switch ON/OFF Power DOWN B R W ACIN Transformer 220V Yun Yong INPU T AC 220V...
- Page 35 Trouble Shooting Electro-meter icon test instruction: Test AC voltage Test DC voltage Test electric resistance Press START button Press START button then continuous at 0.8kph(0.5mph) speed. adjust speed to top speed.
- Page 36 NO DISPLAY REPAIR-1 230 VAC CHECK HOME SWITCH ON AT OUTLET CIRCUIT BREAKER IS SAFETY KEY PULL UP ? IS POWER IS AC LIGHT SWITCH ON ? ON SWITCH ? REPLACE POWER CORD PULL UP SAFETY KEY CHECK 8PIN OR REPLACE CONNECTION AT RELAY BOARD CHECK VOLTAGE...
- Page 37 NO DISPLAY REPAIR-2 Fig. 2: Check voltage across circuit breaker. Fig. 1: Is circuit tripped ? press button to reset. Fig. 3: Check voltage across switch. Fig. 4: Check voltage L1, L2 at main control board. Fig. 5: Check voltage from pin 17v 10v, test pin 10v at main control board.
- Page 38 NO BELT MOVEMENT REPAIR-1 IS COMPUTER CHECK COMPUTER BUTTON PC BOARD SPEED DISPLAY 0.8kph(0.5mph) OR REPLACE COMPUTER WHEN PRESS START BUTTON ? GOOD CHECK DC VOLTAGE FROM 8PIN OF ACROSS PIN3 AND PIN7 AT INCLINE RELAY CHECK 8PIN ASSEMBLE BOARD LOOK FOR INCREASE CONNECTOR AND 8PIN WIRE AS FAST BUTTON...
- Page 39 NO BELT MOVEMENT REPAIR-2 Fig. 1: Check DC voltage from 8pin of across pin3 Fig. 2: Check DC voltage from 6pin of and pin7 at incline relay board check for increase as across pin4 and pin5 at main control fast button is pressed. board check for increase voltage as press SPEED UP button is pressed.
- Page 40 ELEVATION MALFUNCTION UNIT INCLINED NOT UNIT INCLINED CAN NOT UNIT INCLINED GO UP AWAY MOVEMENT LOST CONTROL TO UPPER LIMIT ? LOST CONTROL RECONNECT RECONNECT REST AND COOL DOWN IS INCLINE CN10,11,9 CHECK VR 3PIN CN4 IS ELEVATION MOTOR PLUGS SECURE AT INCLINE CONNECTION AT STOP WORK CAUSE OVERWORK RELAY BOARD...
- Page 41 HEART RATE(HR) NOT FUNCTIONING/ ERRATIC READING HAND PLUSE WIRELESS CHEST BELT BOTH HEART RATE NOT FUNCTIONING NOT FUNCTIONING NOT FUNCTIONING RECONNECT RECONNECT REPLACE BATTRY IS CHEST BELT IS LOOSE CONNECTION ON BATTRY LOW ? HEART RATE RECEIVER ? CHECK HAND PLUSE CONNECTOR GOOD REPLACE CHEST STRAP...
Need help?
Do you have a question about the ACTIVO TREK PRO T8-1 and is the answer not in the manual?
Questions and answers