Table of Contents
Advertisement
Quick Links
Advertisement
Table of Contents

Related Manuals for Ronbow SIGNATURE E016127


Summary of Contents for Ronbow SIGNATURE E016127
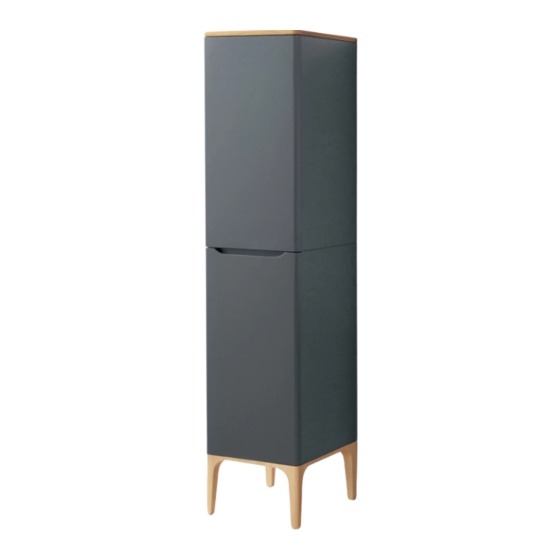
- Page 1 INSTALLATION AND CARE GUIDE 71” TALL WIDE SIDE CABINET E016127...
- Page 2 Designed By: PHOENIX DESIGN | GERMANY PRE-INSTALLATION Tools Required Materials Included drywall screws wood screws pair of anti-tip hardware NOTE: For safety reasons it is highly recommended, but not required to install the anti-tip hardware. INSTALLATION SHEET ronbow.eu | ronbow.com 160825...
- Page 3 Place the matching ends on the back of the cabinet and fasten using the wood screws. Step 7: Zip tie the anti-tip hardware together. Figure 2. Leveler Step 8: Adjust the leg levelers as needed. Figure 2. INSTALLATION SHEET ronbow.eu | ronbow.com 160825...
- Page 4 Locate the screw pictured in Figure 6. Turn the screw clockwise or counter- clockwise to move the door from top to bottom. See Figure 6. Height NOTE: When adjusting the door hinges keep in mind to adjust the other hinges. INSTALLATION SHEET ronbow.eu | ronbow.com 160825...
- Page 5 These variations are considered to be the nature of the material in relation to their environmental exposure and may be significant over a long period of time. The effectiveness of cleaning Ronbow product is dependant on various factors that include sunlight, smoke, moisture, household cleaners and/or amount of cleaning product used over time.
- Page 6 160825 40650 Encyclopedia Circle T 510.713.1188 Fremont, CA 94538 F 510.657.9388 ronbow.eu | ronbow.com...
Need help?
Do you have a question about the SIGNATURE E016127 and is the answer not in the manual?
Questions and answers