
Subscribe to Our Youtube Channel
Related Manuals for Safran STIM300


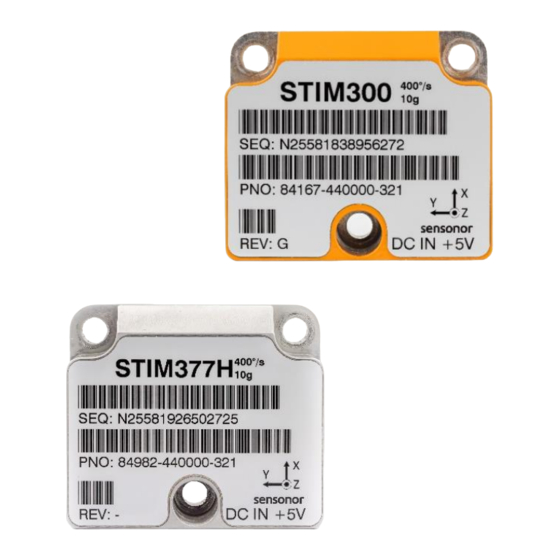
Summary of Contents for Safran STIM300
- Page 1 USER MANUAL EvaluationTools STIM300 STIM377H Evaluation Kit STIM300 STIM377H Evaluation kit User Manual DOK453 rev.2 Page 1 of 29...
-
Page 2: Table Of Contents
Connecting the USB EVK to your PC ......................9 4.2.3 Verification and configuration of serial driver ....................9 .......................... 12 NSTALLATION OF SOFTWARE CONNECTING THE STIM300/STIM377H TO YOUR PC ..................12 USING PC SOFTWARE ............................13 INTRODUCTION TO PC SOFTWARE ........................19 .............................. 19 ANELS OVERVIEW 7.1.1 Service mode panel ........................... -
Page 3: Evk Features
STIM300/STIM377H EVK USB General descriptions The evaluation kits provide measurement and configuration access to STIM300/STIM377H IMU. Configuration, graphical result presentation and saving data to file functions are supported. The single voltage supply required for the gyro module operation is provided from an USB port. -
Page 4: Wiring Diagrams
USER MANUAL EvaluationTools STIM300 STIM377H Evaluation Kit 1.1.1 Wiring diagrams D-SUB 10 - RxD+ 2 - RxD- 1 - TxD- 9 - TxD+ 15 - GND 8 - VSUP 13 - GND 6 - AUX_GND 14 - AUX+ 7 - AUX-... -
Page 5: Configurable And Readable Parameters
Detailed diagnostic information includes RAM and flash checks, stack handling checks, status of internal voltage supply references, and various parameter reports for each measurement axis are available from the supported SERVICE mode. Note: Time of Validity (TOV) and external trigger functionalities of STIM300/STIM377H are not supported by the EVK PC-software. Kit contents ... -
Page 6: Getting Started
USER MANUAL EvaluationTools STIM300 STIM377H Evaluation Kit Getting started Preparing your system involves the following steps: NI Serial Driver installation Serial Driver verification EVK PC Software installation PCI card installation Figure 3: Installation, PCIe Figure 4: Installation, USB DOK453 rev.2... -
Page 7: Pcie Installation
USER MANUAL EvaluationTools STIM300 STIM377H Evaluation Kit PCIe installation 4.1.1 Installation of PCIe to RS422 serial driver Install the serial driver from the memory stick included in the kit. This procedure is self-instructive. Follow the on- screen messages without doing any configuration changes. -
Page 8: Installation Of Pcie Card
Verify that the serial driver installation has completed successfully. An example is shown in Figure 7. Make a note of the assigned COM port value(s) information. This will be needed later for connecting to the STIM300/STIM377H from the PC software. Figure 7: COM port assignments for PCI/PCIe card cable in Windows 7 DOK453 rev.2... -
Page 9: Usb Installation
USER MANUAL EvaluationTools STIM300 STIM377H Evaluation Kit USB installation 4.2.1 Installation of FTDI serial driver To install the drivers for the FTDI serial driver under Windows, follow the instructions below: Connect the USB-RS422 plug to a spare USB port on your PC. Figure 8 shows how to connect the EVK to a ... - Page 10 Figure 9: COM port assignments for USB cable in Windows 7. Make a note of the assigned COM port value(s) information. This will be needed later for connecting to the STIM300/STIM377H from the PC software. Right-click "USB Serial Port (COM<n>)" and select "Properties"...
- Page 11 USER MANUAL EvaluationTools STIM300 STIM377H Evaluation Kit Figure 11: Settings for COM port Set the "Receive (Bytes)" and Transmit (Bytes) settings to 256. Press OK twice. The computer may have to be restarted for the changes to take effect. DOK453 rev.2...
-
Page 12: Installation Of Pc Software
Error! Reference source not found. (PCIe) and Error! Reference source not found. (USB) shows how to connect e EVK to a PC Figure 12: Connecting the STIM300/STIM377H to the computer via PCIe Figure 13: Connecting the STIM300/STIM377H to the computer via USB DOK453 rev.2... -
Page 13: Using Pc Software
STIM300 STIM377H Evaluation Kit Using PC software 1. Navigate to the ‘STIM evaluation tools’ folder from Windows start menu. Click on the shortcut named "STIM300 STIM377H EVK" to start the PC software. For full functionality, the computer user should have Local Administrator rights. - Page 14 USER MANUAL EvaluationTools STIM300 STIM377H Evaluation Kit 3. A pop-up window containing the End User License Agreement appears. Click the “Accept” button to accept the agreement and enable the EVK software to have full functionality. Figure 16: EULA confirmation window 4.
- Page 15 USER MANUAL EvaluationTools STIM300 STIM377H Evaluation Kit Figure 17: Welcome message and software registration 5. The Normal mode panel is shown Figure 18: Normal mode panel after selecting INI-file 6. Verify the correct COM port settings in the Parameters view. If needed port # setting needs to be changed, do this by double clicking on the value and enter correct value.
- Page 16 USER MANUAL EvaluationTools STIM300 STIM377H Evaluation Kit Figure 19: Edit the INI-file in order to verify correct COM port settings 7. From the Normal mode panel, connect to and open the COM port by pressing the ‘Connect to HW’ button. A...
- Page 17 USER MANUAL EvaluationTools STIM300 STIM377H Evaluation Kit 8. Click on the the ’Initiate power-on sequence’ control switch so it switches position to ’On’. Do not insert the power supply cable at this point. The pop-up message asking for confirmation of bitrate appears. Press OK.
- Page 18 USER MANUAL EvaluationTools STIM300 STIM377H Evaluation Kit Figure 22: Confirm power supply is switched on 10. A green LED (Data arriving from device n) indicates that data is received from the gyro module(s). Verify the communication to module by clicking on the ‘Request serial# DG’ button. An example of such a result is shown in Figure 17.
-
Page 19: Introduction To Pc Software
USER MANUAL EvaluationTools STIM300 STIM377H Evaluation Kit Introduction to PC software Panels overview In addition to the Normal mode and Parameters panel, other panels are also available: 7.1.1 Service mode panel Figure 24: Service mode panel DOK453 rev.2 Page 19 of 29... -
Page 20: Utilty Mode Panel
USER MANUAL EvaluationTools STIM300 STIM377H Evaluation Kit 7.1.2 Utilty mode panel Figure 25: Utility mode panel 7.1.3 Measure panel Figure 26: Measure panel DOK453 rev.2 Page 20 of 29... -
Page 21: Logging Panel
USER MANUAL EvaluationTools STIM300 STIM377H Evaluation Kit 7.1.4 Logging panel Figure 27: Logging panel (for saving data to file) DOK453 rev.2 Page 21 of 29... -
Page 22: Main Panel Menu
USER MANUAL EvaluationTools STIM300 STIM377H Evaluation Kit Main panel menu Menu Description ‘File’ → ‘New parameter file’ Creates a new INI-file with default settings. Note that the new INI-file must be edited to match the hardware and gyro module configuration settings. -
Page 23: Utility Mode Panel
Table 5: Service mode panel descriptions Utility mode panel Utility mode is used for configuration and communication with the STIM300/STIM377H through a machine-to-machine interface. Utility mode is entered by clicking on the Utility mode tab after the IMU has been powered up. Utility mode usage, functionalities and descriptions are listed in Table 6. - Page 24 USER MANUAL EvaluationTools STIM300 STIM377H Evaluation Kit When set to ‘Absolute’, all results are plotted as received. When set to ‘Relative’ Relative and absolute toggle switch the curves are translated so that the first measurement is shown in the plot as zero.
- Page 25 USER MANUAL EvaluationTools STIM300 STIM377H Evaluation Kit ACC_X Accelerometer signal X-axis ACC_Y Accelerometer signal Y-axis ACC_Z Accelerometer signal Z-axis ACC_STS Status-byte for accelerometer ACC_TMP_X Temperature, X-axis accelerometer ACC_TMP_Y Temperature, Y-axis accelerometer ACC_TMP_Z Temperature, Z-axis accelerometer ACC_TMP_STS Accelerometer temperature status INC_X...
-
Page 26: Logging Panel
USER MANUAL EvaluationTools STIM300 STIM377H Evaluation Kit Logging panel Panel content Functionality and description Start button Starts data logging Stop button Stops data logging User can select between “Manually”, “No of samples” and “Time Stop criteria slide elapsed” for stopping a measurement series... -
Page 27: Binary File Description
USER MANUAL EvaluationTools STIM300 STIM377H Evaluation Kit Voltage on output of power supply [V] Voltage output on external power supply (optional). Default value is 5.1 V. Value should be within the supply voltage range of the gyro module. See product datasheet for details Current limit on output of power [A] Current limitation on external power supply (optional). - Page 28 USER MANUAL EvaluationTools STIM300 STIM377H Evaluation Kit Failed to acquire the requested number of datagrams from the gyro Unable to synch with DG-stream ! module, unable to get in synch with datagram stream Failed to print the graph, check that a printer is configured...
- Page 29 Safran reserves the right to make changes without further notice to any products herein. Safran makes no warranty, representation or guarantee regarding the suitability of its products for any particular purpose, nor does Safran assume any liability arising out of the application or use of any product or circuit, and specifically disclaims any and all liability, including without limitation consequential or incidental damages.
Need help?
Do you have a question about the STIM300 and is the answer not in the manual?
Questions and answers