Table of Contents
Advertisement
Quick Links
Advertisement
Table of Contents
Troubleshooting

Related Manuals for Steak Locker SL100 STUDIO EDITION


Summary of Contents for Steak Locker SL100 STUDIO EDITION
- Page 1 SL100 S TUDIO DITION SL150 H DITION SL520 P DITION...
- Page 2 SL100 Studio SL520 Home SL520 Pro Dimensions: Dimensions: Dimensions: D 21.45 x W 15.55 x H 34.44 in D 22.56 x W 23.42 x H 32.28 in D26.77 x W 23.43 x H 73.43 (D545xW395xH875) mm (D573xW595xH820) mm D68 x W595 x H1865 mm Capacity: Capacity: Capacity:...
-
Page 3: Table Of Contents
TABLE OF CONTENTS INSTALLATION INSTRUCTIONS SL100 STUDIO EDITION - COMPLETE OVERVIEW SL100 STUDIO EDITION – OPERATING ELEMENTS & DISPLAYS SL100 STUDIO EDITION – MEASURMENTS & CLEARANCES SL150 HOME EDITION - COMPLETE OVERVIEW SL150 HOME EDITION - OPERATING ELEMENTS & DISPLAYS SL150 HOME EDITION –... -
Page 4: Installation Instructions
INSTALLATION INSTRUCTIONS: Setup location Keep proper distance between the equipment and surrounding objects. To ensure the smooth flow of air around the locker, when the machine is installed into a cabinet space, leave enough space on both sides, top and the back to the wall. - Page 5 Handle Bar Installation; SL100 Studio, SL150 Home, SL520 Pro All lockers include the Handle Bar and two supplied screws. To install, slide the rubber gasket on the inside of the door to view the predrilled holes, then use a Phillip head screw driver to set into place.
-
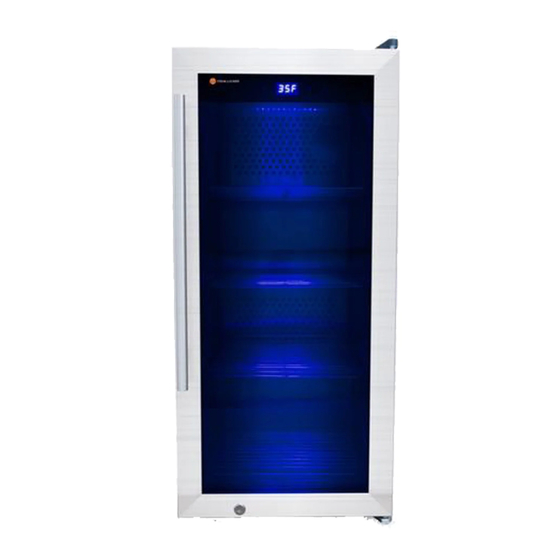
Page 6: Sl100 Studio Edition - Complete Overview
SL100 STUDIO EDITION - COMPLETE OVERVIEW: 1. Carbon Filter 6. Door Hinge 2. Water Reservoir 7. N/A 3. Stainless Steel Shelves 8. Door Frame 4. N/A 9. N/A 5. Control Panel 10. UV Light Bulb... -
Page 7: Sl100 Studio Edition - Operating Elements & Displays
SL100 STUDIO EDITION – OPERATING ELEMENTS AND DISPLAYS: Increase / Decrease Temperature / Humidity Toggle between Temperature and Humidity Press 1x: LED Light On/Off or Hold 5 seconds: UV Light On/Off Locker On/Off a. Temperature control: The temperature range is 35-46°F (2-8°C), press the toggle key... - Page 8 e. LED light ► Press to turn on the LED Light, it turns off automatically after 4 hours ► The LED light will turn off automatically after 5 seconds when the door is closed and the switch is off. f. UV light: ►...
-
Page 10: Sl150 Home Edition - Complete Overview
SL150 HOME EDITION - COMPLETE OVERVIEW: 1. Carbon Filter 6. Door Hinge 2. Water Reservoir 7. Butcher Hooks 3. Stainless Steel Shelves 8. Door Frame 4. Hanging Bar 9. N/A 5. Control Panel 10. UV Light ( Below the Reservoir) -
Page 11: Sl150 Home Edition - Operating Elements & Displays
SL150 HOME EDITION - OPERATING ELEMENTS AND DISPLAYS: a. Key Introduction: Toggle UV Light On/Off Alternate between Temperature and Humidity in Display Increase or Decrease Temperature or Humidity LED Light On/Off Locker On/Off Switch b. Temperature control: The temperature range is 32 - 72° F (1-22°C) press the alter button once and the temperature display will start flashing. - Page 12 f. Toggle the LED display between Celsius or Fahrenheit readings Press the buttons simultaneously for 3 seconds to toggle the LED display between Celsius and Fahrenheit readings. To Change the UV Light: (Previous versions contain this system) • Turn the Locker Off. Then Unplug the Locker. •...
- Page 13 Reservoir – Water Humidity System: ► Some previous versions contain this system. ►Prior to powering on the locker, ADD approximately three fourths of a gallon of Distilled Water purchased from the grocery store. ►Remove the plastic wrapping from the orange filter prior to use inside the reservoir.
-
Page 15: Sl520 Pro Edition - Complete Overview
SL520 PRO EDITION - COMPLETE OVERVIEW: 1. Carbon Filter 6. Door Hinge 2. Water Reservoir 7. Butcher Hooks 3. Stainless Steel Shelves 8. Door Frame 4. Hanging Bar 9. N/A 5. Control Panel 10. UV Light ( Below the Reservoir) -
Page 16: Sl520 Pro Edition - Operating Elements & Displays
SL520 PRO EDITION - OPERATING ELEMENTS AND DISPLAYS: a. Key Introduction: Toggle UV Light On/Off Alternate between Temperature and Humidity in Display Increase or Decrease Temperature or Humidity LED Light On/Off Locker On/Off Switch b. Temperature control: The temperature range is 32 - 72° F (1-22°C) press the alter button once and the temperature display will start flashing. - Page 17 UV light: ► The door has a safety switch, if the door of the locker is opened, the UV light will automatically switch itself off in order to protect your eyes. Never look directly at the UV light. ► The UV light is used to keep bacteria from replicating through the ageing process. ►...
- Page 18 g. Carbon Filter: ► Please use this link to purchase the replacement carbon fiber filter filler. Remove the carbon fiber container, uncap the top, remove the old carbon and replace with the new. This should be done about once a year. https://steaklocker.com/collections/replacement-parts h.
-
Page 20: Cleaning & Maintenance
CLEANING AND MAINTENANCE: This chapter provides you with important information in regards to cleaning and maintaining the locker. These practices are to prevent damages due to cleaning the locker incorrectly and to ensure a trouble-free operation. ► Before cleaning, switch the locker off, un-plug from the wall outlet and remove all the meat. ►... -
Page 21: Troubleshooting - Refrigerator
TROUBLESHOOTING – REFRIGERATOR – SL150 & SL520 WITH RESERVOIR DRAWER If these troubleshooting solutions do not resolve the issue; please remove the product inside the SL Unit and place in a safe environment, then contact Steak Locker immediately. E1 Code / Alarm Sound... - Page 22 TROUBLESHOOTING – REFRIGERATOR – ALL LOCKERS WITHOUT RESERVOIR If these troubleshooting solutions do not resolve the issue; please remove the product inside the SL Unit and place in a safe environment, then contact Steak Locker immediately. Error Code Steak Locker...
- Page 23 temperature should be lower that the ambient temperature. If not, that means the shortage of refrigerant. There is a fan for heat dissipation in the 4> Cooling Fan Fault Replace the fan or check compressor room, the fan should work the cable when the compressor is on.
-
Page 24: Sync S4 Wi-Fi Controller - Sl128 Studio; Sl150 Home, Sl520 Pro
3. A message will appear that says, “Steak Locker” wants to join WIFI Network " �� Steak Locker." Click Join. 4. On the next page: “Searching for Steak Locker..” will appear please do not leave the screen, this may take up to a few minutes. -
Page 25: Full Reset Instructions For Wifi Syncing Trouble Shooting
• iOS Device • Verify latest version by going to App Store Steak Locker App. Ensure it states "Open" • If the App in the store states "Update" Click for update. Step 1: Resetting your controller and "Forgetting" the "��Steak Locker" WiFi network. -
Page 26: Precautions
PRECAUTIONS: • Keep ventilation openings, in the appliance enclosure or in the built-in structure, clear of obstruction. • Do not use mechanical devices or those methods which recommend by other manufacturers to accelerate the defrosting process • Do not damage the refrigerant circuit. •... -
Page 27: Handeling Tips
HANDELING TIPS: • Grasp plug and pull out from the socket when pull out the power plug, never pull the power cord. • If you do not use the equipment for a fairly long period of time, you should pull out the plug, remove all the shelves, clean the equipment thoroughly and keep the door open for 48 hours. -
Page 28: General Safety Information
GENERAL SAFETY INFORMATION: • Refrigerant and foam layer is flammable, Pay attention to the fire when maintenance, installation, transportation and handling. Used product need to be recycled by specialized companies, do not arbitrarily discarded. • It is prohibited to place the machine in a place where is possible to leak corrosive and flammable gas. •... - Page 29 The following precautions will reduce the risk of fire or electrical shock. This appliance should NOT share a socket with other appliances. Do not squeeze the power plug into tight spaces. Do not prick, twist or stretch the power cord. Do not attempt to lengthen the power cord.
- Page 30 Do not store the objects that are sensitive to temperature changes, such as medications or chemicals. Do not use flammable sprays around the locker. Do not put vases, glassware or any container with liquid on the top of the locker. Keep the locker away from open flame and high temperature areas.
-
Page 31: Disposal Of Steak Locker
DISPOSAL OF STEAK LOCKER: ●Wrapping used to protect electric appliance during transport and are made with recycled materials. ●Corrugated paperboard/paperboard (made from waste paper) ●Polystyrene block (foam fluoride-free polystyrene) ●Plastic film, bag (polystyrene) ●Package strapping (polystyrene) ●Never let child play with packing materials, plastic film may cause suffocation.
Need help?
Do you have a question about the SL100 STUDIO EDITION and is the answer not in the manual?
Questions and answers