
Related Manuals for Technics SU-G700M2


Summary of Contents for Technics SU-G700M2
-
Page 1: Remote Control
SU-G700M2 Stereo Integrated Amplifier Operating Instructions Stereo-Vollverstärker Bedienungsanleitung Amplificateur intégré Mode d’emploi Amplificatore stereo integrato Istruzioni per l’uso Geïntegreerde Stereo Versterker Gebruiksaanwijzing... -
Page 2: Batteries For Remote Control
Music is borderless and timeless, touching people’s hearts across cultures and generations. Each day the discovery of a truly emotive experience from an unencountered sound awaits. Let us take you on your journey to rediscover music. - Page 3 Delivering the Ultimate Emotive Musical Experience to All At Technics we understand that the listening experience is not purely about technology but the magical and emotional relationship between people and music. We want people to experience music as it was originally intended and enable them to feel the emotional impact that enthuses and delights them.
- Page 4 • For customers within Ireland: 01 447 5229 • Monday–Friday 9:00 am – 5:00 pm, (Excluding public holidays). • For further support on your product, please visit our website: www.technics.com/uk/ Features Integrated amplifier achieves incredibly clear and dynamic sound quality The JENO Engine transmits and processes audio signals in full digital with minimal jitter from the input stage to the power stage.
-
Page 5: Table Of Contents
Table of contents Please carefully read the “Safety precautions” of this Safety precautions manual before use. Control reference guide This unit, Remote control Connections Speaker connection, AC mains lead connection Operations Playing back connected devices Other settings, Using output correction function Settings (LAPC) Others... -
Page 6: Safety Precautions
Safety precautions Warning Caution Unit Unit • To reduce the risk of fire, electric shock or • Do not place sources of naked flames, such as product damage, lighted candles, on this unit. - Do not expose this unit to rain, moisture, •... - Page 7 • When disposing of the batteries, please contact For the United Kingdom and Ireland your local authorities or dealer and ask for the customer correct method of disposal. • Avoid the use in the following conditions Caution for AC Mains Lead - High or low extreme temperatures during use, (For the AC mains plug of three pins) storage or transportation.
-
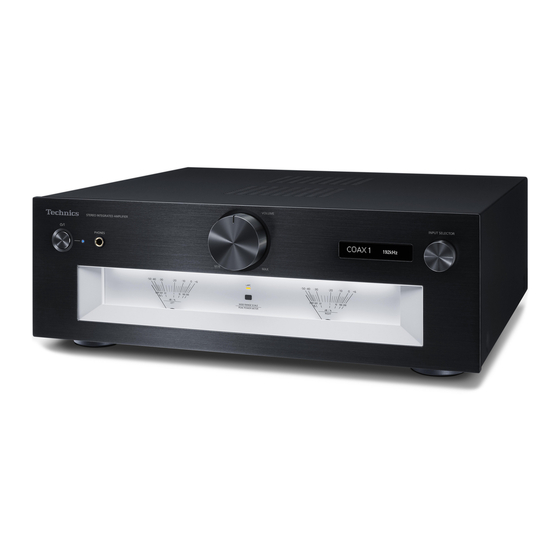
Page 8: Control Reference Guide
Control reference guide This unit 01 Standby/on button ( 06 Input selector knob • Press to switch the unit from on to standby • Turn this knob clockwise or anticlockwise to mode or vice versa. In standby mode, the switch the input source. unit is still consuming a small amount of 07 Peak power meter power. - Page 9 10 USB-B terminal 19 Analogue audio input terminals (LINE1) ( 16) • For connecting to a PC, etc. ( 15) 20 Analogue audio output terminals 11 Optical digital input terminals (LINE OUT) ( 21) (OPT1/OPT2) ( 14) 21 Analogue audio output terminals 12 UPDATE terminal (USB-A) (PRE OUT) (...
- Page 10 Control reference guide Remote control Using the remote control R03/LR03, AAA (Alkaline or manganese batteries) Note • Insert the battery so the terminals ( match those in the remote control. • Point it at the remote control signal sensor on 01 [AMP ]: Standby/on button this unit.
- Page 11 Press and hold [OK] and [2] for at least : Press [AMP] first to operate this unit. (The 4 seconds. remote control may work for other Technics 5 Point the remote control at this unit, devices and may not for this unit when pressing [NWP] or [CD].)
-
Page 12: Connections
Connections Speakers/AC mains lead • Use only the supplied AC mains lead. • Insert the plugs of the cables to be connected all the way in. • Do not bend cables at sharp angles. • This unit can measure the output signal of the amplifier and correct its output to make the optimum adjustment of speaker output. - Page 13 To a household mains socket Insert the AC mains lead up to a point just before the round hole. AC mains lead (supplied) Speaker cable (not supplied) AC mains lead connection Speaker output correction (LAPC) Connect only after all other connections are You can make the optimum adjustment completed.
-
Page 14: Operations
Operations Using digital audio output device You can connect the CD player, etc. with coaxial digital cable (not supplied)/optical digital audio cable (not supplied) to this unit and play back music. Optical digital audio cable (not supplied) CD player, etc. Coaxial digital cable (not supplied) Using coaxial digital cable... - Page 15 • When connecting an audio device with USB- Download and install the dedicated app DAC output terminal such as ST-G30, etc., refer “Technics Audio Player” (free of charge) on to the operating instructions of the connected your PC. device.
- Page 16 Operations Using analogue audio output device (PHONO/LINE1/LINE2) You can connect the turntable with PHONO cable (not supplied) or the Blu-ray Disc player, etc. with analogue audio cable (not supplied) to this unit and play back music. PHONO EARTH Turntable PHONO earth lead (not supplied) PHONO cable (not supplied) Using PHONO cable/...
- Page 17 Do not input the audio signal from PRE OUT/LINE OUT terminals to the analogue audio input terminals of this unit. Doing so may cause malfunction. Blu-ray Disc player, etc. Analogue audio cable (not supplied) Reducing low frequency noise When connecting to “LINE2” Reduces the low frequency noise caused by the Analogue audio input terminals (LINE2/MAIN IN) warpage of record.
- Page 18 Operations Using this unit as power amplifier You can connect the AV receiver, control amplifier, etc. with analogue audio cable (not supplied) to this unit and use this unit as power amplifier. AV receiver, control amplifier, etc. Analogue audio cable (not supplied) Set the volume of the AV receiver, Using analogue audio cable...
- Page 19 10 Confirm the displayed message and Minimising sound distortion press [OK]. 11 Press [ ], [ ] to select “Yes” and then press [OK]. If sound distortion occurs, setting the attenuator to “On” may improve the sound quality. 12 Start playback on the connected •...
- Page 20 Operations Connecting a power amplifier, subwoofer, etc. You can connect the power amplifier, subwoofer, etc. with analogue audio cable (not supplied) to output the analogue audio signals. Power amplifier, Subwoofer, etc. Analogue audio cable (not supplied) 2 Press [SETUP]. Do not input the audio signal from PRE 3 Press [ ], [ ] repeatedly to select OUT/LINE OUT terminals to the analogue audio input terminals of this unit.
- Page 21 Using analogue audio input device You can connect the CD recorder, etc. with analogue audio cable (not supplied) to output analogue audio signals from this unit (LINE1/LINE2/PHONO). CD recorder, etc. Analogue audio cable (not supplied) Do not input the audio signal from PRE Using analogue audio cable OUT/LINE OUT terminals to the analogue audio input terminals of this unit.
-
Page 22: Settings
Adjust the setting with • “TONE” is displayed after setting. the connected device. • While connecting Technics device supporting system control function (Network Audio Player, etc.) to this unit, sound setting on the Adjusting the volume attenuator connected device may have a priority over this unit. - Page 23 Auto off function Displaying the volume status “Auto Off” “VOLUME Display” This unit is designed to conserve its power The volume status is displayed when adjusting consumption and save energy. The unit has been the volume. left unused for about 20 minutes and will enter •...
- Page 24 Settings Using output correction function (LAPC) You can make the optimum adjustment according to your own speakers. Measuring the output signal of the amplifier and correcting its output (LAPC) ■ ■ Turning on/off the output correction Preparation function • Disconnect the headphones. Press [LAPC] to select “On”/“Off”.
- Page 25 • For the update information, refer to the the standby/on button on this unit, following website. disconnect the AC mains lead and USB www.technics.com/support/firmware/ flash memory. 7 Reconnect the AC mains lead after Downloading takes approx. 5 minutes. 3 minutes.
- Page 26 Settings System control connection You can operate this unit and Technics devices supporting system control function (Network Audio Player, Compact Disc Player, etc.) simultaneously with ease on the remote control. For details, refer to the operating instructions of each device.
- Page 27 Switching this unit and the Switching this unit’s input source connected device automatically • If you point the remote control at this unit When you perform an operation such as and press [AMP ] when this unit and the playback on the connected device, the input connected device are in standby mode, this unit source of this unit will be automatically switched and the device will be turned on simultaneously.
-
Page 28: Others
Others Troubleshooting Before requesting service, make the following checks. If you are uncertain about some of the check points, or if the solutions indicated in the following guide do not resolve the issue, then consult your dealer for instructions. Heat buildup of this unit General This unit becomes warm while in use. - Page 29 “PRE OUT” is set to “Off”. (The factory set with “System Control”. ( 26) default is “Off”.) ( 20) • Connect Technics device supporting system • When a plug is connected, the speakers and control function (Network Audio Player, PRE OUT terminals do not output sound.
- Page 30 Others Troubleshooting (Continued) No Device Unit care • USB flash memory with new firmware is not connected. Connect the USB flash memory with new • Pull out the AC mains lead from the outlet firmware. ( 25) before maintenance. Clean this unit with a soft Not Measured cloth.
- Page 31 Specifications ■ ■ GENERAL TERMINALS SECTION Stereo, 6.3 mm AC 220 V to 240 V, Power supply Headphones Jack 50/60 Hz 0.75 mW, 32 Power REAR USB 95 W consumption Type B Connector Power LINE IN ×2 (Pin Jack) consumption in Approx.
- Page 32 Headquarter Address: Panasonic Corporation Kadoma, Osaka, Japan Authorized Representative in Europe: Panasonic Marketing Europe GmbH Panasonic Testing Centre Winsbergring 15, 22525 Hamburg, Germany Panasonic Corporation Web Site: http://www.panasonic.com Ge Fr It Du TQBM0779 © Panasonic Corporation 2021 M0821YY0...
Need help?
Do you have a question about the SU-G700M2 and is the answer not in the manual?
Questions and answers