Table of Contents
Advertisement
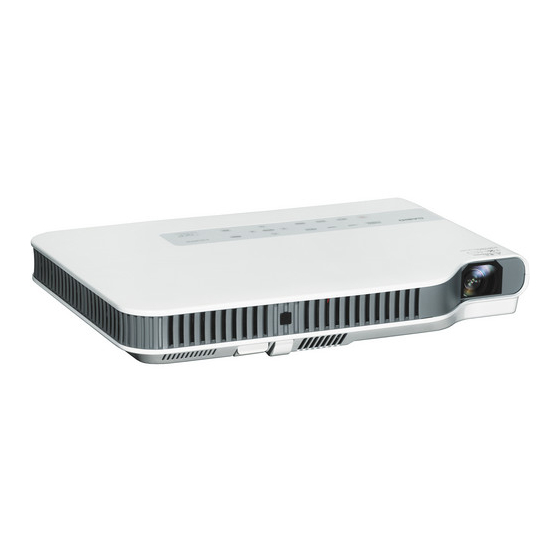
DATA PROJECTOR
DATA PROJECTOR
XJ-A130V / XJ-A135V
XJ-A130V / XJ-A135V
XJ-A140V / XJ-A145V
XJ-A140V / XJ-A145V
XJ-A150V / XJ-A155V
XJ-A150V / XJ-A155V
XJ-A230V / XJ-A235V
XJ-A230V / XJ-A235V
XJ-A240V / XJ-A245V
XJ-A240V / XJ-A245V
XJ-A250V / XJ-A255V
XJ-A250V / XJ-A255V
•
• Some models covered by this User's Guide may not be available
in certain geographic areas.
• Einige der in diese Bedienungsanleitung einbezogenen Modelle
sind in bestimmten Gebieten eventuell nicht erhältlich.
• Certains modèles couverts par ce mode d'emploi peuvent ne
pas être commercialisés dans certaines zones géographiques.
• Algunos modelos cubiertos por esta Guía del usuario pueden no
estar disponibles en determinadas áreas geográficas.
• Alcuni modelli riportati da questa Guida dell'utilizzatore potrebbero
non essere disponibili in determinate aree geografiche.
• Vissa modeller som beskrivs i detta instruktionshäfte saluförs
inte i vissa områden.
*
* USB port models
* Modelle mit USB-Port
* Modèles à port USB
* Modelos con puerto USB
* Modelli con porta USB
* Modeller med USB-port
*
*
*
*
*
*
User's Guide (Basic Operations)
Be sure to keep all user documentation
*
*
handy for future reference.
*
*
Bedienungsanleitung
(Grundbedienung)
*
*
Bitte bewahren Sie die gesamte
Benutzerdokumentation für späteres Nachschlagen auf.
*
*
Mode d'emploi
(Opérations de base)
Conservez la documentation à portée de
main pour toute référence future.
Guía del usuario
(Operaciones básicas)
Asegúrese de tener a mano toda la
documentación del usuario para futuras consultas.
Guida dell'utilizzatore
(Operazioni di base)
Conservare l'intera documentazione dell'utente
a portata di mano per riferimenti futuri.
Instruktionshäfte
(Grundläggande anvisningar)
Förvara all användardokumentation nära till
hands för framtida referens.
JEGFSISwChK Z
Advertisement
Table of Contents
Troubleshooting

Subscribe to Our Youtube Channel
Related Manuals for Casio XJ-A130V/XJ-A135V*


Summary of Contents for Casio XJ-A130V/XJ-A135V*
- Page 1 DATA PROJECTOR DATA PROJECTOR XJ-A130V / XJ-A135V XJ-A130V / XJ-A135V XJ-A140V / XJ-A145V XJ-A140V / XJ-A145V XJ-A150V / XJ-A155V XJ-A150V / XJ-A155V XJ-A230V / XJ-A235V XJ-A230V / XJ-A235V XJ-A240V / XJ-A245V XJ-A240V / XJ-A245V XJ-A250V / XJ-A255V XJ-A250V / XJ-A255V...
-
Page 2: Table Of Contents
CASIO COMPUTER CO., LTD. shall not be held liable for any loss or lost profits due to loss of data caused by malfunction or maintenance of this product, or any other reason. -
Page 3: Safety Precautions
Thank you for selecting this CASIO product. Be sure to read these “Safety Precautions” before trying to use it. After reading this User’s Guide, keep it in a safe place for future reference. About safety symbols Various symbols are used in this User’s Guide and on the product itself to ensure safe use, and to protect you and others against the risk of injury and against material damage. - Page 4 CASIO. Be sure to leave all internal inspection, adjustment, and repair up to your original dealer or authorized CASIO service center.
-
Page 5: Projector Cabinet
(41°F to 95°F)). ● Heavy objects Never place heavy objects on the projector or climb on top of the projector. Doing so creates the risk of fire and electric shock. ● Water Never locate the projector in a bathroom or anywhere else there is the chance that it will be splashed with water. -
Page 6: Power Cord
• Never use detergent to clean the power cord, especially the power plug and jack. • Before moving the projector, be sure to turn it off and unplug it from the power outlet first. ● Backup of important data Be sure to keep separate written records of all data stored in projector memory. -
Page 7: Lens Cover
Allowing dust to build up inside the projector for long periods without cleaning creates the risk of fire and breakdown. Contact your original dealer or authorized CASIO service center once a year about having the interior of the projector cleaned. Note that you will be charged for cleaning. -
Page 8: Operating Precautions
The failure of the light source unit to light or a noticeable drop in light source unit brightness indicates the end of the light source unit’s life. Contact your original dealer or authorized CASIO service center for replacement. -
Page 9: Precaution When Handling The Projector After Use
Even if your projector is still within the warranty period, you will be charged for repair if a problem is due to running the projector non-stop for very long periods (like 24 hours) or if the projector was set up and used without following the “Setup Precautions”... -
Page 10: Unpacking
As you unpack the projector, check to make sure that all of the items listed below are present. DATA PROJECTOR AC Power Cord • Carrying Bag • CD-ROM • User’s Guide (Basic Operations) • “Read this first” Sheet • Warranty •... -
Page 11: Using The Cd-Rom That Comes With The Xj-A135V, Xj-A145V, Xj-A155V, Xj-A235V, Xj-A245V, Xj-A255V
Using the CD-ROM that comes with the XJ-A135V, XJ-A145V, XJ-A155V, XJ-A235V, XJ-A245V, XJ-A255V The CD-ROM contains software for each projector model and PDF files with User’s Guides. In order to read the User’s Guide, you need to have Adobe To view the contents of a User’s Guide (PDF) Place the CD-ROM that comes with the projector into your computer’s CD-ROM... -
Page 12: General Guide
* A special-purpose port is located inside the wireless adapter cover for connecting the supplied YW-3 wireless adapter. For details about the connecting and disconnecting the wireless adapter, see the “Wireless Function Guide” on the CD-ROM that comes with the projector. [Bottom]... -
Page 13: Preparing The Remote Controller
USB port (XJ-A135V/XJ-A145V/XJ-A155V/ XJ-A235V/XJ-A245V/XJ-A255V only) * This serial port is for connecting a separately available special cable (YK-5) to control the projector from a computer. NOTE The anti-theft lock hole is provided for connection of an anti-theft chain. Visit the Kensington Lock Website at http://www.kensington.com/ for more information. -
Page 14: Loading Remote Controller Batteries
Loading Remote Controller Batteries Important! Important! Important! Be sure to use alkaline batteries only. RISK OF EXPLOSION IF BATTERY IS REPLACED BY AN INCORRECT TYPE. Caution DISPOSE OF USED BATTERIES ACCORDING TO THE INSTRUCTIONS. Misuse of batteries can cause them to leak and stain of the area around them, or to explode, creating the risk of fire and personal injury. -
Page 15: Getting Ready
Setting Up the Projector Locate the projector on a desk, table, or stand that is firm and level. Make sure to allow sufficient space around the sides and back of the projector for proper ventilation. The following illustrations show how the projector should be oriented for optimum projection relative to the screen. -
Page 16: Setup Precautions
Over time, use of the projector can cause dust and dirt to build up in and around the fan’s intake vents, which can lead to malfunction of the projector. Be sure to check the intake vents for dust build up each time before you use the projector. -
Page 17: Adjusting The Projector Elevation Angle
Getting Ready Adjusting the Projector Elevation Angle You can change the elevation angle of the projector in a range of 0 to 20 degrees. You can also make fine adjustments to the left and right side elevation angle when necessary. -
Page 18: Connecting A Computer To The Projector
<Projector> AV terminal COMPUTER terminal Audio cable (commercially available) Connecting to a Standard Video Device You can use the projector to project an image from a video deck, TV, video camera, or other video device. Important! Important! Important! Always turn off the projector and the video device before connecting them. -
Page 19: Turning On The Projector
“Specifying the Display Message Language” on the page E-19 to configure the language settings. NOTE If the Eco Mode is turned on, the LIGHT indicator will light green when the projector is turned on. Power supply connector Bundled AC power cord... - Page 20 Specifying the Display Message Language A “Language” window will be projected the first time you turn on the projector. Use the menu on this screen to specify the display language you want to use. Use the cursor [] and [] keys to highlight the language you want to use.
-
Page 21: Turning Off The Projector
Caution Caution The projector may remain quite hot for a while after you turn it off. Take care when moving the projector or otherwise handling it after use. See “Precaution when Handling the Projector after Use” (page E-8) for more information. -
Page 22: Projector Basics
Selecting the Input Source Turning on the projector initially causes the same input source that was selected the last time it was turned off to be selected. You can perform the following steps to select a different input source. Press the [INPUT] key. -
Page 23: To Use Manual Keystone Correction
Keystone Correction (KEYSTONE) When the projector is at an angle to the screen it is projecting on, the projected image may have different length top and bottom edges. This phenomenon is called, “keystoning”. This projector comes with functions for automatic as well as manual keystone correction, which provides a regularly shaped projected image. -
Page 24: Setup Menu List
(UsersGuide_English.pdf) on the CD-ROM that comes with the projector. If your projector is equipped with a USB port, see the user documentation on the CD-ROM that comes with it for information about the “USB” main menu item (USB Function Guide) and the “Wireless” main menu item (Wireless Function Guide). -
Page 25: User Maintenance
About the Light Source Unit Should the light source unit stop working, contact your original dealer or authorized CASIO service center for replacement. Note that problems caused by unauthorized projector disassembly or modification are not covered by the warranty and are not eligible for repair by CASIO. -
Page 26: Projector Troubleshooting
Projector Troubleshooting Check the following items whenever you experience any problem with the projector. Problem The projector does not If the POWER/STANDBY indicator is not lit, the AC power turn on when I press the cord may not be connected correctly. - Page 27 ➔ Refer to one of the following (depending on the When a video device’s or computer’s HDMI output is connected to the HDMI port of the projector, “Line” may be selected for the “Option Settings 2 HDMI Audio Out”...
- Page 28 1. Unplug the AC power cord and wait for at least 10 minutes. 2. Plug the power cord back in and turn the projector back on again. If normal operation does not resume after you perform the above steps, take the projector to your retailer or authorized CASIO service center.
-
Page 29: Specifications
*2: Not supported *3: Included (Connect to projector’s special YW-3 port.) CASIO COMPUTER CO., LTD. makes no guarantees concerning the operation or suitability of any USB device that you connect to the projector’s USB port. Specifications are subject to change without notice. - Page 30 Deutsch Entsorgung von elektrischen & elektronischen Produkten für den Haushaltsgebrauch (anzuwenden nur in den Ländern der Europäischen Union) Dieses Symbol (ausgekreuzte Mülltonne) auf dem Produkt bezeichnet, dass Altgeräte usw. nicht wie normaler Haushaltsabfall in den Müll gegeben werden dürfen, sondern zum Recycling an einer hierfür vorgesehenen Annahmestelle abzugeben ist.
- Page 31 Nederlasnds Afvalverwijdering van Elektrische & Elektronische Apparatuur voor Huishoudelijk Gebruik (Alleen van toepassing in de Europese Unie) Het symbool (doorgekruisde afvalbak op wielen) op het product geeft aan dat het product aan het einde van haar levensduur niet samen met of in de vorm van huishoudafval mag worden weggegooid. Het product moet naar een verzamelplaats (milieudepot) worden gebracht waar dergelijke producten worden gerecycled.
- Page 32 Português Eliminação de Equipamentos Eléctricos e Electrónicos para Uso Doméstico (Aplicável somente na União Europeia) O símbolo (caixote de lixo de rodas com uma linha cruzada) em seu produto indica que o produto, no fim da sua vida útil, não deve ser misturado ou eliminado com o lixo doméstico comum.
-
Page 34: Fcc Warning
Connector cable...XJ-A130V/XJ-A135V/XJ-A140V/XJ-A145V/XJ-A150V/XJ-A155V/XJ-A230V/ XJ-A235V/XJ-A240V/XJ-A245V/XJ-A250V/XJ-A255V unit to PC Model Number: XJ-A130V/XJ-A135V/XJ-A140V/XJ-A145V/XJ-A150V/XJ-A155V/XJ-A230V/ XJ-A235V/XJ-A240V/XJ-A245V/XJ-A250V/XJ-A255V Trade Name: CASIO COMPUTER CO., LTD. Responsible party: CASIO AMERICA, INC. Address: 570 MT. PLEASANT AVENUE, DOVER, NEW JERSEY 07801 Telephone number: 973-361-5400 This device complies with Part 15 of the FCC Rules, Operation is subject to the following two conditions: (1) This device may not cause harmful interference, and (2) this device must accept any interference received, including interference that may cause undesired operation. -
Page 35: Fcc Information
FCC Information This device, IEEE 802.11g Wireless LAN USB Adapter, complies with Part 15 of the FCC Rules. Operation is subject to the following two conditions: (1) this device may not cause harmful interference, and (2) this device must accept any interference received; including interference that may cause undesired operation. Federal Communications Commission (FCC) Statement This Equipment has been tested and found to comply with the limits for a Class B digital device, pursuant to Part 15 of the FCC rules. -
Page 36: Laser Precautions
取扱説明書に指定した以外の手順で操作や調整を行 うと、 危険なレーザー放射にさらされる原因となる ことがあります。 Laser Precautions This projector is a Class 1 laser device that conforms with IEC 60825-1. This projector has a built-in laser module. Disassembly or modification is very dangerous and should never be attempted. - Page 37 Batterij niet weggooien, maar inlevern als KCA Manufacturer: CASIO COMPUTER CO.,LTD. 6-2, Hon-machi 1-chome, Shibuya-ku, Tokyo 151-8543, Japan Responsible within the European Union: CASIO EUROPE GmbH Casio-Platz 1, 22848 Norderstedt, Germany...
- Page 38 Printed in China Imprimé au Chine MA1008-A RJA521342-007...
Need help?
Do you have a question about the XJ-A130V/XJ-A135V* and is the answer not in the manual?
Questions and answers