Advertisement
Quick Links
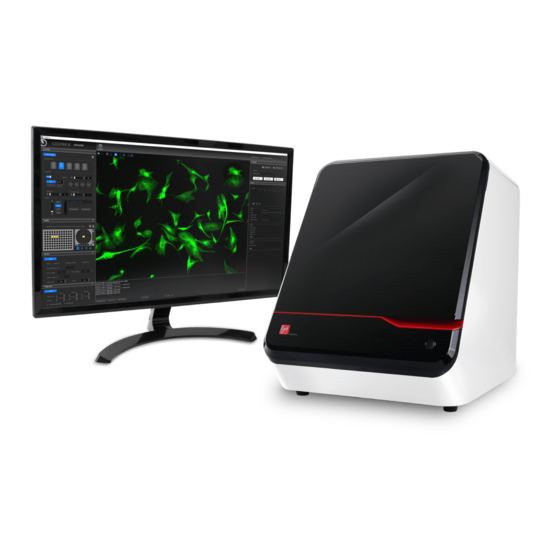
This Installation Guide provides instructions for installing the CELENA® X High Content Imaging System.
For detailed instructions, refer to the user manual in the supplied USB drive.
1. PLACEMENT
Move the unpacked boxes to the site of operation. Open the CELENA® X box and remove the Styrofoam top and sides.
Lift the CELENA® X out of its box by grasping its base firmly. Place the CELENA® X on a flat, level surface that is free of vibration.
!
Do not attempt to lift or move the instrument without assistance. It is recommended that two or more people lift the
instrument together while taking the proper safety measures to avoid injury.
!
Do not subject the CELENA® X to sudden impact or excessive vibration. Handle with care to prevent damage.
!
Avoid vibrations from other devices. An anti-vibration table is recommended for optimal use.
!
Leave sufficient space around the instrument for proper ventilation and to prevent overheating.
!
Do not expose the instrument to intense ultraviolet light.
Place the Controller near the CELENA® X. A separate surface is recommended for optimal use but is not necessary.
Place the PC and UHD monitor near the CELENA® X. A separate surface is recommended for optimal use but is not necessary.
2. CONNECTIONS
Unpack the cables from the accessories box and attach as specified below:
Back of the CELENA® X
Connect the CELENA® X Controller to its power cord and plug into an electrical outlet.
Use a DisplayPort (DP) cable to connect a 4K UHD monitor to the provided PC.
Attach the CELENA® X Cell Analyzer Verification Key to the PC to unlock Cell Analyzer functionality.
3. SHIPPING RESTRAINTS
Your CELENA® X is shipped with two shipping restraints installed (X/Y stage, LED filter cube stage) to prevent damage to the
instrument from shock and vibration during transport.
!
The shipping restraints must be removed before the CELENA® X is turned on.
Unscrew screw A and pull it up to remove it from the LED filter cube stage cover.
Unscrew screw B and pull it up to remove it from the X/Y stage.
A
Note: Store the screws in the accessories box for future use.
Rev. 2
© 2020 Aligned Genetics, Inc. All Rights Reserved.
Logos Biosystems is the life science business brand of Aligned Genetics, Inc.
INSTALLATION GUIDE
PC
Controller
B
CELENA® X & Controller
Cable PS-1 (I10331)
Cable PS-2 (I10332)
Cable SIG (I10333)
Cable AF (I10334)*
*Included if the laser AF module was purchased and installed
**Make sure to plug into the blue USB 3.0 ports at the back of the PC
A
Logos Biosystems |www.logosbio.com
CELENA® X & PC
USB 2.0 (I10335)**
USB 3.0 (I10336)**
B
Advertisement

Related Manuals for Logos CELENA X

Summary of Contents for Logos CELENA X
- Page 1 Unscrew screw B and pull it up to remove it from the X/Y stage. Note: Store the screws in the accessories box for future use. Rev. 2 Logos Biosystems |www.logosbio.com © 2020 Aligned Genetics, Inc. All Rights Reserved. Logos Biosystems is the life science business brand of Aligned Genetics, Inc.
- Page 2 Use the DEL, ▲, and ▼ buttons to edit the list of installed objective as needed. Click Apply to complete. Rev. 2 Logos Biosystems |www.logosbio.com © 2020 Aligned Genetics, Inc. All Rights Reserved. Logos Biosystems is the life science business brand of Aligned Genetics, Inc.