
Related Manuals for Siemens Silver WD7205


Summary of Contents for Siemens Silver WD7205
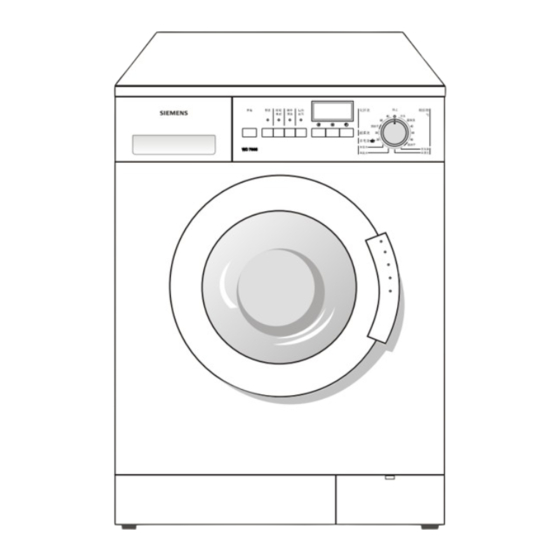
- Page 1 Operating and installation instructions WD7005 WD7005 Silver WD7205 Silver WD7205...
- Page 2 If you need an English user manual, please download it from siemens web. Or you can send the E-mail to service department, or you can call up service hot line for free supply.
-
Page 3: Table Of Contents
Table of Contents Operating Instructions Installation Instructions Appendix Disposal Information..... . . Environmental Protection/Conservation Issues. . Safety Precautions and Warnings... . . Your New Washing Machine. - Page 4 You can increase the economy and environmental friendliness of your washer-dryer by washing ma- ximum loads: refer to page 39 program table How to save energy:...
-
Page 5: Disposal Information
(PS). These materials are pure hydrocarbon compounds and can be recycled. Render the washer-dryer inoperable when it can no longer be used Remove the plug from the so- cket and cut off the power cable. Destroy the catch on the porthole door. -
Page 6: Before Using For The First Time
Precautions and Warnings Before using for the first time: Please read the enclosed documents carefully before using the Washer-dryer for the first time. They contain important information on the insta- llation, use and safety of the machine. The manufacturer does not accept liability if these instructions are not followed. - Page 7 Taking care of your machine: When transporting the machine: Operate the Washer-dryer with cold tap water only. Your Washer-dryer is designed for domestic use only, i.e. For washing machine-washable textiles in a detergent solution. Due to the use of the condensation principle in drying, please keep the connected water tap open during the drying process.
- Page 8 Your new washer-dryer Filling laundry detergent and/or additive dispensers. Chamber I: Detergent for pre-wash,starch, or pre-soaking agent. Chamber II: Detergent for main washing period, water softener, blench and stain- removing salt. Chamber Additives, e.g. fabric softener or former(Do not exceed Max )
-
Page 9: Control Panel
Press the button again. Indicator light goes out. Programme selector For switching the washer-dryer on and off and for selecting the program. Can be rotated in either direction. If rotate it during the washing/drying, the program will be stopped. The program sequence is electronically controlled. - Page 10 Display panel programme status Display Prewash Washing Rinse Final spin/Empty Drying Progress bar Overdosage Childproof lock 5.2kg* Maximum load 1000rpm* Spin speed or Spin speed or no final spin no final spin ---* 120min* Drying time 1 h* Start time Other displays at this location: Programme duration 1:00*...
- Page 11 -mme cottons easy-care delicates model 1000 WD7005 Silver WD7205 1200 The first row of symbols and the progress bar below form the program status display. The progress bar consists of a frame and several segments. When the programme has been selected, the symbols for the individual programme sections are displayed.
- Page 12 Programme duration Start time Drying duration When the programme has been selected, the expected programme duration(time after which the programme is expected to end) is displayed. The programme duration is displayed in hours and minutes, e.g. 01:17 1 hour and 17 minutes 00:35 35 minutes.
- Page 13 Programme buttons Basic program Select the desired programme(refer also to separate Programme table ). Cold, 40 C Cottons/coloureds For hard-wearing fabrics. 30 C quick washing Cottons/coloureds For less soiling fabrics made from cottons or linen. This duration is shorter. 60 C Cottons/coloureds For very dirty ,hard-wearing fabrics.
- Page 14 Additional function Additional function washing prolonged time maximum spin speed Washing Separate washing cycle. Rinsing Separate rinsing cycle with subsequent spin cycle for easy care fabrics. Spin Separate spin cycle. Washing solution or rinsing water is drained prior to the spin cycle. Drain Draining of the rinsing water after a wash programme with the without drain setting for the gentle treatment...
-
Page 15: First Wash Cycle
The installation of the washer-dryer is finished. (See page 41-49) Each washer-dryer has been tested in the factory. A little bit of water can be left in the drum during the test. Please carry out the first wash cycle without laundry to remove any water left over from the factory tests. -
Page 16: Preparing/Sorting And Loading The Laundry
Easy-care items should if possible be removed from the washer-dryer while still slightly damp and allowed do continue drying in the open air. Overdrying may cause excessive creasing. Items which require ironing do not have to be ironed immediately after being tumble-dried. -
Page 17: Sorting The Laundry
Sorting the laundry According to colour and degree of dirt Caution Items of clothing can become discoloured. Never wash new multi-coloured items together with other items. White items may become grey. Always wash white and coloured items separately. Slight dirt No recognizable dirt or staining. - Page 18 Sorting laundry according to their care label specifications Typical stains - Skin fat, cooking oils/fat, sauces, mineral oil, wax(containing fat/oil) - Tea, coffee, red wine, fruit, vegetables(blea chable). - Blood, egg, milk, starch(containing protein/ carbohydrate). - Soot, soil, sand(pigments), red sand on tennis clothes.
- Page 19 Therefore, these items must be rinsed thoroughly by hand. Caution: Loose debris in the washer-dryer drum can damage the laundry. Before loading the laundry, check that there is no debris in the drum. Open the loading door.
-
Page 20: Laundry Detergents And Additives
Caution: You can use any standard powder or liquid detergent which is suitable for automatic washer-dryer. Do not use any detergent boosters containing solve -nts or dirt and stain-removing spraying near the ma -chine, as these could damage the machine. - Page 21 Filling laundry detergent and/or additive dispensers Frequent use of insufficient detergent will eventually become noticeable as followings: - washing appears grey or not properly clean - grey-brown stains (grease marks) form on the washing Too much detergent results in: - unnecessarily high environmental pollution - due to the generation of too much foam, the washing is hard -ly agitated which leads to poor washing results.
-
Page 22: Washing/Drying With Standard Settings
Washing/drying with standard settings Setting the washing programme or washing and drying without interruption Your washer-dryer can be used in three ways: - washing only, - drying only, - washing and drying without a break in between. Caution: For interrupted washing and drying, the maximum load must be reduce to 2.6kg for cottons/coloureds... - Page 23 4. The frame of the progress bar flashes in the display field and the following is displayed for the selected programme: - the symbols for the programme sections, - recommended load, - maximum spin speed, - drying duration (displays 0 min, if the laundry needs to be dried, please refer to setting the drying time), - programme duration.
- Page 24 Setting the drying programme 1. Turn the tap ON. Due to the use of the condensation principle in drying, please keep the connected water tap open during the drying process. 2. Turn the programme selector to the desired programme. (See programme sheet) 3.
-
Page 25: Washing/Drying With Individual Settings
Washing/drying with individual settings Turn the programme selector to the desired programme Load the laundry and close the loading door Spin speed Page 24 Or without final spin Z Z ˜ Make further settings or press the start button You can adjust the setting to your requirements. First find a quick overview of the adjustable settings. -
Page 26: Spin Speed
Spin speed Start time The maximum displayed spin speed depends on the selected programme. Press button until the required spin speed. If setting --- (without final spin) has been selected, the washing remains in the final rinsing water. i Before the laundry can be unloaded, the Empty or Spin programme must be performed. -
Page 27: Childproof Lock
Childproof lock Activating the childproof lock 4 sec Deactivate the childproof lock You can secure your washing machine to prevent selected functions from being inadvertently changed. If the childproof lock has been selected: No changes can be made while the programme is running. - Page 28 Wait about 2 minutes, open the loading door. Add/Remove the laundry Reconnect the power supply, the memory function of the washer-dryer will continue the interrupted programme. So, the time in the display field may be different from previous display. Also, in the case of power failure or the power is...
-
Page 29: When The Programme Has Ended
When the Programme has ended Setting - - - (without final spin ) selected i Display panel: All symbols on the programme status display have gone out, the full bar is displayed. The programme duration is on If the childproof lock is selected, the illuminates. - Page 30 If the loading door can not be opened: Wait for 2 minutes ( the safety function is active ) or there is still water in the washer-dryer if the without final spin option was selected. In the latter case, select the Draining or Spinning programme.
-
Page 31: Special Applications
Special Applications Pre-soak Starching Load laundry of the same color. Add the pre-soak agent to chamber II according to the manufacturer s specifications. Turn the program selector to Cold, Cottons/ coloureds . ,, ,, ,, ,, Press the Start button. ,, ,, The Active control light comes on and the program starts. - Page 32 Dyeing Decolorizing As soon as water starts to enter the machine: Pull out the detergent dispenser slightly. Add the starching solution to chamber I. Close the detergent dispenser. If the without drain option is selected,the Draining program must be subsequently be selected.
-
Page 33: Cleaning And Care
! Risk of explosion! Never use solvents to clean the appliance. Never clean the washer-dryer with a jet of water. As required: Use hot soapy water or a mild, non-abrasive leaning agent. Rub dry with a soft towel. -
Page 34: Clean The Drain Pump
Clean the drain pump Draining the washing solution Pull up the insert. Rinse the detergent dispenser under hot running water. Push down the insert until it clicks into place. Insert the detergent dispenser. This is necessary if the washing solution can not be completely drained. -
Page 35: Cleaning Water Inlet Strainers
Cleaning water inlet strainers Cleaning the strainer at the water tap Remove the pump cap. Remove any loose debris/fluff from inside the pump and clean the pump. The pump impeller must be able to rotate. Clean any residual suds or fluff from the thread of the pump cap and pump housing. -
Page 36: Frost Protection
If, however, descaling the appliance becomes necessary, please follow the instructions provided by the descaling agent manufacturer. If the washer-dryer is located in a room which is exposed to freezing temperatures, any residual water in both the pump and the water inlet hose must be drained immediately every time the machine is used. -
Page 37: Troubleshooting Minor Faults
Service or an authorized technician. If repairs are needed, and assuming that you cannot eliminate the fault yourself with the aid the following table: Turn the programme selector to Disconnect the washer-fryer from the mains. Turn off the water tap. Call Customer Service. Action Check whether laundry is trap- ped in door;... - Page 38 Fault The washer-dryer door cannot be opened. Detergent residue in the detergent dispenser. The gasket is crimped. The belt gets off the pulley. Control lights do not come on. The programme does not start. Detergent in chamber I is not wash away.
- Page 39 Drying programme not selected. Drying time not set, set drying time is too short. Tap not turned on. Washer-dryer door not closed properly. Pump is blocked. This is not a fault. The imbalance compensat- ion system is attempting to...
-
Page 40: Customer Service
Customer Service Identification plate Before calling the Customer Service, please make sure that you cannot eliminate the fault yourself. This is because consultation provided by our technicians, even within the warranty period, will lead to costs being incurred by yourself. If you cannot correct a problem yourself, switch off the washing machine, remove the plug from the socket, shut off the water supply and call... -
Page 41: Programme Table
Programme table Always follow the manufacture s care label instructions Program Cold ℃ quick Cottons/ 40 C coloured 60 C 90 C Intensive dry 40 C Easy- care 60 C Gentle dry Silk 30 C 30 C Wool washing rinsing spinning draining ,, ,,... - Page 42 Programme table: drying cottons/coloureds (cotton, linen) Dry weight in Kg Cupboard dry Iron Easy-care / synthetics Dry weight in Kg Acrylics Easy-care Times are approximate and refer to standard loads. The maximum selectable drying time is 120 minutes. Drying time selector 50-60 60-70 70-80...
-
Page 43: Installation, Connection And Transport
Caution Frozen hoses can tear/burst. Do not install the washer-dryer outdoors or in an area prone to frost. Take care not to damage the washer-dryer . Do not hold onto protruding parts (e.g. Loading door ) when lifting. In addition to the safety information listed here, the local water and electricity supplier may have special requirements. - Page 44 Approx. weight=68Kg To ensure the proper operation of the washer-dryer, please pay attention to the following when you install the machine. The floor should be solid and flat, never put the machine on the soft carpet or on the wood floor.
- Page 45 Keep the environment dry and vented. Never put small appliance, such as microwave oven; and/or jar cooker, on the machine. Keep the machine away from the flaming equip- ment, such as candle, cooking stove, liquefied gas container etc. Never put the pressure containers on the machine. Never put the machine over the opening of uncovered drainage.
-
Page 46: Removing The Transport Bolts
Loosen all four transit bolts with the wrench until they are freely movable. If not all parts have been removed and have falled into the button of the washer-dryer: open the door, pull the drum forwards slightly, reach in and remove the parts. -
Page 47: Hose And Cable Lengths
Hose and cable lengths Left-hand connection Right-hand connection Water connection Water supply 110cm 150cm 140cm Caution: In order to avoid siphon, do not put the outlet hose into a container with water. For the water connection a standard cold-water line with a minimum water pressure of 0.1MPa is required (with tap full ON, at least 8 litres of water must flow out in one minute). - Page 48 OFF after using the machine. The plastic nuts on the hose connections must only be tightened by hand. For tight connection between washer-dryer and water source, you can: 1. Call Customer Service before you install the machine, get the plastic connector freely. It may connect tightly the water inlet pipe and your water tap.
-
Page 49: Leveling Procedure
All four appliance feet must be firmly on the ground. The washing machine must not wobble Level the washer-dryer with the assistance of the four adjustable feet and a spirit level. Loosen the counter-nut 1 using the wrench. - Page 50 When heating, the maximum current of the washer- Electrical connection dryer is 10A, so please make suer that the power supply system (voltage, current and cable) is appli- cable to the load of theapplied appliance. The machine must only be connect to an alternat- ing current supply via a correctly installed earthed socket.
- Page 51 Pull the bolt out of the sleeve until the end of the bolt is flush with the end of the sleeve. Insert and tighten the bolts. The lug on the washer must be located in the groove in the rear panel of the housing.
- Page 52 Appendix Adjust the volume of buzzer and audible feedback of Start button You can change the volume of the buzzer according to your requirement. The operation procedure: 1. Switch on the machine,turn the program selector to Off . 2. Turn the program selector to cold Easy-care , press the additional function button Intensive stains and don t loose, you can hear the volume of the buzzer from minimum to maximum to off...
- Page 53 Appendix Audible feedback of function buttons You can open or close the audible feedback of function buttons according to your requirement. Open procedure: 1. Switch on the machine,turn the programme selector to Off . 2. Press two additional function buttons Intensive stains and Extra rinsing and don t loose.
- Page 54 Contents of this brochure could be changed without written notice.
Need help?
Do you have a question about the Silver WD7205 and is the answer not in the manual?
Questions and answers