Table of Contents
Advertisement
20B1UCover 02.02.08
SHARP ELECTRONICS CORPORATION
Sharp Plaza, Mahwah, New Jersey 07430-2135
SHARP CORPORATION
Printed on post-consumer recycled paper.
Imprimé sur du papier recyclé.
Impreso en papel reciclado.
Impresso em papel reciclado pós utilização.
Printed in Japan
Imprimé au Japon
Impreso en Japón
Impresso no Japão
TINS-A109WJZZ
02P04-JKK
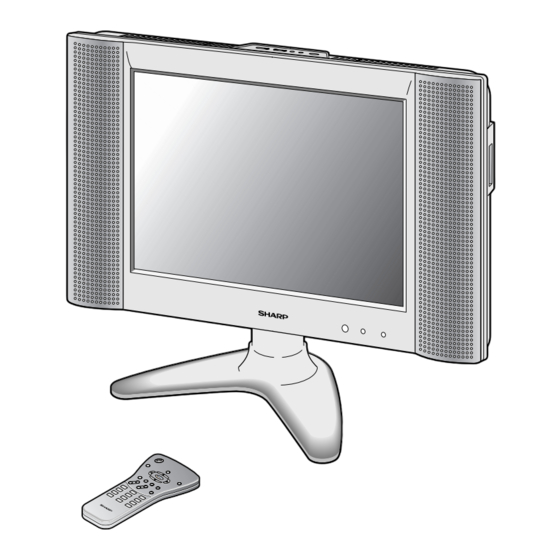
LC-20B1U
LIQUID CRYSTAL TELEVISION
TÉLÉVISEUR À CRISTAUX
LIQUIDES
TELEVISOR DE CRISTAL
LÍQUIDO
TELEVISOR DE CRISTAL
LÍQUIDO
OPERATION MANUAL
MODE D'EMPLOI
MANUAL DE MANEJO
MANUAL DE OPERAÇÃO
Advertisement
Table of Contents
Troubleshooting

Related Manuals for Sharp Aquos LC 20B1U


Summary of Contents for Sharp Aquos LC 20B1U
- Page 1 20B1UCover 02.02.08 SHARP ELECTRONICS CORPORATION Sharp Plaza, Mahwah, New Jersey 07430-2135 SHARP CORPORATION Printed on post-consumer recycled paper. Imprimé sur du papier recyclé. Impreso en papel reciclado. Impresso em papel reciclado pós utilização. Printed in Japan Imprimé au Japon Impreso en Japón Impresso no Japão...
-
Page 2: Operation Manual
LIQUID CRYSTAL TELEVISION IMPORTANT INFORMATION WARNING: TO REDUCE THE RISK OF FIRE OR ELECTRIC SHOCK, DO NOT EXPOSE THIS PRODUCT TO RAIN OR MOISTURE. CAUTION RISK OF ELECTRIC SHOCK. DO NOT OPEN. CAUTION: TO REDUCE THE RISK OF ELECTRIC SHOCK, DO NOT REMOVE COVER (OR BACK). - Page 3 IMPORTANT INFORMATION WARNING: FCC Regulations state that any unauthorized changes or modifications to this equipment not expressly approved by the manufacturer could void the user’s authority to operate this equipment. CAUTION: TO PREVENT ELECTRIC SHOCK, MATCH WIDE BLADE OF PLUG TO WIDE SLOT, FULLY INSERT. “Note to CATV system installer: This reminder is provided to call the CATV system installer’s attention to Article 820-40 of the National Electrical Code that provides guidelines for proper grounding and, in particular, specifies that the cable ground shall be connected to the grounding system of the building, as close to the point of cable entry as practical.”...
-
Page 4: Dear Sharp Customer
DEAR SHARP CUSTOMER Thank you for your purchase of the Sharp LCD Color TV product. To ensure safety and many years of trouble-free operation of your product, please read the Safety Precau- tions carefully before using this product. IMPORTANT SAFETY PRECAUTIONS Electricity is used to perform many useful functions, but it can also cause personal injuries and property damage if improperly handled. - Page 5 IMPORTANT SAFETY PRECAUTIONS (Continued) I Cleaning—Unplug the power cord from the AC outlet before cleaning the product. Use a damp cloth to clean the product. Do not use liquid cleaners or aerosol cleaners. I Water and moisture—Do not use the product near water, such as bathtub, washbasin, kitchen sink and laundry tub, swimming pool and in a wet basement.
-
Page 6: Important Safety Precautions
IMPORTANT SAFETY PRECAUTIONS (Continued) I If an outside antenna is connected to the television equipment, be sure the antenna system is grounded so as to provide some protection against voltage surges and built-up static charges. Section 810 of the National Electrical Code provides information with respect to proper grounding of the mast and supporting structure, grounding of the lead-in wire to an antenna discharge unit, size of grounding conductors, Iocation of antenna-discharge unit, connection to grounding elec- trodes, and requirements for the grounding electrode. -
Page 7: Table Of Contents
CONTENTS DEAR SHARP CUSTOMER ... 3 IMPORTANT SAFETY PRECAUTIONS ... 3-5 SUPPLIED ACCESSORIES ... 7 PREPARATION ... 8-10 Using the Remote Control ... 8 Batteries for the Remote Control ... 8 Power Connection ... 9 Antenna Connection ... 9, 10 FRONT AND REAR CONTROL OPTIONS ... -
Page 8: Supplied Accessories
SUPPLIED ACCESSORIES Make sure the following accessories are provided with the product. Remote Control RRMCGA051WJSA Antenna Cable QCNWG0003CEPA AC Adapter UADP-0243CEPZ UADP-0212CEZZ LC-20B1U-GBpp01-18 “AAA” size (UM/SUM-4) Dry Battery (×2) UBATU0038CEZZ AC Cord RRMCG1559CESA QACCD3097CEPA Operation Manual Cable Clamp (×2) LC-20B1U LIQUID CRYSTAL TELEVISION TÉLÉVISEUR À... -
Page 9: Preparation
PREPARATION Using the Remote Control I Use the remote control by pointing it towards the remote sensor window. Objects between the remote control and sensor window may prevent proper operation. Cautions regarding use of remote control I Do not expose the remote control to shock. In addition, do not expose the remote control to liquids, and do not place in an area with high humidity. -
Page 10: Power Connection
“B” position on the RF switch (not supplied) : You can view the scrambled channels via the converter/ RF switch (not supplied) Note Consult your SHARP Dealer or Service Center for the type of splitter, RF switch or combiner that might be required. LC-20B1U-GBpp01-18... -
Page 11: Antenna Connection
PREPARATION (Continued) Antenna Connection (Continued) ANTENNAS • The antenna requirements for good color television reception are more important than those for black & white television reception. For this reason, a good quality outdoor antenna is strongly recommended. The following is a brief explanation of the type of connections that are provided with the various antenna systems. -
Page 12: Front And Rear Control Options
FRONT AND REAR CONTROL OPTIONS Main unit (front view) Upper control panel Speaker Remote sensor window (The actual location is not visible.) Note TV/VIDEO, CH ( )/( ), VOL (–)/(+), and MENU on the main unit have the same functions as the same buttons on the remote control. - Page 13 FRONT AND REAR CONTROL OPTIONS (Continued) Main unit (rear view) VIDEO V ID E O /O U T AUDIO (L) A V -I N 2 A U D IO AUDIO (R) O N E N T C O M P AUDIO (L) AUDIO (R) A U D IO...
-
Page 14: Removing The Back Cover
FRONT AND REAR CONTROL OPTIONS (Continued) Removing the Back Cover I Before connecting a connection cord into the rear terminal, remove the back cover. Push in the tab and pull out the back cover carefully. I To mount the cover, insert the 2 hooks on the bottom of the cover into the cabinet and press on the upper part of the back cover until the tab locks in place with a click. -
Page 15: Remote Control
REMOTE CONTROL POWER DISPLAY* SLEEP MUTE BRIGHT VOL(+)/(–) MTS* BASIC OPERATION This product is factory set to comply with the TV broadcasting system in the United States. For Brazil, Argentina and Uruguay, set the color system according to the country before using this product by following the table below. -
Page 16: Turning On Power
Turning on POWER MAIN POWER POWER indicator Switching TV/VIDEO [AV1/AV2/COMPONENT/CARD/TV] Modes POWER POWER DISPLAY SLEEP CARD ENTER MUTE BRIGHT MENU TV/VIDEO FLASHBACK TV/VIDEO LC-20B1U-GBpp01-18 BASIC OPERATION (Continued) Press MAIN POWER, located on the upper side of the main unit, to The POWER indicator instantane- ously changes from red to green and the main unit is turned on. -
Page 17: Sound Volume
BASIC OPERATION (Continued) Sound Volume POWER DISPLAY SLEEP CARD ENTER MUTE BRIGHT MENU TV/VIDEO FLASHBACK MUTE (+)/(–) ON/OFF Standby POWER DISPLAY SLEEP CARD ENTER MUTE BRIGHT MENU TV/VIDEO FLASHBACK POWER LC-20B1U-GBpp01-18 Press VOL (+) to increase the sound volume. The segment of the indicator increases. -
Page 18: Changing The Channels
Changing the Channels Changing channels by using Channel Select on the remote control • This LCD TV set allows you to select up to 125 channels (1 to 125). To select a channel, enter a 2- or 3-digit number. POWER DISPLAY SLEEP CARD... -
Page 19: Selecting Menu Items
SELECTING MENU ITEMS Selecting Menu Items • This LCD TV set allows you to adjust the various settings using the menu screen. Select the desired menu item by following the steps below and then refer to the indicated page for details. POWER DISPLAY SLEEP... -
Page 20: Adjustment
ADJUSTMENT Adjusting the SLEEP TIMER Settings You can set the SLEEP TIMER to automatically turn off the TV. SLEEP POWER DISPLAY SLEEP CARD ENTER MUTE BRIGHT MENU TV/VIDEO ENTER/ ]/[/ FLASHBACK </ > MENU Note When you set the SLEEP TIMER, the SLEEP indicator lights. After you set the SLEEP TIMER, if you turn off the MAIN POWER on the TV set or press the POWER button on the remote control, the SLEEP TIMER setting is cancelled and the SLEEP indicator goes out. -
Page 21: Adjusting The Brightness Settings
ADJUSTMENT (Continued) Adjusting the BRIGHTNESS Settings You can set the brightness of the screen. POWER DISPLAY SLEEP CARD ENTER MUTE BRIGHT MENU TV/VIDEO FLASHBACK BRIGHT POWER DISPLAY SLEEP CARD ENTER MUTE BRIGHT MENU TV/VIDEO ENTER/ FLASHBACK ]/[/ </ > MENU LC-20B1U-GBpp19-35 Directly setting the BRIGHTNESS Press BRIGHT to display the... -
Page 22: Adjusting The Language Settings
Adjusting the LANGUAGE Settings The language for the On-Screen Display can be ENGLISH, SPANISH or FRENCH. POWER DISPLAY SLEEP CARD ENTER MUTE BRIGHT MENU TV/VIDEO ENTER/ FLASHBACK MENU LC-20B1U-GBpp19-35 ADJUSTMENT (Continued) Press MENU to display the MENU screen. Press ]/[ to move the cursor to SET UP, and press ENTER. -
Page 23: Adjusting The Video Adjust Settings
ADJUSTMENT (Continued) Adjusting the VIDEO ADJUST Settings POWER DISPLAY SLEEP CARD ENTER MUTE BRIGHT MENU TV/VIDEO ENTER/ FLASHBACK ]/[/ </ > MENU LC-20B1U-GBpp19-35 Press MENU to display the MENU screen. Press ]/[ to move the cursor to VIDEO ADJUST, and press ENTER. -
Page 24: Adjusting The Video Adjust Settings
LC-20B1U-GBpp19-35 ADJUSTMENT (Continued) When the COMPONENT mode is selected Press >. Increase contrast Toward green Higher color intensity More bright Sharp picture Press >. Increase contrast Toward green Higher color intensity More bright Hard picture More blue level More green level Press >. -
Page 25: Adjusting The Preset Settings
ADJUSTMENT (Continued) Adjusting the PRESET Settings POWER DISPLAY SLEEP CARD ENTER MUTE BRIGHT MENU TV/VIDEO ENTER/ FLASHBACK ]/[/ </ > MENU Selected item Factory setting BRIGHTNESS [BRIGHT] AUTO POWER OFF [OFF] (only TV mode) UPSIDE [NORMAL] Normal vertical RIGHT/LEFT [NORMAL] Normal horizontal AV2 IN/OUT [IN] Note... -
Page 26: Set Up
SET UP I CHANNEL SETTING It is necessary to set the receiving mode to AIR or CABLE channels to receive locally broadcast TV programs. POWER DISPLAY SLEEP CARD ENTER MUTE BRIGHT MENU TV/VIDEO ENTER/ FLASHBACK MENU Note Receivable channels of your TV set are: AIR channels: VHF: 2 through 13. - Page 27 ADJUSTMENT (Continued) SET UP (Continued) I Saving broadcast TV channels in the memory POWER DISPLAY SLEEP CARD ENTER MUTE BRIGHT MENU TV/VIDEO ENTER/ FLASHBACK ]/[/ </ > MENU I Adding weak or additional channels or erasing unwanted channels from TV memory POWER DISPLAY SLEEP...
-
Page 28: Adjusting The Blue Screen Settings
Adjusting the BLUE SCREEN Settings I BLUE SCREEN Automatically turns the screen blue if a broadcast signal is not received. POWER DISPLAY SLEEP CARD ENTER MUTE BRIGHT MENU TV/VIDEO ENTER/ FLASHBACK ]/[/ </ > MENU Note When received signals are weak or interfered with by some other signals, the BLUE SCREEN function may be activated. -
Page 29: Adjusting The Closed Caption Settings
ADJUSTMENT (Continued) Adjusting the CLOSED CAPTION Settings I SETTING CLOSED CAPTION • This TV set is equipped with an internal Closed Caption decoder. “Closed Caption” is a system which allows conversations, narration, and sound effects in TV programs and home videos to be viewed as captions on the TV screen (see the illustration). •... -
Page 30: Adjusting The V-Chip Settings
Adjusting the V-CHIP Settings I V-CHIP • This function allows TV programs to be restricted and TV usage to be controlled based on FCC data. It prevents children from watching violent or sexual scenes that may be harmful. • Restriction of TV programs includes two ratings that contain information about the program: the MPAA rating and the TV Parental Guidelines. - Page 31 ADJUSTMENT (Continued) Adjusting the V-CHIP Settings (Continued) [2] TV PARENTAL GUIDELINES RATING TV-Y (All children) TV-Y7 (Direct to Older Children) ⇑ TV-G (General Audience) base TV-PG (Parental Guidance Suggested) ⇓ TV-14 (Parents Strongly Cautioned) TV-MA (Mature Audience Only) : The content rating can be set, but this rating is not normally broadcast by TV stations. ✕...
-
Page 32: I Setting V-Chip
Adjusting the V-CHIP Settings (Continued) I SETTING V-CHIP [1] MPAA RATING POWER DISPLAY SLEEP CARD ENTER ENTER/ MUTE BRIGHT MENU TV/VIDEO ]/[/ FLASHBACK </ > MENU Channel Select Note If you set G to BLOCK, all ratings are automatically blocked. If you set X to BLOCK, G, PG, PG-13, R and NC-17 are not blocked. - Page 33 ADJUSTMENT (Continued) Parent Control (V-CHIP Operation Continued) Adjusting the V-CHIP Settings (Continued) [2] TV GUIDELINES I Setting MPAA POWER DISPLAY SLEEP CARD ENTER MUTE BRIGHT MENU TV/VIDEO ENTER/ FLASHBACK ]/[/ </ > MENU LC-20B1U-GBpp19-35 Repeat steps 1 to 3 of [1] MPAA RATING.
- Page 34 Parent Control (V-CHIP Operation Continued) Adjusting the V-CHIP Settings (Continued) I Setting BLOCK CONTENT POWER DISPLAY SLEEP CARD ENTER MUTE BRIGHT MENU TV/VIDEO ENTER/ FLASHBACK ]/[/ </ > MENU Note If you set TV-14 to BLOCK, TV-MA is automatically blocked. Contents D, L, S and V are automatically blocked by X in the table on page 30.
- Page 35 ADJUSTMENT (Continued) Adjusting the V-CHIP Settings (Continued) [3] ACTIVATE ON TO TURN ON V-CHIP BLOCK POWER DISPLAY SLEEP CARD ENTER ENTER/ MUTE BRIGHT MENU TV/VIDEO FLASHBACK MENU Channel Select [4] CANCELING THE V-CHIP BLOCK SCREEN WHILE V-CHIP BLOCK IS ACTIVATED POWER DISPLAY SLEEP...
-
Page 36: Adjustment
Adjusting the V-CHIP Settings (Continued) [5] CHANGING THE V-CHIP BLOCK SETTINGS POWER DISPLAY SLEEP CARD ENTER MUTE BRIGHT MENU TV/VIDEO FLASHBACK Channel Select [6] CHANGING OR CLEARING THE SECRET NUMBER If you forget the secret number, clear the secret number as follows. Upper control panel of the main unit MENU... -
Page 37: Memory Card Playback
MEMORY CARD PLAYBACK Memory Cards I Images that have been recorded on the memory card using a digital camera or other device and that conform to the DCF standard* can be played back in CARD mode. * DCF (Design rule for Camera File system) is a standard of the Japan Electronics and Information Technology Industries Association (JEITA). -
Page 38: Card Precautions
Do not disassemble or modify the memory card or PC card adapter. I Storing data Recorded data may be lost in the following cases. Sharp bears absolutely no responsibility for recorded data that may be lost. Data may be lost IF: * The user or third party uses the memory card incorrectly. -
Page 39: Preparation
MEMORY CARD PLAYBACK (Continued) Preparation POWER DISPLAY SLEEP CARD ENTER MUTE BRIGHT MENU TV/VIDEO FLASHBACK POWER Pulling out the memory card Press POWER to turn off the LCD TV. Raise the card release lever horizontally. Press the lever straight on. Pull out the card and lower the lever. -
Page 40: Turning On Card Mode
MEMORY CARD PLAYBACK (Continued) Turning on CARD Mode POWER </ > CARD POWER DISPLAY SLEEP CARD ENTER MUTE BRIGHT MENU TV/VIDEO FLASHBACK TV/VIDEO Channel Select Note If a card error message (red) appears on the screen and images cannot be played back, refer to TROUBLESHOOTING on page 53. -
Page 41: Selecting The Playback Mode
MEMORY CARD PLAYBACK (Continued) Selecting the Playback Mode CARD playback mode Images on the card are displayed one by one. It is possible to forward or reverse through the images. POWER DISPLAY SLEEP CARD ENTER MUTE BRIGHT MENU TV/VIDEO CARD FLASHBACK </ >... - Page 42 MEMORY CARD PLAYBACK (Continued) Selecting the Playback Mode (Continued) I INDEX playback mode It is possible to display nine images at a time. POWER DISPLAY SLEEP CARD ENTER MUTE BRIGHT MENU TV/VIDEO CARD FLASHBACK ENTER/ ]/[/ </ > Note The DISPLAY button does not function on the INDEX MODE screen. In INDEX MODE, the contents displayed differ as described below depending on the ORDER TO SHOW setting made for SLIDE SHOW playback mode.
-
Page 43: Card Adjustment
CARD ADJUSTMENT Selecting CARD SETTING Items CARD SETTING on the MENU screen can be used to make various settings such as SLIDE SHOW, MY PROGRAM, ROTATE and SOUND SETTING. Select the desired item by following the steps below and then refer to the indicated page for details. CARD CARD MENU... -
Page 44: Adjusting The Slide Show Settings
Adjusting the SLIDE SHOW Settings You can set the desired display time and playback order. REPEAT setting is also available. CARD POWER DISPLAY SLEEP CARD ENTER MUTE BRIGHT MENU TV/VIDEO ENTER/ FLASHBACK ]/[/ </ > MENU Note The above time setting for INTERVAL is the minimum display time per image. Actual playback time for an image may vary depending on the data size and the time required to load the image from the media. -
Page 45: Adjusting The My Program Settings
CARD ADJUSTMENT (Continued) Adjusting the MY PROGRAM Settings You can select and register any of up to nine images from a large number of images. Images registered for MY PROGRAM are displayed in the specified sequence in SLIDE SHOW playback mode. I Registering MY PROGRAM Images CARD POWER... - Page 46 Adjusting the MY PROGRAM Settings (Continued) I Erasing the MY PROGRAM Settings POWER DISPLAY SLEEP CARD ENTER MUTE BRIGHT MENU TV/VIDEO ENTER/ FLASHBACK MENU LC-20B1U-GBpp36-47 CARD ADJUSTMENT (Continued) Press ]/[/</ > to select the image to be registered, moving the selection marker (yellow) in the selection area, and press ENTER.
-
Page 47: Adjusting The Rotate Settings
CARD ADJUSTMENT (Continued) Adjusting the ROTATE Settings • You can rotate a recorded image. • You can move to the next or previous image by selecting CHOOSE FILE even if you have not exited the ROTATE screen. I Rotating Images When the image that you want to rotate is displayed in CARD or SLIDE SHOW playback mode, follow the steps below to rotate the image. -
Page 48: Adjusting The Sound Settings
Adjusting the SOUND Settings You can listen to the audio from TV or external devices such as VCR or DVD player, etc. through the TV set while card playback. CARD POWER DISPLAY SLEEP CARD ENTER MUTE BRIGHT MENU TV/VIDEO ENTER/ FLASHBACK ]/[/ </>... -
Page 49: Connecting With External Devices
CONNECTING WITH EXTERNAL DEVICES You can enjoy picture and sound by connecting a VCR or a home video game system to the terminals located on the rear of the TV set. When connecting an external device, turn off the power of the main unit first to prevent any possible damage. - Page 50 CONNECTING WITH EXTERNAL DEVICES (Continued) Connecting a VCR, DVD player or a video camera (AV-IN1/2/COMPONENT) V ID E O /O U T A V -I N 2 A U D IO O N E N T C O M P A U D IO V ID E O A V -I N...
-
Page 51: Connecting With External Devices
CONNECTING WITH EXTERNAL DEVICES (Continued) Outputting video and audio (video output) You can output video and audio data from the TV set through the AV output terminals (AV-OUT). Note AV2 has 2 OUT modes (see page 24). When using the S-Video input for AV-IN1, no video output will be made to the AV output terminal, but audio output will be made for connection to external audio systems. -
Page 52: Troubleshooting
TROUBLESHOOTING I Before calling for repair service, check the following items for possible remedies to the encountered symptoms. TV set Problem Picture Sound There is no picture or sound. There is no Picture picture. There is no picture from AV-IN 1. There is no sound. - Page 53 TROUBLESHOOTING (Continued) Antenna Problem The picture is not sharp. The picture moves. The picture is doubled or tripled. The picture is spotted. There are stripes on the screen or colors fade. I Use in hot and cold rooms (locations) • When the unit is used in a low temperature rooms (location), the picture may leave trails or appear slightly delayed.
-
Page 54: Troubleshooting
Card Problem Data on the card cannot be played back. NO CARD INSERTED* displayed. NO IMAGE IN THE CARD* displayed. ACCESSING DATA* displayed. PLEASE SET MY PROGRAM is displayed. CARD SETTING on the MENU screen is displayed in magenta and cannot be selected. Desired operaions may be selected after data has been loading from the card. -
Page 55: Specifications
Weight Accessories As a part of policy of continuous improvement, SHARP reserves the right to make design and specification changes for product improvement without prior notice. The performance specification figures indicated are nominal values of production units. There may be some deviations from these values in individual units. -
Page 56: Dimensional Drawings
DIMENSIONAL DRAWINGS 4.2/107.3 2.9/72.6 1.58/40 1.2/30.5 6.5/163.9 2.6/65.5 9.0/229.4 LC-20B1U-GBpp48-58 MENU TV/VIDEO MAIN POWER 12.6/319 24.8/630 15.8/401.3 14.9/379 VIDEO AV-IN1 AUDIO VIDEO S-VIDEO AV-IN 2/OUT AUDIO HEAD PHONE COMPONENT ANT. 3.94/100 AUDIO POWER INPUT DC12V 02.2.21, 4:39 PM Unit: inch/mm... -
Page 57: Calling For Service
Product, and shall constitute full satisfaction of all claims, whether based on contract, negligence, strict liability or otherwise. In no event shall Sharp be liable, or in any way responsible, for any damages or defects in the Product which were caused by repairs or attempted repairs performed by anyone other than an authorized servicer. - Page 58 (b) Any Sharp product tampered with, modified, adjusted or repaired by any party other than Sharp, Sharp’s Authorized Service Centres or Sharp’s Authorized Servicing Dealers. (c) Damage caused or repairs required as a result of the use with items not specified or approved by Sharp, including but not limited to head cleaning tapes and chemical cleaning agents.
- Page 59 LC-20B1U-GBpp48-58 02.2.21, 4:39 PM...
Need help?
Do you have a question about the Aquos LC 20B1U and is the answer not in the manual?
Questions and answers