ZyXEL Communications P-660HW-D Quick Start Manual
Adsl2+ 4-port gateway
Hide thumbs
Also See for P-660HW-D:
- User manual (344 pages) ,
- Quick start manual (7 pages) ,
- Support notes (122 pages)
Advertisement
Quick Links
Advertisement

Related Manuals for ZyXEL Communications P-660HW-D


Summary of Contents for ZyXEL Communications P-660HW-D
- Page 1 P-660HW-D ADSL2+ 4-port Gateway Quick Start Guide Version 3.40 1/2007 Edition 2...
- Page 2 If you prefer to see a multi-media animation of how to make hardware connections, see the installation tutorial on the included CD. 1 On the included CD, click Multimedia Auto Provisioner > Installation Tutorial. 2 At the end of the tutorial, click Configuration Genie to set up your P-660HW-D to connect to the Internet.
-
Page 3: Hardware Connections
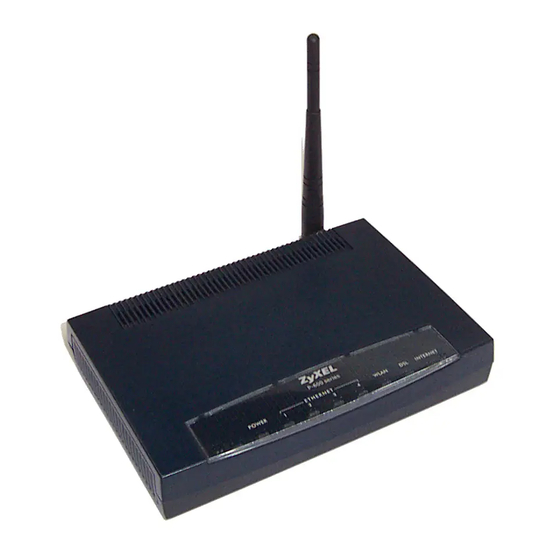
P-660HW-D Quick Start Guide 1 Hardware Connections 1 DSL: Use the gray telephone wire to connect your P-660HW-D’s DSL port to a telephone jack (or to a splitter, if one is already installed). 2 ETHERNET: Use the yellow Ethernet cable to connect a computer to an ETHERNET port for initial configuration and/or Internet access. - Page 4 • The POWER light blinks while your P-660HW-D starts up and stays on once it is ready. • The DSL light is on when the P-660HW-D has a DSL connection. • The INTERNET light is on when you are able to access the Internet and blinks when the P-660HW-D is send- ing or receiving data.
-
Page 5: Internet And Wireless Setup: Wizard
5 If you do not see the connection test screen, or if the connection test is not successful, check your connections and restart the P-660HW-D. If you still cannot access the Internet, follow the steps in the following section. You should have information provided by your Internet Service Provider. - Page 6 P-660HW-D Quick Start Guide 3 Type (and retype) a new password and click Apply. Note: You have to use a new password other than the default password 1234, or you cannot apply it successfully. 4 The system asks you to enter your new password to log in again.
- Page 7 P-660HW-D Quick Start Guide 6 Click INTERNET/WIRELESS SETUP. Wait while your P-660HW-D tries to detect your DSL connection. 7 Click Next. Go to step to configure wireless settings. If the connection test is not successful, you may see either a screen similar to one of the following. Either click Restart the Internet/Wireless Setup Wizard if available to have the ZyXEL Device detect your connection again or click Next to set up your Internet connection manually.
- Page 8 P-660HW-D Quick Start Guide Follow up the instructions in the wizard. Enter your Internet connection information exactly as provided by your ISP. If you do not see the following screen, go to section 4. 8 Select Active and click Next to continue. Make sure Enable OTIST is not selected (recommended).
- Page 9 P-660HW-D Quick Start Guide 9 Configure your wireless settings in the screen. Click Next. 10 Follow the directions in the screen. The screen varies depending on the security you choose. Click Next to continue. 11Click Apply to save your wireless LAN settings.
- Page 10 P-660HW-D Quick Start Guide 12Use the read-only summary table to check whether what you have configured is correct. Click Finish to complete and save the wizard setup. 13The Internet connection is ready for you to use. 4 Internet Connection Setup: Manual Use this section to set up your Internet connection manually if you do not see the ISP Parameters for Internet Access screen when you run the wizard (see section 3).
- Page 11 P-660HW-D Quick Start Guide 3 The Status screen appears. Click Network > WAN in the navigation panel on the left of the screen. 4 The Internet Connection screen appears. Enter the information exactly as provided by your ISP. Click Apply.
-
Page 12: Troubleshooting
You must enable OTIST on the P-660HW-D and all wireless clients within three minutes in any order. To enable OTIST on the P-660HW-D, you can either use the wizard (see section 3) or hold in the RESET button (see section 1) for one to five seconds. Do not hold the RESET button in for too long, as this will reset the P-660HW-D to the factory defaults. - Page 13 DHCP Setup and ensure that DHCP is set to None. Your ISP gives your computer an IP address directly. If you want to access the P-660HW-D again, you need to use a static IP address in the same subnet as your P-660HW-D (the P-660HW-D’s default IP address is 192.168.1.1).
Need help?
Do you have a question about the P-660HW-D and is the answer not in the manual?
Questions and answers