Advertisement
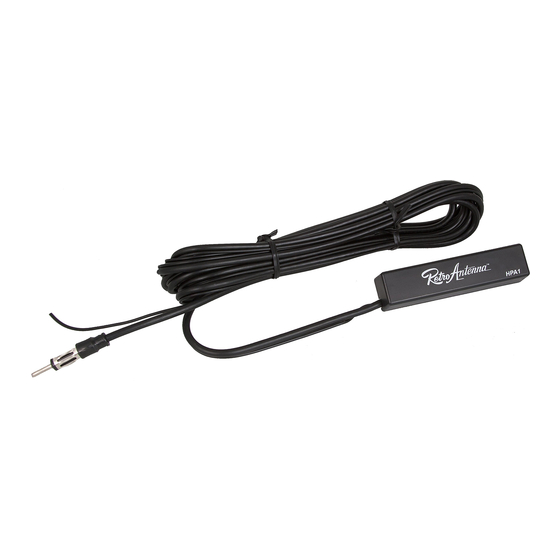
HPA1 Antenna
The HPA1 antenna is designed to mount inside your vehicle when you are not using a
traditional fender-mounted antenna.
Installation
1. Place the main body of the HPA1 as high in the dash as possible. Avoid placing it
near any high-current wiring.
2. Ground the HPA1 to a clean metal point close to its body with the small braided
cable and eyelet.
3. Route the antenna cable with the thin black power wire to your radio location.
Connect the thin black wire to a 12-volt ignition source or the blue power antenna
output wire of your RetroSound® radio.
4. Connect the male antenna plug into the female antenna receptacle of your radio.
Installation Guide
www.r et ro ma n u fa c t ur i n g. c o m
HPA1
Amplified AM/FM
Hide-away Antenna
Advertisement
Table of Contents

Related Manuals for RetroSound HPA1

Summary of Contents for RetroSound HPA1
- Page 1 Installation 1. Place the main body of the HPA1 as high in the dash as possible. Avoid placing it near any high-current wiring. 2. Ground the HPA1 to a clean metal point close to its body with the small braided cable and eyelet.
- Page 2 Warranty Your unit comes with a manufacturer's warranty covering any defects in materials and workmanship. Retro Manufacturing, LLC (collectively referred to as "the warranter"), at its option, will either (a) repair your unit with new or refurbished parts or (b) replace it with a new or refurbished unit. The warranty period starts from the original purchase date and is valid for the length of time indicated in the chart below.
Need help?
Do you have a question about the HPA1 and is the answer not in the manual?
Questions and answers