Table of Contents
Advertisement
Quick Links
OnAir 2500 Quick reference
OnAir 2500 Quick Reference ..................................................................................................................................................... 3
1
What You See Is What You Got .................................................................................................................................. 4
2
Safety Information ...................................................................................................................................................... 4
3
First Aid ...................................................................................................................................................................... 4
4
Earthing ....................................................................................................................................................................... 5
5
Dimensions ................................................................................................................................................................. 5
6
Setup of the Fixed-frame Version ............................................................................................................................... 7
7
Setup of the Modulo Version .................................................................................................................................... 10
8
Power-up ................................................................................................................................................................... 12
9
The Fader Strip ......................................................................................................................................................... 12
10
Connector Pin Assignments ...................................................................................................................................... 13
11
Optional External Units ............................................................................................................................................ 14
Document generated: 09.09.14
OnAir 2500 Digital Mixing Console
Quick Reference Guide 1
Advertisement
Table of Contents

Subscribe to Our Youtube Channel
Related Manuals for Studer OnAir 2500


Summary of Contents for Studer OnAir 2500
-
Page 1: Table Of Contents
OnAir 2500 Digital Mixing Console OnAir 2500 Quick reference OnAir 2500 Quick Reference ..............................3 What You See Is What You Got ..........................4 Safety Information ..............................4 First Aid ..................................4 Earthing ..................................5 Dimensions ................................. 5 Setup of the Fixed-frame Version ..........................7 Setup of the Modulo Version ............................ - Page 2 OnAir 2500 Digital Mixing Console 2 Quick Reference Guide Document generated: 09.09.14...
-
Page 3: Onair 2500 Quick Reference
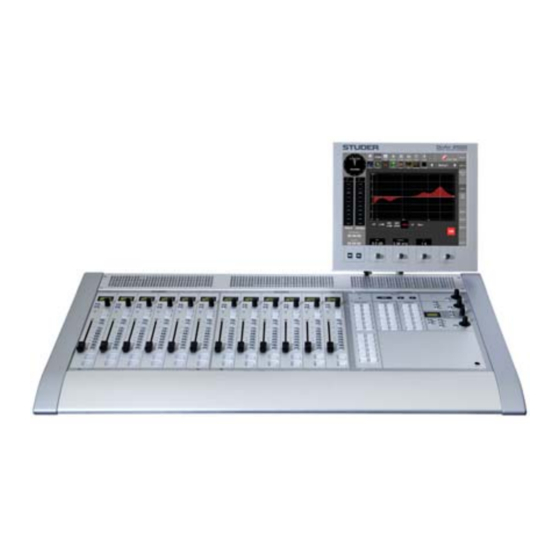
• All-in-one console design – no additional core required for operation; an optional, external D21m I/O frame for additional I/O can be connected via MADI • Also available as OnAir 2500 Modulo, with rackmountable DSP mainframe and furniture-recessable fader modules • 12, 18 or 24 fader layout with 100 mm manual faders (motor faders optional) • Touch-sensitive 12” color TFT screen, four rotary encoders for parameter... -
Page 4: What You See Is What You Got
OnAir 2500 Digital Mixing Console What You See is What You Got • OnAir 2500 digital mixing console • Main screen with stand and four mounting screws (M4×10) • Mains cable with IEC connector and three mains plugs (for G/F, UK, US) • Tool set (consisting of Allen screwdrivers 2/2.5/3 mm, USB stick, 2 37-pin Sub-D plugs for GPIO sockets, 5 fader knobs, 1 rotary knob, 6 key caps) • This quick reference instruction leaflet • Talkback module (optional; including one ADAT and one Cat5 cable) • Redundant power supply unit (PSU) (optional; including mains cable with IEC connector and DC supply cable 5 m) It is a good idea to keep the original packing materials in case that your unit needs to be transported. -
Page 5: Earthing
OnAir 2500 Digital Mixing Console earthing Earthing of units with mains supply (class I equipment) is performed via the protective earth (PE) conductor integrated in the mains cable. Units with battery operation (< 60 V, class III equipment) must be earthed separately. Earthing the unit is one of the measures for protection against electrical shock hazard (dangerous body currents). Hazardous voltage may not only be caused by a defective power supply insulation, but may also be introduced by the connected audio or control cables. - Page 6 812 mm / 32” (12 Fader) 1056 mm / 41.6” (18 Fader) 1300 mm / 51.2” (24 Fader) OnAir 2500 Digital Mixing Console 8 mm / 0.3” 122 mm / 4.8” 40 mm / 1.6” 732 mm / 28.8” (12 Fader) 465 mm / 18.3”...
-
Page 7: Setup Of The Fixed-Frame Version
OnAir 2500 Digital Mixing Console 269 mm / 10.6” 207 mm / 8.2” 292 mm / 11.5” Central Module Fader Module cut-out 245 mm / 9.65” cut-out 245 mm / 9.65” 244 mm / 9.6” 244 mm / 9.6” Core Frame Front View 380 mm / 15”... - Page 8 OnAir 2500 Digital Mixing Console USB Socket Mains 24 V Earth Screen Mount Screen RS422 Studio MADI MADI WCLK AES/EBU Inlet/ Inlet Term- RS232 Mon/TB Main Sync In Switch inal 8 Quick Reference Guide Document generated: 09.09.14...
- Page 9 OnAir 2500 Digital Mixing Console Signal Connection Connect your inputs and output signals. For a basic test hookup a digital signal (AES / EBU IN / OUT [3]) or an analog line source (LINE IN [4]) and a pair of active monitor loudspeakers (CR LSP [5]) or headphones (DJ [6]) will do. An optional talkback module can be connected to the optical ADAT 1 (ST MON) [7] input/output and to the ST MON [8] socket.
-
Page 10: Setup Of The Modulo Version
OnAir 2500 Digital Mixing Console For additional information on ambient temperature, mains connection and earthing please refer to the Operating Instructions file on this same CD. Setup of the Modulo Version Mounting The fader modules as well as the central module can be flush-mounted into a table or furniture. The core frame can be rackmounted in a 19” rack. Free air circulation must be guaranteed through all the air vents of the core frame wiring Fader... - Page 11 OnAir 2500 Digital Mixing Console connected to the mains earth. If the earthing connection can be interrupted, for example, by unplugging the mains plug of an external power supply unit, an additional, permanent earthing connection must be installed using the...
-
Page 12: Power-Up
OnAir 2500 Digital Mixing Console Power-up The power switch is located next to the 100-240V~ [10] mains inlet. If using an external DC power supply unit connected to 24V DC IN [9], the console can be switched on and off with the PSU’s power switch. -
Page 13: Connector Pin Assignments
OnAir 2500 Digital Mixing Console connector Pin Assignments MIC IN / LINE IN (XLR 3f) LINE OUT 1-8 / CR LSP L/R (XLR 3m) Signal (Input) Signal (Output) Screen Screen In + Out + In – Out – LINE OUT 9-16 (25-pin D-type, female) -
Page 14: Optional External Units
OnAir 2500 Digital Mixing Console 24V DC IN (10-pin Hirose, male) Signal +22...28 V +22...28 V n.c. (no internal connection) Power alarm output n.c. (no internal connection) n.c. (no internal connection) n.c. (no internal connection) Power alarm enable GPI / GPO 1-16 (37-pin D-type, female; 2 plugs supplied) - Page 15 GPO signal. gPIO Boxes Two types of general-purpose desktop boxes in the OnAir 2500 design, both with an illuminated key, and one of them with three additional LEDs are available for many different applications, e.g. cough key, control of external devices, etc. The keys may directly be connected to GPIs, the LEDs to GPOs,...
- Page 16 OnAir 2500 Digital Mixing Console Studio Source Selection Selection of the studio monitoring source can be done on the CR desk or on the compact monitoring/TB box. Studio Muting The studio monitoring speakers are automatically muted if at least one of the microphones in the studio (Configuration: Input Location = Studio2) is on. The studio headphones are not muted in such a case. talkback During talkback from studio to CR and vice versa, the studio speaker level is automatically dimmed. The talkback signal from CR to studio is not...
- Page 17 OnAir 2500 Digital Mixing Console For easier wiring of single GPI and/or GPO signals, this break-out box can be used. 16 GPI signals and 12 of the 16 GPO signals of a GPIO card with relay outputs (A949.0436) are wired to single, 4-pin ‘Combicon’ terminals (see below), providing the relay contacts or opto-coupler inputs, as well as GND and a short circuit-proof 5 V DC supply. If voltages exceeding 50 V (AC or DC) are switched, the break-out box must be placed within a closed rack in order to avoid shock hazards by touching the contacts.
- Page 18 OnAir 2500 Digital Mixing Console 18 Quick Reference Guide Document generated: 09.09.14...
- Page 19 The information in this document has been carefully checked and is believed to be accurate at the time of publica- tion. However, no responsibility is taken by us for inaccuracies, errors, or omissions, nor is any liability assumed for any loss or damage resulting either directly or indirectly from use of the information contained within it. Prepared and edited by Copyright by Studer Professional Audio GmbH Studer Professional Audio GmbH Printed in Switzerland Technical Documentation Order no. 5053946 (0914)
Need help?
Do you have a question about the OnAir 2500 and is the answer not in the manual?
Questions and answers