Advertisement
Table of Contents
- 1 Table of Contents
- 2 Features
- 3 Control Locations
- 4 Choosing a Power Supply
- 5 Preliminary Settings
- 6 Tuning Modes
- 7 Clock Radio Operation
- 8 Setting the Sleep Timer
- 9 Specialtuning Techniques and Controls
- 10 Using Your Cassette Recorder
- 11 Special SSB/CW Reception Techniques
- 12 Care and Maintenance
- 13 Specifications
- Download this manual
Advertisement
Table of Contents

Related Manuals for Sangean ATS-818ACS


Summary of Contents for Sangean ATS-818ACS
-
Page 2: Table Of Contents
CONTENTS Features Control Locations Choosing a Power Supply Preliminary Settings Tuning Modes Clock Radio Operation Special Tuning Techniques and Controls Using Your Cassette Recorder Special SSB/CW Reception Techniques Care and Maintenance Specifications... -
Page 3: Features
FEATURES C o n t i n u o u s Tuning a l l o w s c o n t i n u o u s r e c e p t i o n o f a l l s t a t i o n s a n d b a n d s . F a s t r e s p o n s e , T h r e e C o l o r L C D d i c a t e s s t a t i o n f r e q u e n c y i n l a r g e e a s y - t o - r e a d n u m b e r s , i n c l u d i n g d u a l t i m e ,... -
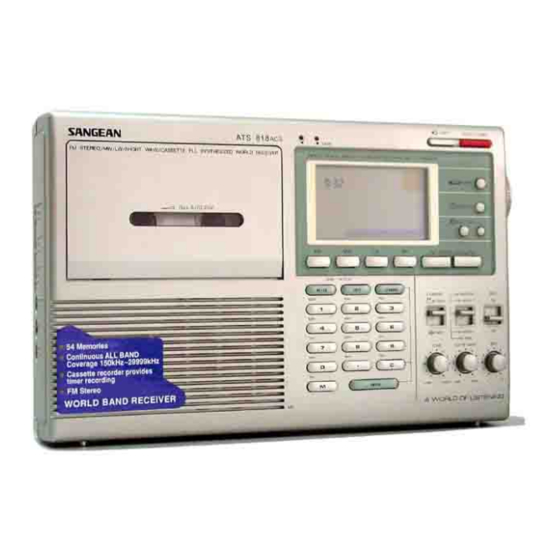
Page 4: Control Locations
CONTROL LOCATIONS 1 . D i s p l a y L i g h t B u t t o n 2 . R a d i o P o w e r o n / o f f B u t t o n . 3 . - Page 5 30 29 28 27 26...
-
Page 6: Choosing A Power Supply
CHOOSING A POWER SUPPLY You can operate the receiver using: “ ” 4 Alkaline D size Batteries HouseholdAC[With optional AC Adaptor] 12 Volt DC Automobile Battery [With optional DC adaptor] USING BATTERIES “ 1.Press latch marked OPEN on battery compartment cover in the direction of the arrow and lift off cover. - Page 7 USING HOUSE CURRENT [AC] T h e r e c e i v e r m a y b e p o w e r e d b y A C c u r r e n t u s i n g t h e A C a d a p t o r ( n o t i n c l u d e d ) . I n s e r t t h e s m a l l b a r r e l s h a p e d p l u g i n t o t h e j a c k o n t h e s i d e o f t h e r a d i o m a r k e d "...
-
Page 8: Preliminary Settings
PRELIMINARY SETTINGS SETTING THE CLOCK T h e t i m e i s d i s p l a y e d i n t h e 2 4 h o u r m o d e s i n c e m o s t s h o r t w a v e s t a t i o n s o p e r a t e a c c o r d i n g t o U T C . - Page 9 4 . N o w p r e s s b u t t o n m a r k e d " E N T E R " . D i s p l a y s h o w s h o u r s a n d m i n u t e s .
- Page 10 SETTING DUALTIME A s e c o n d t i m e z o n e c a n b e p r o g r a m m e d i n t o t h i s u n i t s u c h a s y o u r h o m e t i m e i f y o u a r e t r a v e l l i n g , o r U T C World Time f o r i n s t a n t a c c e s s t o s h o r t - w a v e b r o a d c a s t s o r t h e l o c a l t i m e w h e r e e v e r y o u m a y b e .
- Page 11 5.Now press button marked "ENTER" , Display shows hours and minutes. 6.By pressing the right side "DUAL TIME" button now, the LCD display will once again show the clock time. 7.To verify "DUAL TIME" , press the left side 'DUAL TIME" button to display your "OTHER"...
- Page 12 BAND SELECTION There are four band selector buttons located Just beneath the LCD display. BAND 1.Turn radio on by pressing "POWER{ button. Display will show last band and frequency selected. 2.By pressing any one of the four band selector buttons the display shows the band selected and a random frequency within that band.
-
Page 13: Tuning Modes
TUNING MODE A D J U S T I N G T H E A N T E N N A L o c a t e t h e b a n d y o u w a n t t o l i s t e n t o i n t h e f o l l o w i n g c h a r t a n d a d j u s t t h e a n t e n n a a s i n d i c a t e d F R E Q U E N C Y... -
Page 14: Direct Tuning
You may select any frequency using four different tuning methods: Direct Tuning Manual Tuning Scan Tuning Memory Tuning DIRECT TUNING You may "KEY IN" a specific band (120m, 49m,16m) by pressing the appropriate button. The exact station is then selected by pressing the buttons corresponding to the station frequency. - Page 15 4.Press the button marked "ENTER" within twelve seconds. The frequency and band will now show up in the display. The SIGNAL STRENGTH will also show. NOTE: Be sure to press the decimal point [.] in 100.70 MHz, otherwise the display will show "SW"...
- Page 16 MANUALTUNING To select a station you do not know the frequency of , use the MANUAL TUNING [V] button or the ROTARY TUNING control on the side of the radio . 1 . P r e s s t h e P O W E R b u t t o n t o t u r n o n r a d i o .
- Page 17 NOTE When you repeatedl press the[ ] or uttons, the frequencies change in ncrements of : FM: 50 kHz (or 100 kHz) LW: 9 kHz MW: 9 kHz or 10 kHz SW: 5 kHz 4.Adjus t the VOLUM E and TON E controls as you like.
-
Page 18: Scan Tuning
SCAN TUNING U s e s c a n t u n i n g t o q u i c k l y l o c a t e a s t a t i o n o r t o m o n i t o r s e v e r a l s t a t i o n s w i t h i n a s p e c i f i c b a n d . - Page 19 4.Press and hold the or [V] buttons for at least a half second or more and the radio will scan all the frequencies in that band, and will stop automatically each time it lands on an active station. Signal strength is recorded on the SIGNAL STRENGTH INDICATOR.
-
Page 20: Memory Tuning
MEMORY TUNING Yo u m a y s t o r e u p t o e i g h t e e n d i f f e r e n t f r e q u e n c i e s o n t h e S W / F M b a n d s a n d u p t o n i n e d i f f e r e n t f r e q u e n c i e s o n e a c h o f L W / M W b a n d s f o r i n s t a n t s e l e c t i o n o f y o u r f a v o r i t e s t a t i o n s . - Page 21 RECALLING A FREQUENCY 1. Press POWER button to turn on radio. 2.Select a band in which a station is stored that you want to recall. 3.Press any of the NUMBERED buttons for a desired station and the radio will instantly tune to it and display that frequency and the MEMORY position number.
-
Page 22: Clock Radio Operation
CLOCK RADIO OPERATION With this receiver y o u can fall asleep to your favorite station by pressing the SLEEP button, o r wake you to the morning, news, o r an alarm buzzer. Make the following settings with the POWER off!! Setting the A l a r m 1.Press STANDBY button s o display s h o w s 0:00.STANDBY will flash for 1 5 seconds. -
Page 23: Setting The Sleep Timer
4.To verify, press STANDBY button again. Press STANDBY once more and the clock returns to the current time. 5.You may select radio or buzzer alarm to wake you by setting STANDBY:BUZZER/ RADIO selector switch . 6. To cancel the ALARM time, press STANDBY and "C"... -
Page 24: Specialtuning Techniques And Controls
SPECIALTUNING TECHNIQUES AND CONTROLS I n a d d i t i o n t o t h e s t a n d a r d t u n i n g o p e r - A a t i o n s d e s c r i b e d p r e v i o u s l y , u s e t h e f o l l o w i n g c o n t r o l s f o r s p e c i a l o p e r a t i o n s . - Page 25 HEADPHONE USE While not a control, you may consider using HEADPHONES to obtain the best audio clarity when listening to SW. Since many SW stations broadcast only marginal signals, using HEADPHONES will enable you to distinguish between the signal and the noise usually encountered at night.
- Page 26 EXTERNA To obtain optimum performance from this unit, especially when listening to SW/SSB/ C W a n e x t e r n a l antenna should be used, if at all possible. The antenna is connected to the EXTERNALANTENNAADAPTER and then plugged into the EXTERNALANTENNA jack located on the left side of the radio.
-
Page 27: Using Your Cassette Recorder
Using Your Cassette Recorder The Sangean Cassette Recorder built in to your Sangean Model ATS-818ACS is a top quality, precision cassette recorder providing a number of features to further enhance your use and enjoyment of your Sangean radio .Your Recorder can: A: Allow you to play your favorite cassettes. - Page 28 To Record with the Built-in Microphone Your cassette recorder has a built-in condenser microphone [21] on the front of the cabinet. To record with the built-in microphone follow the following steps: 30 29 28 27 26 To Record from the Radio To record the current tuned program follow these steps: 30 29 28 27 26 1.Select CrO2/NORMAL Tape Selection...
- Page 29 To Record from the Radio using the Program Feature 30 29 28 27 26 1.Turn on radio and tune to the desired station. 2.Turn off the radio, push STANDBY but- ton [9] and set time for required start of recording. 3.Switch Standby Buzzer /Radio Switch [12] to the Radio position.
-
Page 30: Special Ssb/Cw Reception Techniques
SPECIAL SSB/CW RECEPTION TECHNIQUES M a n y s t a t i o n s t r a n s m i t t e l e g r a p h t r a n s m i s s i o n s i n t h e s h o r t w a v e b a n d . - Page 31 4 . R o t a t e t h e B F O P I T C H c o n t r o l t o t h e m i d p o i n t 5 . R o t a t e t h e R F G A I N c o n t r o l t o t h e M A X p o s i t i o n .
- Page 32 8.Adjust the C W t o n e using the BFO PITCH control. 9.Reduce strong signals by using the RF GAIN control. This also reduces interference and noise. TO RECEIVE SSB VOICE 1 .Turn on t h e radio. 2 .Extend the antenna fully, i n a straight u p position.
- Page 33 4 .Rotate t h e B F O P I T C H c o n t r o l t o t h e m i d p o i n t . 5 .Rotate t h e R F G A I N c o n t r o l t o t h e M A X p o s i t i o n .
- Page 34 8.Rotate the BFO PITCH control to adjust the signal quality. 9.Rotate the RF CAIN control to dampen strong signals. This can improve signal clarity as well. Note :Before choosing another band, set the RF GAIN control to MAX, and move the BFO switch to the OFF position.
-
Page 35: Care And Maintenance
CARE AND MAINTENANCE T h i s r e c e i v e r i s a n e x a m p l e o f s u p e r i o r d e s i g n a n d c r a f t s m a n s h i p . T h e f o l l o w i n g s u g g e s t i o n s w i l l h e l p y o u c a r e f o r t h e r e c e i v e r s o t h a t y o u c a n e n j o y i t f o r y e a r s . - Page 36 Wipe the product with a dampened cloth occasionally to keep it looking new. Do not use harsh chemicals, cleaning solvents, or strong detergents to clean to product. Use only fresh batteries of the recommend- ed size and type. Always remove old or weak batteries .They can leak chemicals that destroy electronic circuits.
-
Page 37: Specifications
SPECIFICATIONS S e m i c o n d u c t o r s : 1 L S I . 8 F ET. 6 0 D i o d e s . 2 L E D S . C i r c u i t : A M ( LW , M W , S W ) F r e q u e n c y r a n g e : F M :... - Page 38 Wow & Flutter: Frequency Response: Signal to Noise Ratio: Power sources: Dimension: Weight: Accessories: 0.35%W/RMS. 125-8000 Hz. 35dB. DC: 4 each D size batteries 3 each AA size batteries AC: 6 volt DC (optional adapter negative center) 296(L) x 192(H) x 68(T)mm 2000g without batteries Adaptor (except for certain areas like United Kingdom, New Zealand,Australia, SouthAfrica, etc.)
Need help?
Do you have a question about the ATS-818ACS and is the answer not in the manual?
Questions and answers