Kiddery Toys BKW101 Assembly Instructions Manual
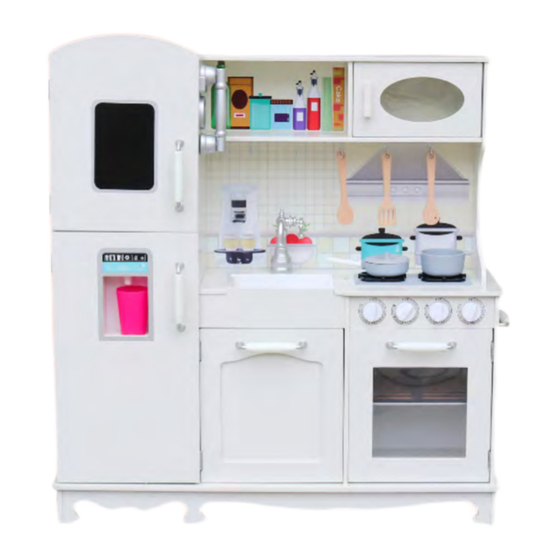
Wooden kitchen
Hide thumbs
Also See for BKW101:
- Assembly instructions manual (11 pages) ,
- Assembly instructions manual (11 pages)

Related Manuals for Kiddery Toys BKW101


Summary of Contents for Kiddery Toys BKW101
- Page 1 W O O D E N K I T C H E N M O D E L B K W 1 0 1 Scan QR CODE for Assembly Video A s s e m b ly I n s t r u c t i o n s...
- Page 2 • Tenga cuidado de no apretar demasiado los tornillos o no mantendrán las piezas juntas de manera adecuada. • Para montaje permanente se recomienda cola para madera Please retain this information for future reference. 1 | Kiddery Toys - Kitchen Set Product Manual...
- Page 3 • 3 x Wooden Cooking Utensils • 1 x Vintage Telephone Vintage Telephone Holder Realistic Sink Pretend Oven with Knobs Kitchen Towel Rack Imaginary Blackboard and Baking Rack For Notes Kiddery Toys - Wooden Kitchen Toy Product Manual | 2...
- Page 4 Ax35 Bx58 Dx52 Ex20 3 | Kiddery Toys - Wooden Kitchen Toy Product Manual...
- Page 5 Insert F's into side holes of part 21 & 22 make sure to keep the opening upwards. Fasten 10 to 20 by turning F so it locks G into place. Kiddery Toys - Wooden Kitchen Toy Product Manual | 4...
- Page 6 3 from the inside Insert B's in holes • of 11, 33, 34,and (using Wood Glue Bx16 could help hold the B's in place while going to next step) 5 | Kiddery Toys - Wooden Kitchen Toy Product Manual...
- Page 7 E from bottom Ex10 thru part 9 do not tighten screws yet (May experience some difficulty to align thru W&V) Make sure to tighten the screws after all screws are inserted Kiddery Toys - Wooden Kitchen Toy Product Manual | 6...
- Page 8 A thru part 2. (may require 2 people) Screw in R's to 8 • Connect item 7 to 8 • using A and to 9 using H as shown. 7 | Kiddery Toys - Wooden Kitchen Toy Product Manual...
- Page 9 Lock 24 & 26 to the already mounted 27 then Lock opposite side 27 and screw to door 30. Connect 23 to the assembly using screw C. Kiddery Toys - Wooden Kitchen Toy Product Manual | 8...
- Page 10 • base using hinges J & screws D. (see image below as every door has their unique way of installation) Fasten K to 2 and 6 Dx22 • using D. 9 | Kiddery Toys - Wooden Kitchen Toy Product Manual...
- Page 11 Questions? Help? Replacements? Scan QR to share what your child 1-844-kiddery enjoys most about (543-3379) Text or Call the set, wood, looks, 24-7 text help 914-623-8794 features etc. Email: support@kidderytoys.com www.kidderytoys.com Kiddery Toys - Wooden Kitchen Toy Product Manual | 10...
Need help?
Do you have a question about the BKW101 and is the answer not in the manual?
Questions and answers