Advertisement
Quick Links
Packaging:
Your Arctic Oven 10x20 comes disassembled in a large, nylon drawstring storage bag.
The storage bag includes one (1) nylon tent fly, one (1) nylon/polypropylene tent body, one (1)
small nylon stake bag, and one (1) medium sized nylon pole bag. The pole bag includes eight (8)
"end poles", two (2) "center poles", two (2) "ridge poles", and one (1) "center pole" with
attached carabineer.
Parts and Pieces:
Before assembling you're Arctic Oven 10x20, it's important to identify the parts and
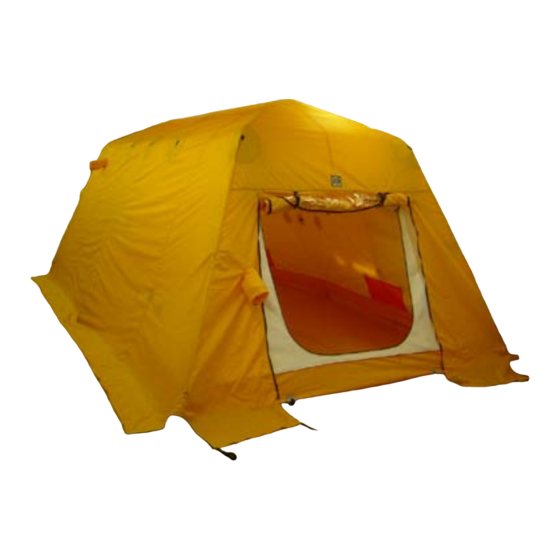
pieces. Fabric pieces first. The smaller of the two fabric bundles is the tent fly. Solid yellow in
color, the one-piece, nylon tent fly includes two zippered doors, two vent tubes, and one gray
stove jack with attached cover. The larger fabric bundle is the tent body. The one-piece tent body
also includes two zippered doors, two vent tubes, and one gray stove jack (no flap). Additionally,
the tent body includes two attached, five-legged "end spiders".
Inside the pole bag you will find thirteen (13) frame components. There are eight (8)
identical "end poles". "End poles" are comprised of five shock-corded, aluminum sections and a
small J-bolt. Two (2) "center poles" are included. Slightly shorter than the "end poles", "center
poles" are also comprised of five shock-corded, aluminum sections and a small J-bolt. There are
two (2) "ridge poles" identical 54" straight sections of aluminum tubing. Lastly, the "center
spider" is a simple, four-legged steel component with an attached carabiner.
Site Preparation:
Before erecting your tent, locate and properly prepare your tent site. Find a site
significantly larger that the size of your tent – the more room you have, the easier it will be to
erect your tent. Choose a firm, level tent site free of roots and shrubs. Remove any objects that
may wear or, in any way, damage your tent floor. And, for safety's sake always choose a site
shielded from direct winds.
Setup:
The Arctic Oven 10x20 is a large, multi-piece tent. Setup is best accomplished with two
or more people – especially in adverse conditions. Do not attempt to setup an Arctic Oven 10x20
alone; damage to the tent or personal injury may occur.
Arctic Oven 10 X 20 Instructions
ALASKA FABRICS, INC.
FAIRBANKS
529 FRONT STREET
FAIRBANKS, AK 99701
PHONE (907) 456-6328
FAX
(907) 452-5260
1-800-478-8368 (Within Alaska)
ARCTIC OVEN 10x20
November 5, 2003
100 E. INTERNATIONAL AIRPORT RD
SET-UP
INSTRUCTIONS
www.alaskatent.com
Page 1 of 9
D/B/A
ANCHORAGE
ANCHORAGE, AK 99518
PHONE (907) 562-2293
FAX (907) 562-8368
Advertisement

Related Manuals for Alaska Tent & Tarp ARCTIC OVEN ARKTIKA

Summary of Contents for Alaska Tent & Tarp ARCTIC OVEN ARKTIKA
- Page 1 ALASKA FABRICS, INC. D/B/A FAIRBANKS ANCHORAGE 529 FRONT STREET 100 E. INTERNATIONAL AIRPORT RD FAIRBANKS, AK 99701 ANCHORAGE, AK 99518 PHONE (907) 456-6328 PHONE (907) 562-2293 (907) 452-5260 FAX (907) 562-8368 1-800-478-8368 (Within Alaska) ARCTIC OVEN 10x20 SET-UP INSTRUCTIONS Packaging: Your Arctic Oven 10x20 comes disassembled in a large, nylon drawstring storage bag.
- Page 2 1. Assemble all eight (8) “end poles” and both “center poles “. Place four “end poles” at each end of your proposed tent site. Place the “center poles” and “ridge poles” midway between, one of each on either side of the site.
- Page 3 5. Attach “end poles” to the remaining two typical legs of the “end spider”. Make sure that the non-typical leg of the “end spider” is pointed toward the center of the tent body. You should now have an “end pole” connected between each of the four typical legs of the “end spider”...
- Page 4 8. Grasp the “end spider” in one hand. Make sure that the non-typical leg of the “end spider” is pointed toward the center of the tent body. With the other hand, firmly slide the larger end of one “end pole” over one of the “end spider’s”...
- Page 5 10. Connect all remaining O-ring assemblies to their respective poles. Next, connect the lower portion of the tent body liner to the frame assembly. Starting at one corner of the tent body, find the two-piece, black plastic side release buckle located along the black nylon edge binding.
- Page 6 13. Lift the fly to expose a spring snap sewn to a gray patch. Also, sewn to the tent body, find a D-ring sewn to a gray patch. Connect the spring snap through the D-ring. Connect all remaining spring snaps and D-ring assemblies.
- Page 7 15. As with any tent, the Arctic Oven Arktika must be guyed-out. Never leave a tent erected without guying it out. Arctic Oven 10 X 20 Instructions www.alaskatent.com November 5, 2003 Page 7 of 9...
-
Page 8: Important Notes
IMPORTANT NOTES: When this tent is up and sealed, ventilation is at a minimum. We have installed vents in the front and rear top of the tent, BE SURE that you have the proper ventilation. The use of gasoline, propane, wood, or charcoal stoves; lanterns or heaters in a confined space is NEVER recommended. - Page 9 LENGTH OF SERVICE Various factors affect the life of a tent: 1. A nylon tent that is left erected all summer will last only one or two seasons. The sun’s ultra-violet rays damage both nylon and polypropylene under continuous exposure. 2.
Need help?
Do you have a question about the ARCTIC OVEN ARKTIKA and is the answer not in the manual?
Questions and answers