Table of Contents

Related Manuals for Sic Marking ec7

Summary of Contents for Sic Marking ec7
- Page 1 User Guide ec7 – e7p62 – e7p122 SIC MARKING 13 route de Limonest ZAC de la Braille 69380 LISSIEU – France Telephone: (+33) 04.72.54.80.00 Fax: (+33) 04.78.47.39.40 E-Mail: info@sic-marking.com http://www.sic-marking.com NOTE7V1EC7P62P122US-R01.doc 1/46...
-
Page 3: Table Of Contents
CONTENTS ................7 QUIPMENT SUPPLIED FOR THE STANDARD SYSTEM ............................7 NPACKING ..........................7 NSTALLATION a) Fixing............................7 b) Power supply ...........................7 II - USE ...............................8 .............................8 AFETY ..........................8 OW TO MARK a) Positioning and securing of the part to be marked..............8 b) Regulating the stylet / part distance ..................9 c) Starting / stopping marking .....................9 ....................10 NTRODUCTION TO THE SOFTWARE... - Page 4 PREVENTATIVE MAINTENANCE ........................26 LEVEL MALIGNANCE ............................27 VIII - ANNEXES..........................28 7 ......................28 PERCUTEURS GAMME E a) hammer mechanism ec7......................28 b) hammer mechanism ep7 ......................30 7................32 COLUMN MOUNTED MARKING MACHINE EC 3 - M 62 ........................39 ARKING GUN E 4 - M 122 ......................43...
- Page 5 INTRODUCTION Thank you for choosing an SIC MARKING machine. SIC MARKING systems help improve the traceability of your products as required by industrial standards. We would like to extend a warm welcome you to as one of the users of our systems.
-
Page 7: Equipment Supplied For The Standard System
EQUIPMENT AND INSTALLATION Equipment supplied for the standard system The standard system is made up of - • marking mechanism with integrated electronic controls • power lead • maintenance kit Unpacking Unless delivered by us, the marking equipment is delivered in its own packaging. This packaging should be kept carefully in case the equipment needs to be returned under guarantee. -
Page 8: Use
II - USE Safety When used intensively the temperature of the hammer unit may reach 100 °C the wearing of goggles is recommended the wearing of helmet mounted ear defenders os also recommended sound level of the machine when marking: 76 dB* on a steel block at an average impact and speed Warning, this is not an upper limit the noise will depend on the object to be marked... -
Page 9: B) Regulating The Stylet / Part Distance
b) Regulating the stylet / part distance The quality of the marking depends in large measure on the part to be marked (materials, state of the surface, hardness etc.). A smooth, flat surface will be much easier to mark than a granulated irregular surface. Usually it will be necessary to adapt the force used in the marking to the height of the characters. -
Page 10: Introduction To The Software
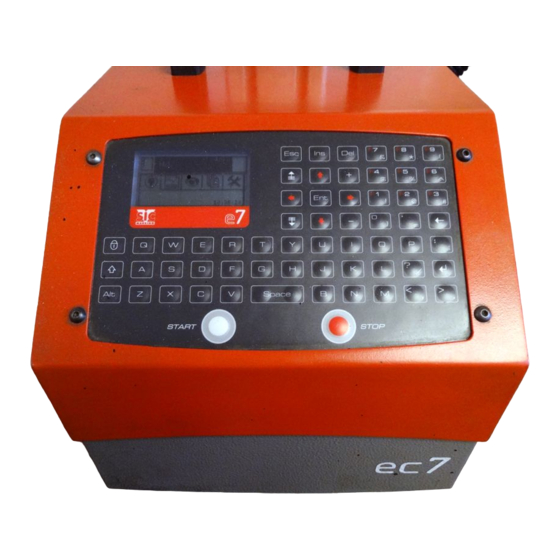
Introduction to the software - Special keys The F1 to F9 ( … ) keys are generally keyboard shortcuts. key cancels data input in progress or returns you to the previous window key enables you to validate data entry or move on to on to the next field. key enables you to return to the previous field, to validate the data in the present field and to return to the previous field keys enable you to scroll through a list... - Page 11 The fields followed by arrows: (as for the Speed field) are list type fields: - the arrows enable you to scroll through this list key enables you to show the contents of the list: - another key starts a search from the first letter of the list - Data entry using insert mode By pressing on the key the cursor moves from being a hyphen...
-
Page 12: Starting Up
III - STARTING UP The opening screen V1-0-0 (2004-01-26) Programme version number, V1-0-0 programme creation date (Year, Month, Day) (2004 –01-26) After initialisation the monitor moves into marking mode. Marking Mode a) Description of the screen Number of lines in the file Name of the active file Mode in use indicator Selector tab... -
Page 13: Introduction
Introduction c) Description of the screen From marking mode open the tab to go into write mode. This mode enables you to create a marking file Write icon Toolbar Configuration values First marking file d) Printing As an example we will create a new file Press the key to create a new file The monitor screen should be as follows... -
Page 14: E) Marking
Name it, for instance, FIRST FILE then validate it using Save as e) Marking To leave write mode and enter marking mode , press - One press on will start the marking - Opening the tab allows you can simulate the marking cycle (moves the then clicking on marking head but there is no power to the stylet) At the end of the marking cycle (or the simulation) - Page 15 Text to be marked. field represents the force of the impact: Depth Impact 1 is weak, Impact 9 is strong Impact 0 does not mark field represents point size Quality = character on a 5x7 grid = character on a 9x13 grid 0.58 = 0.58 mm between each point Font style of character...
- Page 16 •Circular marking ANGLE RADIUS original position ANGL RADIUS NOTE7V1EC7P62P122US-R01.doc 16/46...
-
Page 17: File Management
IV - FILE MANAGEMENT Introduction Open the file management tab The monitor screen should be as follows Search area File list FIRST_FILE Memory in use Loading a file into memory select a file using the arrows. You can search for a file by starting to type in its name in the search area (the key removes what you have typed) Deleting files... -
Page 18: Advanced Functions
V - ADVANCED FUNCTIONS Using the adjustment function To help the operator in adjusting the marking files, the function allows ADJUSTMENT you to position the marking head with the marking co-ordinates. This function is available from write mode or by using F8 The screen is then as follows Setting the X, Y co-ordinates by adjusting the marking head use the... - Page 19 NOTE7V1EC7P62P122US-R01.doc 19/46...
-
Page 20: Using The Variable Fields
Using the variable fields When one part of the text to be marked regularly needs modifications, such as increments using a counter or date stamping, it is advisable to use the variable functions rather than completely re-enter the data every time (and thereby increase the possibility of errors at each change) There are two function types;...
Need help?
Do you have a question about the ec7 and is the answer not in the manual?
Questions and answers