Table of Contents
Advertisement
Quick Links
Advertisement
Table of Contents

Related Manuals for envea LEAK ALERT 73

Summary of Contents for envea LEAK ALERT 73
- Page 1 LEAK ALERT 73 USER MANUAL...
- Page 3 LEAK ALERT 73 Filter Leak Monitor USER MANUAL Publication Part No. PC-000834-MA...
- Page 4 ENVEA UK Ltd. Disclaimer ENVEA reserves the right to revise and update this documentation from time to time without obligation to provide notification of such revision or change. Revised documentation may be obtainable from ENVEA.
-
Page 5: Table Of Contents
LEAK ALERT 73 Table of Contents Table of Contents ....................v List of Figures ....................vii INTRODUCTION ____________________________________________ 1 Purpose of this Manual ................1 Product Safety ..................1 1.2.1 Danger from Process ................. 1 Safety Procedures ................. 2 Intended Use .................... 3 1.4.1 Limits of Use .................. - Page 6 GENERAL COMPLIANCE _________________________________________ 33 Waste of Electrical and Electronic Equipment (WEEE) Directive (2012/19/EU) . 33 RoHS Compliance Statement ..............33 List of Materials ..................33 INDEX ______________________________________________________ 34 ENVEA SERVICE AND SUPPORT CENTRES ___________________________ 36 ENVEA UK Ltd (PC-000834-MA Issue 5, December 2021)
-
Page 7: List Of Figures
LEAK ALERT 73 List of Figures Fig. 1: Fitting the sensor to the stack..............9 Fig. 2: Sensor PCB connections................10 Fig. 3: Sensor wiring label – AC versions (inside enclosure lid)....... 11 Fig. 4: Power supply label (mains)..............12 Fig. - Page 8 LEAK ALERT 73 [This page is left blank intentionally.] viii ENVEA UK Ltd (PC-000834-MA Issue 5, December 2021)
-
Page 9: Introduction
LEAK ALERT 73 1 Introduction Introduction Purpose of this Manual This manual contains all information necessary for the correct installation, setup, operation, and instrument maintenance. The procedures given in this manual must be carried out only by suitably trained and qualified personnel. -
Page 10: Safety Procedures
1 Introduction LEAK ALERT 73 Safety Procedures Always observe the following safety precautions. Personnel installing, operating, or maintaining the equipment are responsible for their personal safety and for the correct handling and use of the equipment in accordance with the safety procedures detailed in this manual. -
Page 11: Intended Use
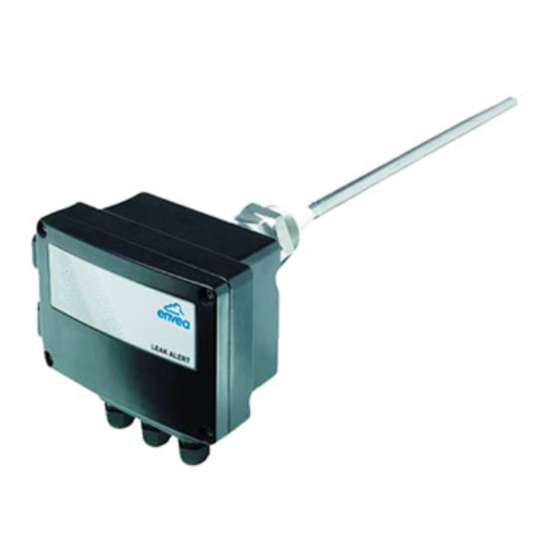
The ENVEA’s LEAK ALERT family of sensors has been designed to detect low and medium levels of dust leakage in addition to gross filter failure. -
Page 12: Certification
LEAK ALERT 73 Certification Conformance and Related Standards ENVEA UK Ltd hereby declares that this instrument – within the limits specified in this manual – conforms to the essential requirements and other provisions of the pursuant of the following: 1. European Union Directives: Low Voltage and EMC. -
Page 13: Product Description
LEAK ALERT 73 2 Product Description Product Description Overview The instrument is designed for use as a standalone sensor. It has various outputs for connection to plant CEM systems. There is no logging capability in the instrument. Technical Specification Stack temperature range -20 to 400 °C (-4 to 752 °F) -
Page 14: Sensor Options
CD and is also available for download from the ENVEA UK website: www.envea.global/s/process- (DVD/CD) en/dahs-software/pc-me-dust-tools/. For information on hardware requirements, contact ENVEA or your local ENVEA representative. The availability of software modules depends upon the type of sensor. For more information, see on page Product Parts and Options... -
Page 15: Sensor Installation
No responsibility for damage arising from the use of non-approved packaging will be accepted. Ensure all items and accessories specified are present. If not, NOTE contact ENVEA or your local ENVEA representative (see the reverse of this manual). Prerequisites and Guidelines 3.3.1 Location Requirements When selecting a mounting location for optical sensors, the following should be considered for optimum performance. -
Page 16: Cable Routing Guidelines
3 Sensor Installation LEAK ALERT 73 2. The earth wire (GND) should be longer than both the Live (L) and Neutral (N) to ensure that this will be the last to pull out if the mains cable suffers a tug. -
Page 17: Fitting The Sensor To The Stack
LEAK ALERT 73 3 Sensor Installation WARNING Tripping hazard. Ensure all cables are routed safely to avoid tripping or entangling hazards and to avoid kinks and pinches. 3.4.2 Fitting the Sensor to the Stack 1 ................Stack wall 2 ... Stack wall opening/port hole for probe (at least 45 mm) 3 ................ -
Page 18: Sensor Connections
3 Sensor Installation LEAK ALERT 73 3. Insert the sensor probe into the socket and secure it with the floating nut. Ensure the sensor enclosure is upright with the cable entry glands at the bottom and is adequately supported when tightening the floating nut. -
Page 19: Connecting The Power Supply
LEAK ALERT 73 3 Sensor Installation Connecting the Power Supply 3.5.1 Connecting the Cables Easily accessible disconnect devices, such as switches or circuit breakers along with a separate fuse, must be fitted to the power supply wiring for mains-powered sensors and the purge blower unit. These must be located so they can be reached easily (within 2m/ 6½... -
Page 20: Wiring The 24V Dc Supply
3 Sensor Installation LEAK ALERT 73 Fig. 4: Power supply label (mains). 3.5.3 Wiring the 24V DC Supply Fig. 5: Sensor wiring label – 24V versions (inside enclosure lid). 1. Undo the 4 off screws and open the hinged sensor enclosure lid. -
Page 21: User Controls And Menu Selection
LEAK ALERT 73 4 User Controls and Menu Selection User Controls and Menu Selection Overview of Internal Controls Fig. 6: Internal sensor controls. 1 ... Navigation buttons (LEFT, DOWN, UP, RIGHT) 2 ..........Four-digit LED display 3 ........ Menu selection (with jumper) 4 ............ -
Page 22: Navigation And Basic Functionality
4 User Controls and Menu Selection LEAK ALERT 73 Navigation and Basic Functionality The sensor settings are organised into a list of menu headings. Use the UP and DOWN buttons to scroll between menu headings. Press the RIGHT button to view or edit the settings associated with each menu heading and the LEFT button to return to the previous setting. -
Page 23: Instrument Settings: Standard Menu
LEAK ALERT 73 5 Instrument Settings: Standard Menu Instrument Settings: Standard Menu Standard Menus – Scaling Methods Refer to the on page 5 for information on scaling options ECHNICAL PECIFICATION for your instrument. 5.1.1 Scaling Method 1 – % of 4-20mA Fig. -
Page 24: Scaling Method 2 - Scaling Factor (Option)
5 Instrument Settings: Standard Menu LEAK ALERT 73 5.1.2 Scaling Method 2 – Scaling Factor (Option) Fig. 8: Standard menu – Scaling method 2 (SF). Menu Meaning Description DUST Displays dust emissions and self-check readings SENS Sensitivity Adjust the instrument sensitivity... -
Page 25: Entering Or Changing The Password [Pass]
LEAK ALERT 73 5 Instrument Settings: Standard Menu Entering or Changing the Password [PASS] If a password has been set, this must be entered before values can be changed. 1. Scroll DOWN to the PASS (Password) menu heading. 2. Press RIGHT: the display shows ENTR (Enter). -
Page 26: Scaling Methods
5 Instrument Settings: Standard Menu LEAK ALERT 73 1. Adjust the value, then press RIGHT to return to DISP. FILTER: this is an integer value. Allows values between 1 and 9999 NOTE secs. Scaling Methods 5.5.1 Scaling Method 1 – Scaling to % of 4-20mA Output [SCAL]... -
Page 27: 4-20Ma Span [4-20Ma] (Scaling Method 2 Only)
LEAK ALERT 73 5 Instrument Settings: Standard Menu 2. Scroll DOWN to the SF menu heading. 3. Press RIGHT: the display shows the current scaling factor (default: 1.000) 4. Adjust each digit value using the UP/DOWN buttons, then press RIGHT to move to the next digit. -
Page 28: Instrument Settings: Engineering Menu [Eng]
6 Instrument Settings: Engineering Menu [ENG] LEAK ALERT 73 Instrument Settings: Engineering Menu [ENG] Fig. 9: Engineering menu [ENG] (based on scaling method 1). ENVEA UK Ltd (PC-000834-MA Issue 5, December 2021) -
Page 29: Advanced Functions
LEAK ALERT 73 6 Instrument Settings: Engineering Menu [ENG] Advanced Functions Menu Meaning Description 4_20 FLTR 4-20mA output settings Adjust filter on the 4-20mA output Alarm Settings (Relay View/adjust the alarm set point and delay for ALA1 Relay 1 Alarm Settings (Relay... -
Page 30: Emission Alarm Settings [Ala1, Ala2]
6 Instrument Settings: Engineering Menu [ENG] LEAK ALERT 73 Filter: this is an integer value. Allows values between 1 and 9999 NOTE seconds. Emission Alarm Settings [ALA1, ALA2] The Alarm Settings menus [ALA1, ALA2] are used to set up emission alarms used to activate the two alarm relays in the sensors. -
Page 31: Change The Alarm Settings - Relay 1 [Ala1]
LEAK ALERT 73 6 Instrument Settings: Engineering Menu [ENG] (1) Averaging is done using a walking window filter. This means the average values used to generate alarms may differ from the average logged data which uses simple averaging. (2) The averaging filter is reset at power-up, after pressing the NOTE RESET button and after making setting adjustments. -
Page 32: Enable The Plant Stop Option
6 Instrument Settings: Engineering Menu [ENG] LEAK ALERT 73 6.4.1 Enable the Plant Stop Option 1. Enter the password, if required (see section on page 2. Scroll DOWN to the PL.ST (Plant Stop) menu heading. 3. Press RIGHT: the display shows the Plant Stop option, for example, OFF (default). -
Page 33: Rs-232 Settings [Rs232]
LEAK ALERT 73 6 Instrument Settings: Engineering Menu [ENG] 6.5.3 RS-232 Settings [RS232] The RS-232 output has fixed settings (as outlined in the following table). Menu Default value ADDR As set in the RS-485 menu (see section above). BAUD 19200... -
Page 34: Test Functions [T.rel, T.dig, T.led]
6 Instrument Settings: Engineering Menu [ENG] LEAK ALERT 73 6.6.2 Test Functions [T.REL, T.DIG, T.LED] The table below shows the operation of the test functions. Use the UP/DOWN buttons to change the values. Menu Setting Result (of test function) Set to 0 Relay1 and Relay2 closed Relays [T.REL]... -
Page 35: Quality Assurance And Self-Tests
LEAK ALERT 73 7 Quality Assurance and Self-Tests Quality Assurance and Self-Tests Sensor Tests (Options) Optional sensor checks are available to provide monitoring of the integrity of your instrument. The sensor provides alarm notifications of sensor test failures. ZERO / REF checks: self-checks to test for faults with the sensor hardware. -
Page 36: Running Self-Tests [Run.t]
7 Quality Assurance and Self-Tests LEAK ALERT 73 If available, the Short-circuit check runs automatically on an hourly cycle. If the test fails, it is repeated at 10-minute intervals (for example, at 20 and 30 minutes). If the test fails on all three occasions, then an alarm is generated. -
Page 37: Maintenance
LEAK ALERT 73 8 Maintenance Maintenance Safety Information WARNING Electric shock. This section is intended for ENVEA-trained service engineers only. Only trained and competent personnel should work inside the instrument with mains power connected and switched on. WARNING Danger from the process. - Page 38 8 Maintenance LEAK ALERT 73 metallic insulator and about 25mm (1 ) of the metal parts on either side of the ” insulator (the aim is to prevent shorting across the insulator). The cleaning may be performed using wire wool. For sticky or stubborn deposits, a cleaning agent may be used (use a fast-drying solvent cleaner –...
-
Page 39: Changing The Fuse (Mains-Powered Sensors Only)
(see Fig. 4 on page 12). If a replacement fuse fails immediately, contact ENVEA or your local ENVEA service representative. Do NOT replace with a higher value fuse! 1. Switch OFF and isolate the instrument from power. -
Page 40: Resetting The Sensor [Rset]
Appendix A LEAK ALERT 73 Appendix A Resetting the Sensor [RSET] CAUTION Loss of data. Performing a Reset can stop the sensor from working. A reset will put all instrument settings back to their default values. Therefore, the procedure given in this section must be carried out only by suitably trained and qualified personnel. -
Page 41: General Compliance
Dispose of this product at a collection point for the recycling of electrical and electronic equipment according to local government regulations. RoHS Compliance Statement ENVEA UK Ltd is compliant with the EU Directive on the restriction of the use of certain hazardous substances in electrical and electronic equipment (RoHS Directive). -
Page 42: Index
LEAK ALERT 73 Index fuse applications · 30 reset · See sensor replacement · 31 type and rating · 31 cables safety procedures · 2 connecting · 11 precautionary measures · 1 power supply · 11 sensor grounding cabling reset · 32 strap (or wire) ·... -
Page 44: Envea Service And Support Centres
ENVEA Sales and Service engineers are available to consult regarding equipment suitability and technical support. To find a local ENVEA representative for your country or region, please contact us or visit our website www.envea.global ENVEA UK Ltd ENVEA House Rose &...
Need help?
Do you have a question about the LEAK ALERT 73 and is the answer not in the manual?
Questions and answers