Table of Contents
Advertisement
Available languages
Available languages
Quick Links
Advertisement
Table of Contents

Related Manuals for Little Seeds DA8036399LS


Summary of Contents for Little Seeds DA8036399LS
- Page 1 Look inside for Assembly Manual Check us out! Littleseedskids.com...
- Page 2 Date of purchase: Two adults 2021/11/22 recommended B34DA8036399LS00-103185 for assembly This product is not intended for commercial use. Do NOT return this product. Follow little seeds on: For missing or broken parts - Visit www.littleseedskids.com - Write to cs@dhpfurniture.com - Call 1-800-267-1739...
- Page 3 Visit your local retailer's website, rate your purchased product and leave us some feedback! We would like to extend a big "Thank You" to all of our customers for taking the time to assemble this Little Seeds product, and to give us your valuable feedback. www.littleseedskids.com...
-
Page 4: Limited Warranty
Do NOT returnthisproduct to thestore! Contact our friendly customer service team first for help. 1-800-267-1739 Visit: Assembly Tips DHP Consumer Services www.littleseedskids.com 12345 Albert-Hudon Boulevard, Suite 100 Montreal, Quebec Saturday 10:00 am - 6:30 pm Canada H1G 3L1 Sunday 11:00 am - 7:00 pm cs@dhpfurniture.com (Eastern Time) NOTES... - Page 5 WARNING Use the wall safety strap provided to secure the unit to the wall. • CAUTION: Adult assembly required. • To avoid unnecessary damage, when levelers have been extended, DO NOT drag across surface when moving. • Make sure to lift the unit. www.littleseedskids.com...
-
Page 6: Part Identification
All packed in 1 box! Part Identification Not actual size www.littleseedskids.com... -
Page 7: Bottom Panel
All packed in 1 box! Part Identification There are inner box(es) with components required to complete the Not actual size assembly. Before you throw the package, please use the Check Box to identify the parts and ensure that you have all the parts needed for the assembly. - Page 8 DRAWER FRONT DRAWER LEFT DRAWER BACK DRAWER RIGHT BOTTOM SUPPORT DRAWER BOTTOM www.littleseedskids.com...
- Page 9 Part Number Part Label DA8036399LS (White) T507930 T507940 T507950 T507960 T507970 T507980 T507990 T508000 T508010 T508020 T508030 T508040 T508050 T508060 IMPORTANT: This part number list is unique to your product. Please keep it on hand when calling for replacement parts.
-
Page 10: Hardware List
Hardware Pack #: The screw(s), bolt(s) to be used at each step are shown in actual size in the lower right corner of the page. HP#:TDA8036399LS -00 DA8036399LS (White) Actual size LARGE WOOD 1/4 x 1-1/5" DOWEL 8 x 30mm 1/4 x 1-1/2"... -
Page 11: Safety Strap
Not actual size ∅10 x ∅1/4x 11mm OPEN WASHER CAM BOLT 20 x 12 x 2mm X 10 CAM LOCK SAFETY STRAP X 1 kit HANDLE www.littleseedskids.com... - Page 12 Step 1- Dresser Assembly Attach Top Rail (E) to Top Panel (A) with Wood dowels (5) and Screws (8) by using screw driver (not included). LARGE WOOD DOWEL 8 x 30mm SCREW #8 x 25mm www.littleseedskids.com...
- Page 13 Step 2- Dresser Assembly Attach Right Side Panel (C) and Left Side Panel (B) to Upper Back Panel (F) and Bottom Back Panel (G) with Wood dowels (5), Bolts (2) and open washers (12) by using Allen key (15). OPEN WASHER 20 x 12 x 2mm LARGE WOOD DOWEL...
- Page 14 Step 2- Dresser Assembly Attach the assembled unit (B&C&F&G) to Top Panel (A) with Wood dowels (5), Bolts (2), open washers (12) and bolts (1) by using Allen key (15). OPEN WASHER 20 x 12 x 2mm 1/4 x 1-1/4" LARGE WOOD 1/4 x 1-1/2"...
- Page 15 Step 2- Step 4 - Dresser Assembly Dresser Assembly Attach Bottom Panel (D) to the assembled unit (B&C&F&G) with Wood dowels (5), Bolts (4) and Nuts (11) by using Allen key (15). LARGE WOOD ∅10 x ∅1/4x 11mm DOWEL 1/4 x 3" 8 x 30mm www.littleseedskids.com...
-
Page 16: Flat Washer
Step 2- Step 5 - Dresser Assembly Dresser Assembly Attach Legs (Hx4) to Bottom Panel (D) with Bolts (3), Flat washers (6) and Lock washers (7) by using Allen key (15). ∅12 x 1.5mm ∅18 x 1.5mm LOCK WASHER 1/4 x 1-3/4" FLAT WASHER www.littleseedskids.com... - Page 17 Step 2- Step 6 - Dresser Assembly Dresser Assembly Attach Drawer Rights (Kx3) and Drawer Lefts (Jx3) to Drawer Back (Lx3) with Screws (8) by using screw driver (not included). SCREW #8 x 25mm X 12 www.littleseedskids.com...
- Page 18 Step 7 Step 2- - Dresser Assembly Dresser Assembly Slide the Drawer Bottom (M) into the grooves of Drawer Left (J) and Drawer right (K). www.littleseedskids.com...
- Page 19 Step 2- Step 8 - Dresser Assembly Dresser Assembly Attach the drawer support bar (N) to Drawer Back (L) with small wood dowels (9) and screws (8) by using screwdriver (not included). SMALL WOOD DOWEL SCREW 6 x 15mm #8 x 25mm www.littleseedskids.com...
- Page 20 Step 2- Step 9 - Dresser Assembly Dresser Assembly Attach the Drawer Front (I) to Drawer Right (K), Drawer Left (J) and Bottom Support (N) with small wood dowels (9), screws (8), cam bolt (13) and cam lock (14) by using screwdriver (not included). CAM BOLT CAM LOCK SMALL WOOD...
- Page 21 Step 2- Step 10 Dresser Assembly - Dresser Assembly Attach the Handles (16) to Drawer Front (I) with bolts (10) by using screw driver (not included). HANDLE BOLT 5/32 x 32mm www.littleseedskids.com...
- Page 22 Step 2- Step 11 - Dresser Assembly Dresser Assembly Insert all drawers into the assembled unit. www.littleseedskids.com...
- Page 23 Step 2- Dresser Assembly Top panel maximum weight 30 lbs. Maximum weight per drawer 15 lbs. www.littleseedskids.com...
- Page 24 Furniture Wall Safety Strap MOUNTING BRACKET SAFETY WALL STRAP LONG SCREW SHORT SCREW 4 PCS 2 PCS 2 PCS 2 PCS TOOLS NECESSARY: RUBBER MALLET AND PHILLIPS SCREWDRIVER ARE NOT INCLUDED. NOTE: 3/8" DRILL BIT AND ELECTRIC DRILL ARE NOT PROVIDED. WARNING: WHEN UPRIGHT, IT IS POSSIBLE THAT THE FURNITURE MAY TIP OVER.
- Page 25 Manual de Instrucciones ¡Sfguenos! Littleseedskids.com...
- Page 26 Guarde este Manual de Instrucciones para referencia futura. NO tire este manual de instrucciones. Use el bolsillo que esta sobre el soporte del colchôn para guardar este manual para uso futuro. Modelo No: DA8036399LS (Blanco) NOTA: ESTE MANUAL DE INSTRUCCIONES CONTIENE INFORMACIÔN DE SEGURIDAD IMPORTANTE.
-
Page 27: Garantia Limitada
iNo regrese este producto a la tienda! Contacte nuestro amigable equipo de servicio al cliente si necesita ayuda. Consejos para DHP Consumer Services 1-800-267-1739 Visit: Lunes - Viernes www.littleseedskids.com el ensamblaje 12345 Albert-Hudon 9:00 am - 9:00 pm Boulevard, Suite 100 Sabado 10:00 am - 6:30 pm Montreal, Quebec Domingo 11:00 am - 7:00 pm... - Page 28 PRECAUCIÔN • Este producto está diseñado para uso doméstico y no para uso comercial. • ADVERTENCIA PARA NIÑOS PEQUEÑOS - Este producto contiene componentes pequeños. Por favor asegúrese de que las piezas estén fuera del alcance de los niños. • No utilice herramientas eléctricas para ensamblar su mueble. Este tipo de herramientas pueden rasgar o dañar las partes.
- Page 29 Antes de tirar este paquete, por favor utilice la Casilla de Verificaciôn para identificar sus partes y garantizar de que cuenta con todas las piezas necesarias para el ensamblaje. Part Number ETIQUETAS DE DESCRIPCIÓN DA8036399LS (White) PIEZAS T507930 PANEL SUPERIOR T507940...
- Page 30 Ensamblaje de la Cómoda PASO 1: Fije el riel superior (E) al panel superior (A) con tacos de madera (5) y tornillos (8) utilizando un destornillador (no incluido). PASO 2: Fije el panel lateral derecho (C) y el panel lateral izquierdo (B) al panel trasero superior (F) y al panel trasero inferior (G) con tacos de madera (5), pernos (2) y arandelas abiertas (12) utilizando una llave Allen (15).
- Page 31 Peso máximo del panel superior 30 libras. Peso máximo por cajón: 15...
- Page 32 Correa de seguridad para fijar el mueble a la pared GANCHO DE METAL 4 CORREA DE SEGURIDAD TORNILLO LARGO 2 TORNILLO CORTO 2 PZAS PARA LA PARED 2 PZAS PZAS PZAS HERRAMIENTAS NECESARIAS: LA MASA DE CAUCHO Y EL DESTORNILLADOR PHILLIPS NO ESTÁN NOTA: LA MECHA DE 5/16"...
- Page 33 Etapa 1: CON EL TORNILLO CORTO (A), FIJE FIRMEMENTE UN GANCHO DE METAL (D) A LA BARRA TRANSVERSAL SUPERIOR POSTERIOR DEL MEUBLE, A TRAVÉS DEL AGUJERO MÁS PEQUEÑO Etapa 2: CON UN ANCLAJE, COLOQUE EL OTRO GANCHO DE METAL (A) SOBRE LA PARED 2 PULGADAS POR DEBAJO DEL GANCHO YA COLOCADO EN LA PARTE POSTERIOR DEL MUEBLE.
-
Page 34: Manuel D'instructions
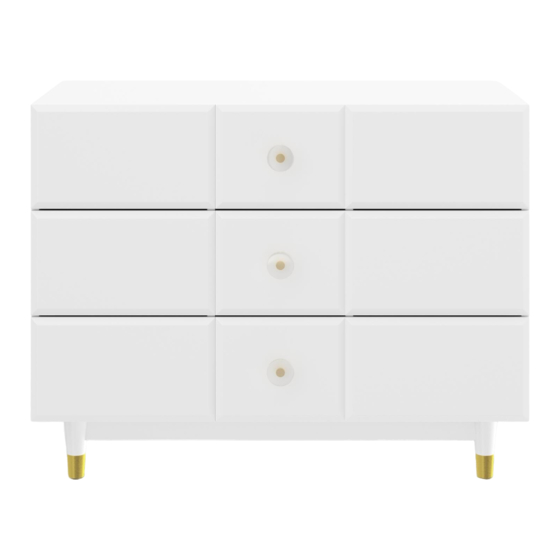
MANUEL D'INSTRUCTIONS Modèle No: DA8036399LS COMMODE 3 TIROIRS (BLANC) NOTE: CE MANUEL D'INSTRUCTIONS CONTIENT DES INFORMATIONS IMPORTANTES SUR LA SÉCURITÉ. S.V.P. LIRE ET CONSERVER POUR RÉFÉRENCES ULTÉRIEURES. Numéro de Lot: (SITUÉ SUR LA BOÎTE) Date d'achat: NE PAS RETOURNER CE PRODUIT AU MAGASIN. - Page 35 Vous pouvez également nous contacter en nous écrivant à l'adresse ci-dessous. N'oubliez pas d'inclure le numéro de modèle du produit, sa couleur et une description détaillée de votre demande. DHP Consumer Services 12345 Boulevard Albert-Hudon, Suite 100 Montréal, Québec Canada, H1G 3L1 NOTES ET INSTALLATION * Avant de commencer, assurez-vous d'avoir en main toutes les pièces et composantes nécessaires à...
- Page 36 GARANTIE LIMITÉE D'UN AN Dorel garantit que son produit soit exempt de défauts de fabrication et de matériaux et accepte de remédier à un tel défaut. Cette garantie couvre un (1) an à partir de la date d'achat originale. Cette garantie est valable uniquement sur présentation d'une preuve d'achat.
- Page 38 COMMODE 3 TIROIRS DA8036399LS QUINCAILLERIE DA8036399LS (Blanc) DA8036399LS HP#:T Remarque: Sauf indication contraire dans les instructions, ne pas resserrer complètement les vis et les boulons, jusqu'à ce que l'assemblage soit terminé. Les vis et boulons utilisés durant chaque étape sont illustrés en taille réelle au coin inférieur droit de la page.
- Page 39 Part Number ETIQUETAS DE DESCRIPCIÓN DA8036399LS (BLANC) PIEZAS T507930 PANEL SUPERIOR T507940 LADO IZQUIERDO T507950 LADO DERECHO PANEL INFERIOR T507960 BARANDILLA SUPERIOR T507970 PANEL TRASERO SUPERIOR T507980 PANEL TRASERO INFERIOR T507990 PIERNA T508000 CAJÓN DELANTERO T508010 CAJÓN IZQUIERDO T508020 CAJÓN DERECHO T508030 CAJÓN TRASERO...
- Page 40 POIDS MAXIMAL - Commode Poids maximum du panneau supérieur 30 lbs. Poids maximum par caisse : 15 lbs...
- Page 41 Liste de quincaillerie CROCHET MÉTAL SANGLE DE SÉCURITÉ VIS LONGUE 2 VIS COURTE 2 4 PCES 2 PCES PCES PCES OUTILS NÉCESSAIRES: LE MAILLET EN CAOUTCHOUC ET LE TOURNEVIS PHILLIPS NE SONT PAS COMPRIS. NOTE: LA MÈCHE DE 5/16" ET LA PERCEUSE ÉLECTRIQUE NE SONT PAS FOURNIES. AVERTISSEMENT: QUAND LE MEUBLE EST PLACÉ...
- Page 42 ÉTAPE 1: À L'AIDE DE LA VIS COURTE (D), FIXEZ FERMEMENT UN CROCHET MÉTAL (A) À LA BARRE TRANSVERSALE SUPÉRIEURE T POSTÉRIEURE DU MEUBLE, À TRAVERS LE TROU LE PLUS PETIT ÉTAPE 2: À L'AIDE D'UN ANCRAGE, PLACEZ L'AUTRE CROCHET MÉTAL (A) SUR LE MUR 2 POUCES EN- DESSOUS DU CROCHET DÉJÀ...
Need help?
Do you have a question about the DA8036399LS and is the answer not in the manual?
Questions and answers