Advertisement
Quick Links
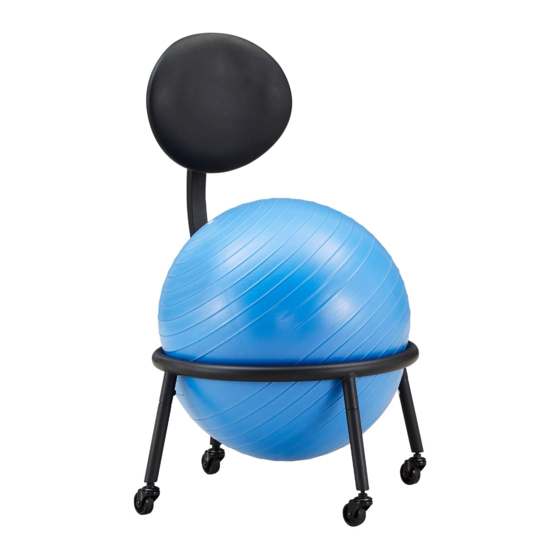
ASSEMBLY INSTRUCTION
E875C BALL CHAIR WITH PUMP
A
Ball Base
1pc
E
Support Leg - Back
1pc
I
Bolt
∅
1/4"x 1-3/8"
1pc
M
Spanner
14mm
1pc
B
Back Post
1pc
F
Support Leg
3pcs
Flat Washer
J
Ø1/4"x16mm
4pcs
Pump
J
1pc
C
Ball
1pc
G
Caster
4pcs
Lock Washer
K
Ø1/4"x13mm
4pcs
This page lists all the contents included in
the box. Please take the time to identify
the hardware as well as the individual
components to this product. As you
unpack and prepare for assembly, place
the contents on a carpeted or padded
area to protect them from damage.
1
D
Back Cushion
1pc
H
Bolt
Ø1/4"x5/8"
10pcs
Allen Key
L
M4
1pc
Advertisement

Related Manuals for Inspire Q Classic Batavia Blue Balance Ball


Summary of Contents for Inspire Q Classic Batavia Blue Balance Ball
- Page 1 ASSEMBLY INSTRUCTION E875C BALL CHAIR WITH PUMP Ball Base Back Post Ball Back Cushion Support Leg - Back Support Leg Bolt Caster Ø1/4"x5/8" 10pcs 3pcs 4pcs Flat Washer Lock Washer Allen Key Bolt Ø1/4"x16mm Ø1/4"x13mm ∅ 1/4"x 1-3/8" 4pcs 4pcs Pump Spanner 14mm...
- Page 2 Assemble Support Leg (E & F) to the Ball Base (A), using Bolt (H) to fasten by Allen Key (L). ASSEMBLY Do not fully tighten all bolts until assembly is complete.This will help all parts 4pcs to assemble properly. Assemble Caster (G) to Support Leg (E & F) with Lock Washer (K), then fasten by Spanner (M).
- Page 3 Assemble Back Post (B) to Ball Base (A) and Suppor Leg - Back (E), using Bolt (H) & Bolt (I), then fasten by Allen Key (L). 2pcs Assemble Back Cushion (D) to Back Post (B), using Bolt (H) & Flat Washer (J), then fasten by Allen Key (L).
- Page 4 Pull out the hole plug, use a Pump (J) to inflate the Ball (C) until it is full, and then insert the hole plug as below shown. Please make sure the max diameter of the ball does not exceed 450mm after inflation. plug air inflation plug...