Advertisement
Quick Links
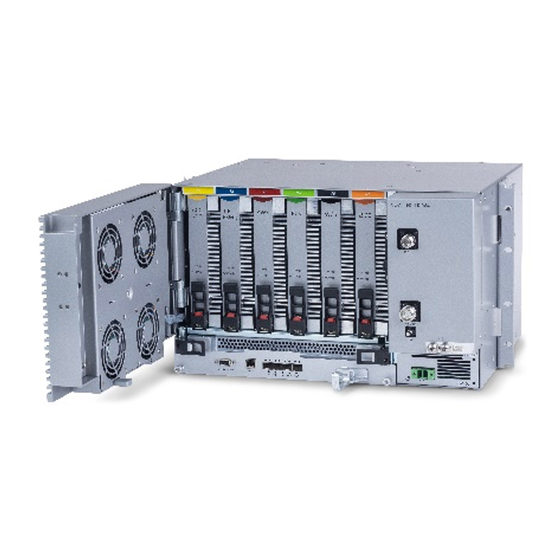
User Manual v1.0
2.6.8 Connect the rest of the Cables
For each of the units, connect the cables as follows:
▪
Ground, see 2.6.8.1
▪
Antenna, see 2.6.8.2
2.6.8.1 Ground
Note: Ground according to local regulations
The following additional (not supplied) tools and components are required for connecting the system ground:
▪
Grounding wire - grounding wire should be sized according to local and national installation
requirements. The provided grounding lug supports 14 AWG to 10 AWG stranded copper (or 12
AWG to 10 AWG solid) wire conductors.
1.
Use a wire-stripping tool to remove approximately 0.4 inch (10.9 mm) of the covering from the end of
the grounding wire
2.
Insert the stripped end of the grounding wire into the open end of the grounding lug
3.
Crimp the grounding wire in the barrel of the grounding lug. Verify that the ground wire is securely
attached to the ground lug by holding the ground lug and gently pulling on the ground wire
4.
Prepare the other end of the grounding wire and connect it to an appropriate grounding point at the site
to ensure adequate earth ground
UM_-_Everon_6000_DAS_-_5-AUG-2021 | Aug 2021
|Page 71 of 246
Advertisement

Related Manuals for CORNING Everon 6000


Summary of Contents for CORNING Everon 6000
- Page 1 User Manual v1.0 2.6.8 Connect the rest of the Cables For each of the units, connect the cables as follows: ▪ Ground, see 2.6.8.1 ▪ Antenna, see 2.6.8.2 2.6.8.1 Ground Note: Ground according to local regulations The following additional (not supplied) tools and components are required for connecting the system ground: ▪...
- Page 2 User Manual v1.0 2.6.8.2 Antenna Connect the MRU male 4.3-10 Type duplexed RF “ANTENNA” port to the broadband antenna(s) using appropriate coax cables. Notes: 1. To avoid MIMO disruption, ensure the antennas are connected correctly according to the combiner labels. 2.
- Page 3 User Manual v1.0 2.6.9 Combiner cables Connect the Antenna cables according to the figure below. NOTE: C-Band is for future use. Mid-band Combiner in bracket Low band Combiner Fiber optic cable example (not provided) UM_-_Everon_6000_DAS_-_5-AUG-2021 | Aug 2021 |Page 73 of 246...
- Page 4 User Manual v1.0 Fully connected system Notes: 1. To avoid MIMO disruption, ensure the antennas are connected correctly according to the combiner labels. 2. There may be some configurations/use-cases where a combiner is not required, as there is only one type of unit (either low or mid band) UM_-_Everon_6000_DAS_-_5-AUG-2021 | Aug 2021 |Page 74 of 246...
- Page 5 User Manual v1.0 2.6.10 Verify normal operation The following table describes the LRU LED behaviour. UM_-_Everon_6000_DAS_-_5-AUG-2021 | Aug 2021 |Page 75 of 246...
- Page 6 User Manual v1.0 2.7 MRU (Digital Medium-power Remote Unit) Installation dMRU Notes: * Equipment with permanently connected to PE, conductor for installation of this conductor is carried by a skilled person. * The shield of the coax cable shall be connected to PE . * Equipment for use in locations where children not likely to be present.
- Page 7 User Manual v1.0 Item Description Flavor Image dMRU-AC supported dMRU-67819-AC assembly with three dPAM modules - 600/700, 800/850 and dMRU-AC supported dMRU-6781923- assembly with four dPAM modules - 600/700, 800/850, PCS and WCS DC Chassis dMRU Chassis dMRU-ASM-DC Assembly with: DOPTM, FAM, Mid- Plane, Cavity Filter, MUX and DC power...
- Page 8 User Manual v1.0 Item Description Flavor Image dMRU-DC supported dMRU-6781923- assembly with four dPAM modules - 600/700, 800/850, PCS and WCS dMRU CHASSIS dMRU-CHS-ASM ASSEMBLY WITH: DOPTM, FAM, MID- PLANE, CAVITY FILTER, MUX Brackets Wall mount bracket for dMRU BR-dMRU-W Screws, flathead,8-32X3/8 (Quantity: 11) DC connector...
- Page 9 User Manual v1.0 ➢ Example Package Unpacking For an ordered package of PN : Open the box and verify the following units are available: dMRU-ASM-AC DOPTM, FAM, Mid-Plane, Cavity Filter, MUX and AC power supply. The units are to be entered into the chassis according to the installation instructions below. UM_-_Everon_6000_DAS_-_5-AUG-2021 | Aug 2021 |Page 79 of 246...
- Page 10 . Any attempt to pull out the module without first releasing may cause damage. Corning will not be liable for damage of products resulting from improper handling during installation or repair.
- Page 11 User Manual v1.0 2.7.3 Mount chassis in 19-in Rack Note: for dimensions and specifications refer to chapter 11 Before mounting the chassis: unwrap each of the PAMs, and enter each PAM to its dedicated slot inside the chassis, according to the color-codes: Determine the location of the MRU in the rack while considering additional units (e.g.
-
Page 12: Wall Mount
Reference source not found.). Any attempt to pull out the module without first releasing may cause damage. Corning will not be liable for damage of products resulting from improper handling during installation or repair. Caution: Due to the chassis + 6 DPAMS weight, it is recommended the unit is carried by two persons, to avoid damage to the system. - Page 13 User Manual v1.0 Assemble the wall-mount bracket to MRU underside Insert anchors in wall, hang unit and tighten to secure Minimum 16-in clearance Figure 13. Example of MRU Chassis wall Installation UM_-_Everon_6000_DAS_-_5-AUG-2021 | Aug 2021 |Page 83 of 246...
- Page 14 User Manual v1.0 2.7.5 Ground MRU Chassis The grounding connection is performed via a two-hole, standard barrel grounding lug located on the front of the MRU chassis. ➢ Required tools and components The following additional (not supplied) tools and components are required for connecting the system ground: ▪...
- Page 15 User Manual v1.0 2.7.6 Connect Fiber SFP+ Note: use SFP+ from the approved list provided by Corning. Remove the rubber stopper from the source port. Push the SFP+ connector into the port, until it clicks (note that there is only one correct direction for plugging-in).
-
Page 16: Connect Antenna
User Manual v1.0 2.7.7 Connect Antenna NOTE: The MRU has one output, that can be split via passive splitters. Connect the MRU male 4.3-10 Type duplexed RF “ANTENNA” port to the broadband antenna(s) using appropriate coax cables. Note: The test port is used for coupling; used for measuring the power without disconnecting the antenna. - Page 17 User Manual v1.0 2.7.9 Connect Power & POWER UP The MRU PSM is located on the bottom right of the chassis front. The PSM type (AC/DC) is model dependent. ▪ Refer to section 2.4.7.1 for AC models. ▪ Refer to section 2.4.7.2 for DC models 2.7.9.1 AC models WARNING! Approved power cable –...
- Page 18 User Manual v1.0 2.7.9.2 DC Models DC model includes Class 1 terminal block connector: ▪ Power input: 36-60VDC ▪ Power consumption: 580W (maximum) ▪ Maximum DC current consumption: 16A Open PSM captive screws and pull-out module from chassis. Set DC input source type to “CLASS1” connector and secure PSM module back in place. See Figure 8. 3.
- Page 19 User Manual v1.0 Verify Normal Operation 2.7.10 LEDs Verify that fans are operational. Refer to status LEDs on the top-left of the chassis door and on each PAM to confirm normal system operation according to the following table: Table 7: MRU Chassis and DOPTM LEDs Table 8: PAM LEDs UM_-_Everon_6000_DAS_-_5-AUG-2021 | Aug 2021 |Page 89 of 246...
- Page 20 User Manual v1.0 Table 9: SFP LEDs UM_-_Everon_6000_DAS_-_5-AUG-2021 | Aug 2021 |Page 90 of 246...
- Page 21 User Manual v1.0 2.8 HRU Installation dHRU comes in various formats, according to customer needs. An example is brought bellow: To install the dHRU, follow these steps: Verify your box contents, according to the specific model ordered, see 2.8.1 Review the system elements and interfaces, see 2.8.2 Install the system, see 0 UM_-_Everon_6000_DAS_-_5-AUG-2021 | Aug 2021 |Page 91 of 246...
- Page 22 User Manual v1.0 2.8.1 Verify Box Contents Open the package and verify all elements are available according to the following table. Notes: * for details see APPENDIX B: Ordering information * See unpacking example underneath the table. Table 10: dHRU Package Items List Item Description Flavor Image...
- Page 23 User Manual v1.0 Item Description Flavor Image dHRU-dHPAM-19 HRU Digital High Power Amplifier Module supporting PCS dHRU-dHPAM-17 HRU Digital High Power Amplifier Module supporting AWS dHRU-dHPAM-23 HRU Digital High Power Amplifier Module supporting WCS dHRU-dHPAM-25 HRU Digital High Power Amplifier Module supporting TDD 2500, 100MHz contiguous BW HRU combiner module...
- Page 24 User Manual v1.0 Item Description Flavor Image HRU combiner module supporting low bands AWS,PCS,WCS and TDD 2500 including cables dHRU-COMB-M dHRU-TL HRU termination load BR-dHRU-L HRU bracket to support low band modules UM_-_Everon_6000_DAS_-_5-AUG-2021 | Aug 2021 |Page 94 of 246...
- Page 25 User Manual v1.0 Item Description Flavor Image BR-dHRU-M HRU bracket to support mid band modules dHRU-CABLE HRU 4.3-10 RF Jumper Cable dHRU-INT-SFP HRU Internal SFPs (from dHRU-dHPOM to modules) and Fiber ➢ Example Layouts UM_-_Everon_6000_DAS_-_5-AUG-2021 | Aug 2021 |Page 95 of 246...
- Page 26 User Manual v1.0 2.8.2 dHRU Interfaces, Connections, Dimensions This section details the interfaces of the system sub-elements, as well as the fully connected system internal and external interfaces: ▪ OEU interfaces, see 2.8.2.1 ▪ RFU interfaces, see 2.8.2.2 ▪ Combiner interfaces, see 2.8.2.3 ▪...
- Page 27 User Manual v1.0 ➢ Bottom panel DRY CONTACT (8 pin) and Local debug port, RJ45 external alarm interface (6pin) UM_-_Everon_6000_DAS_-_5-AUG-2021 | Aug 2021 |Page 97 of 246...
- Page 28 User Manual v1.0 ➢ OEU Dimensions UM_-_Everon_6000_DAS_-_5-AUG-2021 | Aug 2021 |Page 98 of 246...
- Page 29 User Manual v1.0 2.8.2.2 RFU Interfaces ➢ Bottom Panel CPRI Optical AC power Local debug Interface, To OEU (from OEU) port, RJ45 UM_-_Everon_6000_DAS_-_5-AUG-2021 | Aug 2021 |Page 99 of 246...
- Page 30 User Manual v1.0 ➢ Top Panel External Interface: Coupling (power check 4.3-10 Mini Din without disconnecting from internet) UM_-_Everon_6000_DAS_-_5-AUG-2021 | Aug 2021 |Page 100 of 246...
- Page 31 User Manual v1.0 ➢ Mechanical dimensions UM_-_Everon_6000_DAS_-_5-AUG-2021 | Aug 2021 |Page 101 of 246...
- Page 32 User Manual v1.0 2.8.2.3 Combiner interfaces UM_-_Everon_6000_DAS_-_5-AUG-2021 | Aug 2021 |Page 102 of 246...
- Page 33 User Manual v1.0 2.8.2.4 Full System Interfaces The system includes two combiners and several band modules. Note: There are labels on the combiners, indicating the RFU band names, to which they connect (two of each, as this is MIMO) RF connections and combiner Bottom connections: 7 CPRI ports: from OEU to each unit...
- Page 34 User Manual v1.0 700 unit (zoom out) UM_-_Everon_6000_DAS_-_5-AUG-2021 | Aug 2021 |Page 104 of 246...
- Page 35 User Manual v1.0 2.8.2.5 System Connection Architecture Note: all internal connectors from OEUs to RFUs are provided. All external SFPs (OEUs to DRU) are purchased separately. The following figure indicates the system internal and external interfaces. The system includes two combiners: 1) Low band: Ports for: 600, 700, 850 + a port that that receives the combined RF signal from the mid-band combiner (entry coming from the Mid-band) 2) Mid band: Ports: sums all bands –...
-
Page 36: Installation Steps, Overview
User Manual v1.0 2.8.3 Installation steps Overview 1) Mount the system, see 2.8.3.1 2) Connect the internal cables (CPRIs, RFs), see 2.8.3.2 3) Connect external cables (OEUs to DRUs) see 2.8.3.3 4) Connect the other cables (ground, power), see 2.8.3.4 5) Power up and verify normal operation, see 0 6) Perform fine tuning (via login to the GUI), see 2.8.3.6 UM_-_Everon_6000_DAS_-_5-AUG-2021 | Aug 2021... - Page 37 User Manual v1.0 2.8.3.1 Mount chassis on the wall Note: for dimensions and specifications refer to chapter 11 Mount each of the two brackets (Low and Mid) on the wall, and connect the modules to the bracket using screws as follows: Before mounting the dHRU: unwrap each of the elements.
- Page 38 User Manual v1.0 Note: The following figures demonstrate the wall installation for low and high bands UM_-_Everon_6000_DAS_-_5-AUG-2021 | Aug 2021 |Page 108 of 246...
- Page 39 User Manual v1.0 2.8.3.2 Connect the Internal cables (OEUs to RFUs) The internal cable connections include: Connect the modules bottom panel CPRI connections (lower RFU and OEU panels) Note: the internal fibers are provided; the external fibers are not provided. OEU interface to RFU UM_-_Everon_6000_DAS_-_5-AUG-2021 | Aug 2021...
- Page 40 User Manual v1.0 RFU interface to OEU Connect the RF between the modules and the combiners in the upper panel (all jumpers – these are provided with the kit) UM_-_Everon_6000_DAS_-_5-AUG-2021 | Aug 2021 |Page 110 of 246...
- Page 41 2.8.3.3 Connect the External cables (OEUs to DRUs) The following figure indicates the connections between the system and the DRU 1. Connect the cables between the OEU and the DRU OEU interface to DRU OEU to corning DRU UM_-_Everon_6000_DAS_-_5-AUG-2021 | Aug 2021 |Page 111 of 246...
- Page 42 User Manual v1.0 2.8.3.4 Connect the rest of the Cables For each of the units, connect the cables as follows: ▪ Ground, see 2.8.3.4.1 ▪ Power, see 2.8.3.4.2 2.8.3.4.1 Connect Ground Note: Ground according to local regulations The following additional (not supplied) tools and components are required for connecting the system ground: ▪...
- Page 43 User Manual v1.0 2.8.3.4.2 Connect AC Power The AC power is connected to the OEU, and is distributed from the OEU to the modules ➢ To connect the power 1. Connect the AC power source to the OEU input power port Connect to AC power source UM_-_Everon_6000_DAS_-_5-AUG-2021 | Aug 2021...
- Page 44 User Manual v1.0 2. Connect each of the RFUs to an OEU power source distribution port UM_-_Everon_6000_DAS_-_5-AUG-2021 | Aug 2021 |Page 114 of 246...
- Page 45 User Manual v1.0 2.8.3.5 Power up and Verify Normal Operation Power up the system, and verify normal operation according to the following LED guidelines Note: the alarm LED is lit in RED only when there is an alarm. The above figure is an illustration. 2.8.3.6 Perform fine tuning (via login to the GUI) See setup from user interface for details on how to setup the system.
-
Page 46: Screen Layout
User Manual v1.0 3. GUI – General Description This section provides general guidelines and tools for navigating the system GUI: ▪ Screen layout, see 3.1 ▪ Main menu options, see 3.2 ▪ Default network settings, see 3.3 ▪ Supported access options, see 3.4 3.1 Screen Layout The main menu (located to the left of the window) lists all the available management options. -
Page 47: Main Menu Options
User Manual v1.0 3.2 Main Menu Options The table below lists the management options provided by the main menu: Table 11: Main Menu Options Icon Enables user to… View the system topology and information about the different system elements. View all system events and generate reports. Perform initial system configurations. -
Page 48: Default Network Settings
User Manual v1.0 3.3 Default Network Settings The system devices are managed via a web session to the headend control module (HCM) that is installed as either a headend unit (HEU) or integrated headend unit (IHU) The HCM has three types of RJ45 Ethernet ports: LOCAL port, LAN port and four INTERNAL ports. ▪... - Page 49 Once all the system elements are installed, the system administrator can log into the system GUI and perform initial configurations. It is recommended to begin working with the Corning® Everon™ 6000 by following these steps: Open a local session to the HCM, see section 4.1.
- Page 50 User Manual v1.0 Go to Start ➔ Settings ➔ Network & Internet b. Select Ethernet ➔ Change adapter options UM_-_Everon_6000_DAS_-_5-AUG-2021 | Aug 2021 |Page 120 of 246...
- Page 51 User Manual v1.0 Right-click on the Ethernet USB adapter or ethernet cable and select Properties d. Select TCP/IPv4 and click Properties UM_-_Everon_6000_DAS_-_5-AUG-2021 | Aug 2021 |Page 121 of 246...
- Page 52 User Manual v1.0 Type in the properties: 172.16.1.2 : 255.255.0.0 ➔ click OK Examples of IP addresses: • Allowed: 172.16.1.5. • Not allowed: 172.16.1.1 (this IP is used by the LOCAL port). Set the IP address according to the default IP address of the LOCAL port and the subnet mask.
- Page 53 User Manual v1.0 4.2 Remote Management (Configure the LAN IP settings) After doing the preliminary configuration (see section 4.1), the system can be used for remote management, and needs to be configured as follows. This section describes the configurations required for remote session access using Ethernet connection via the LAN port.
- Page 54 User Manual v1.0 Note: make sure the values you enter in the above fields aren't used by other system elements, and are different than the default values. Make sure the address format matches IPv4 or IPv6, according to the tab being updated. For Dynamic IP Address —...
- Page 55 User Manual v1.0 Click the "SIGN IN" button. System GUI main screen appears. 10. Configure the IP settings (to allow working through LAN IP address and not only via the local port connection) as follows: In the Device view Select Admin UM_-_Everon_6000_DAS_-_5-AUG-2021 | Aug 2021 |Page 125 of 246...
- Page 56 User Manual v1.0 b. Select IP Settings and click on Edit Set internal ports to the required IP address (in this example 11.0.0.1) UM_-_Everon_6000_DAS_-_5-AUG-2021 | Aug 2021 |Page 126 of 246...
- Page 57 User Manual v1.0 d. Click on LAN port to display roll-down menu and select Client Click on Apply UM_-_Everon_6000_DAS_-_5-AUG-2021 | Aug 2021 |Page 127 of 246...
- Page 58 User Manual v1.0 Enter the credentials Sign out of the application. Then re-access the application: In your browser address bar type the IP address again: UM_-_Everon_6000_DAS_-_5-AUG-2021 | Aug 2021 |Page 128 of 246...
- Page 59 User Manual v1.0 h. Select advanced➔ proceed to (the IP address) The application appears. UM_-_Everon_6000_DAS_-_5-AUG-2021 | Aug 2021 |Page 129 of 246...
- Page 60 User Manual v1.0 5. Commissioning (Initial configurations) This section describes all the initial configurations (commissioning) that must be done by the system administrator, in order to add operators and perform commissioning. Also – to configure maps: Verify all the hardware and modules have been connected, see 5.1 Create new user operators, see 5.2 Set the system parameters: •...
- Page 61 User Manual v1.0 5.1 Verify Hardware-modules connection (auto discovery) Verify that all the hardware and modules have been connected. This is indicated by the message: “system is in discovery mode”. When the message disappears, you may view the system hardware configuration through the site-config auto set screen.
- Page 62 User Manual v1.0 5.2 Create new user operators Initially the system administrator is the only system user. To enable other users to log in to the system, the system administrator must create user operators for the different providers/carriers. When a new operator is created the administrator of the new operator must log in to add users to the operator.
Need help?
Do you have a question about the Everon 6000 and is the answer not in the manual?
Questions and answers