Advertisement
Quick Links
Patent pending / Brevet en instance / Chronione patentem / Заявлено на патент
Made in China / Fabriqué en Chine / Wyprodukowano w Chinach / Сделано в Китае
Italian designed / De design italien / Włoski projekt / Разработано в Италии
Do not discard these instructions / Ne pas jeter ces instructions
Nie wyrzucaj niniejszej instrukcji / Не выбрасывайте эту инструкцию
ASSEMBLY INSTRUCTIONS
INSTRUCTIONS D'ASSEMBLAGE
INSTRUKCJA MONTAŻU
ИНСТРУКЦИЯ ПО СБОРКЕ
AVSC2155
AUDIO/VIDEO TELEVISION SYSTEM
MEUBLE TV POUR TÉLÉVISEURS
STOLIK RTV
ПОДСТАВКА ПОД ТЕЛЕВИЗОР
И АУДИО/ВИДЕО АППАРАТУРУ
M-1_032612v1T
Advertisement

Subscribe to Our Youtube Channel
Related Manuals for Bell'O AVSC2155


Summary of Contents for Bell'O AVSC2155
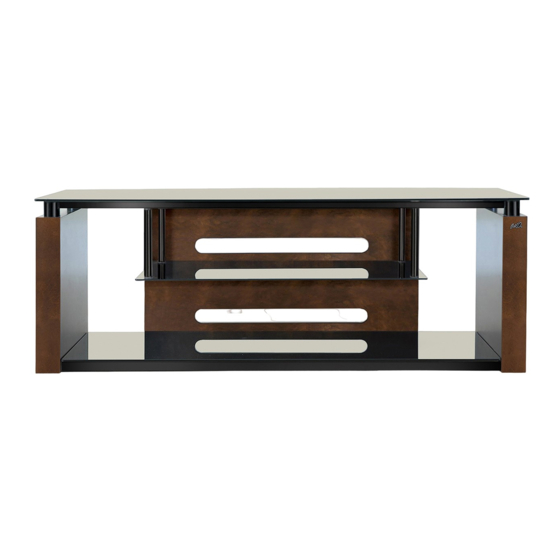
- Page 1 AVSC2155 AUDIO/VIDEO TELEVISION SYSTEM MEUBLE TV POUR TÉLÉVISEURS STOLIK RTV ПОДСТАВКА ПОД ТЕЛЕВИЗОР И АУДИО/ВИДЕО АППАРАТУРУ ASSEMBLY INSTRUCTIONS INSTRUCTIONS D’ASSEMBLAGE INSTRUKCJA MONTAŻU ИНСТРУКЦИЯ ПО СБОРКЕ Patent pending / Brevet en instance / Chronione patentem / Заявлено на патент Made in China / Fabriqué en Chine / Wyprodukowano w Chinach / Сделано в Китае...
- Page 2 ! NE MONTEZ PAS OU NE MARCHEZ PAS SUR LE MEUBLE OU SUR DES TABLETTES DU MEUBLE. ! NE FRAPPEZ PAS OU NE VOUS APPUYEZ PAS SUR LES TABLETTES DE VERRE. Bell'O International Corps décline toute responsabilité en cas d'assemblage non conforme aux instructions ou pour l'assemblage, l'utilisation ou la manutention incorrects de ce meuble.
- Page 3 PARTS LIST / NOMENCLATURE DES PIÈCES / LISTA CZĘŚCI / ПЕРЕЧЕНЬ ДЕТАЛЕЙ Quantity Quantity Quantité Quantité Part / Pièce / Część / Деталь Part / Pièce / Część / Деталь Ilość Ilość Количество Количество 35 mm 15 mm 50 mm 28 mm...
- Page 4 ASSEMBLY INSTRUCTIONS / INSTRUCTIONS D'ASSEMBLAGE INSTRUKCJA MONTAŻU / ИНСТРУКЦИЯ ПО СБОРКЕ NOTE: 2 PEOPLE ARE RECOMMENDED TO ASSEMBLE THIS FURNITURE. TO AVOID DAMAGE DURING ASSEMBLY, IT SHOULD BE ASSEMBLED ON A SOFT SURFACE. REMARQUE : IL EST CONSEILLÉ D’ÊTRE À DEUX POUR ASSEMBLER CE MEUBLE. POUR ÉVITER LES DOMMAGES, EFFECTUER L'ASSEMBLAGE SUR UNE SURFACE DOUCE.
- Page 5 Fig. 2 2. ATTACH the Top Shelf Support Frame (M3) to the Left and Right Side Panels (M1) using four 15 mm Screws (M10) as shown above. Tighten fully. 2. FIXEZ le cadre de soutien de la tablette supérieure (M3) aux panneaux latéraux gauche et droit (M1) à l’aide de quatre vis (M10) 15 mm, tel qu’indiqué...
- Page 6 Fig. 3 3. INSERT four Plastic Caps (M11) into the openings in the top of the Top Shelf Support Frame (M3). PRESS DOWN firmly to ensure they are properly inserted. 3. INSÉREZ quatre capuchons en plastique (M11) dans les ouvertures situées dans la partie supérieure du cadre de soutien de la ta- blette supérieure (M3).
- Page 7 Fig. 4 4. ATTACH the Rear CMS (Cable Management System) Panel (M4) to the Top Shelf Support Frame (M3) using two ® 50 mm Bolts (M12) as shown above. Do not yet tighten fully. 5. ATTACH the Rear CMS (Cable Management System) Panel (M4) to the Bottom Shelf Support Frame (M2) using two ®...
- Page 8 Fig. 5 6. CAREFULLY PLACE the Top Glass Shelf (M5) down onto the Top Shelf Support Frame (M3) as shown above. Make sure the discs on the underside of the Top Glass Shelf are properly inserted into the holes in the Top Shelf Support Frame. 7.
- Page 9 Fig. 6 8. With the help of an assistant to hold the Middle Glass Shelf (M7) in place, CAREFULLY ATTACH the Middle Glass Shelf to the Mid- dle Shelf Posts (M6) and SECURE the Middle Glass Shelf using four 35 mm Screws (M9). Tighten fully, but be careful not to over- tighten Screws.
- Page 10 Fig. 7 9. PLACE six Soft Glass Pads (M14), evenly distributed, along the top edge of the Bottom Glass Support Frame (M2) as shown above. 10. CAREFULLY PLACE the Bottom Glass Shelf (M8) down onto the Glass Pads (M14). MAKE SURE THE FURNITURE AND ALL SHELVES ARE PROPERLY INSTALLED, SUPPORTED, AND LEVEL BEFORE ATTEMPTING TO PLACE ANY COMPONENTS ON THEM.
Need help?
Do you have a question about the AVSC2155 and is the answer not in the manual?
Questions and answers