
Related Manuals for Accurex Lysun RFM-101

Summary of Contents for Accurex Lysun RFM-101
- Page 1 Renal Function Analysis Meter (RFM-101) User’s Manual RFM-101 insert 20191125.indd 1 2019/11/27 10:41:57...
- Page 2 RFM-101 insert 20191125.indd 2 2019/11/27 10:41:57...
-
Page 3: Renal Function Analysis Meter
Renal Function Analysis Meter Identification Meter: RFM-101 Test strips: RFS-101,CRS-101,UAS-101,URS-101 Important Safety Instructions • Misuse of electrical meter can cause electrocution, burns, fire and other hazards. • Do not place the meter in liquid, nor put it where it could fall into liquid. If the meter becomes wet, unplug it before touching it. -
Page 4: Table Of Contents
Table of Contents Renal Function Analysis Meter ������������������������������������������������������������������������������ 1 Section 1 Introduction �������������������������������������������������������������������������������������������� 3 Section 2 Getting Started ��������������������������������������������������������������������������������������� 4 Section 3 Components ������������������������������������������������������������������������������������������� 7 Section 4 Initial Setup ������������������������������������������������������������������������������������������ 14 Section 5 Meter Setup and Options �������������������������������������������������������������������� 15 Section 6 Testing �������������������������������������������������������������������������������������������������� 17 Section 7 Memory/Communication ���������������������������������������������������������������������... -
Page 5: Section 1 Introduction
Section 1 Introduction The Renal Function Analysis Meter is intended for the quantitative determination of Uric Acid (UA), Creatinine (CR) and Urea (UR) in capillary blood, venous whole blood, plasma and serum. The easy to operate system consists of a portable meter that analyzes the intensity and color of light reflected from the reagent area of a Test strip, ensuring quick and accurate results. -
Page 6: Section 2 Getting Started
Section 2 Getting Started Please check the following requirements when you first receive our products: Unpacking, Checking delivery for completeness, Checking for damage during transport. If you have any question, please contact the manufacturer. Before testing, read the instructions carefully and learn about all the components of the Renal Function Analysis Meter. - Page 7 Component Descriptions 01� Renal Function Analysis Meter: Reads the test strips and displays the concentrations of UA, CR, UR. 02� Test Strips: Part of the system, these are inserted into the meter to measure the concentrations of Uric Acid (UA), Creatinine (CR) and Urea (UR). 03�...
- Page 8 use the Control solution. 14� Warranty Card: Card included in the package, which should be completed and returned to the distributor to qualify for the 2-year meter warranty. Caution:Test strip, safety lancets, sterile lancets and capillary transfer tubes/droppers are disposable materials� Please use them before the expiration date�...
-
Page 9: Section 3 Components
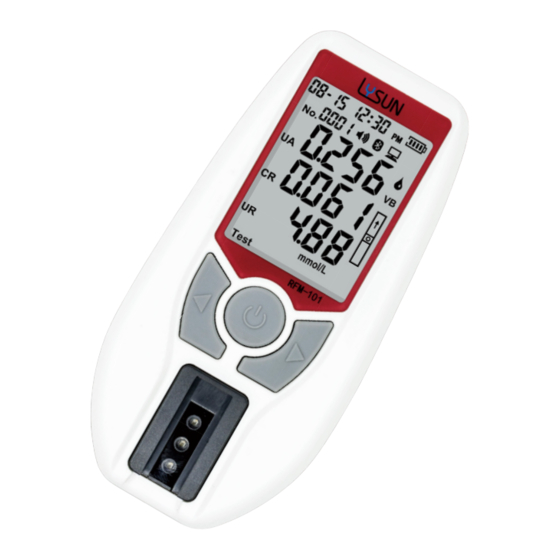
Section 3 Components The Renal Function Analysis Meter reads the test strips and displays the concentrations of Uric Acid (UA), Creatinine (CR) and Urea (UR). Use this diagram to become familiar with all the parts of the meter. USB Port Liqiud Crystal Display (LCD) Left Key Power Key... - Page 10 Note: Follow proper precautions and all local regulations when disposing of the meter. Test strips The Renal Function test strips are plastic devices that work with the Renal Function Analysis Meter to measure the UA, CR, UR concentration in whole blood, plasma and serum.
- Page 11 Test strips can detect Uric Acid (UA), Creatinine (CR) and Urea (UR). Insert Arrow: Located on the front of the test strip, the arrows indicate the direction in which the test strip should be inserted into the meter. Specimen Application Area: After the strip is inserted into the Test Strip Holder, apply the correct specimen volume to the region in the center of the test strip.
- Page 12 a new test strip. Note: If the specimen applied to the Specimen Application Area is not enough, do not add more specimens to the test strip. Instead, retest with a new strip. If the E-2 Error or another error appears on the display, please discard the used strip and retest with a new strip.
- Page 13 ink-jet printing on the code chip. • Refer to the test strip package insert for more details. Optical verify strip The Renal Function optical verify strips work with Renal Function Analysis Meter to ensure the optical part is working properly. After the optical verify strip is inserted into the meter, the meter’s optical part detects the color intensity of the optical verify strip.
- Page 14 discolored, or damaged optical verify strip. • Do not use it after the expiration date. • For in vitro diagnostic use only. Storage and Handling • Store optical verify strips in a cool, dry place. Store away from heat and direct sunlight.
- Page 15 Precautions Make sure the control solution and all the test materials reach operating temperature of 10 - 35°C prior to testing. The control solutions and test materials are only accurate within this temperature range. Use the control solution before the expiration date shown on the bottle. Discard the control solution if it appears cloudy.
-
Page 16: Section 4 Initial Setup
Section 4 Initial Setup Before testing, ensure the following procedures are followed. Turn on Meter Press to turn the meter on. The meter will automatically turn off after 5 minutes of inactivity. Coding the Meter Each time a new box of test strips is used, the new code chip included in the box must be inserted into the meter. -
Page 17: Section 5 Meter Setup And Options
Section 5 Meter Setup and Options With the meter turned on, press and hold for 2 seconds to enter the Setting mode. Press ◄ or ► to display several setup sub-modes. Press to enter the SET item. Year Setup As the year is displayed, please press ◄ or ► to switch. Press to save. - Page 18 Press to save. Sample Select As the sample shows FB, VB or SP, please press to enter the Sample Set. Press ◄ or ► to switch between the Capillary Blood(FB), Venous Blood(VB) and Plasma and serum(SP). Press to save and enter the setup mode after selected. Caution: The Capillary Blood(FB) is the meter default�...
-
Page 19: Section 6 Testing
Section 6 Testing The following steps show how to use each component to measure the sample concentration. Specimen Collection 01. Use fresh capillary blood from the fingertip. 02. Use heparinized or EDTA venous whole blood. Please refer to Professional Testing below. Caution: Before testing, choose a clean, dry work surface�... - Page 20 Testing with fingertip blood Wipe away the first drop of blood. Apply light pressure to obtain a second drop of blood. Use a capillary transfer tube or pipette to collect capillary blood. For use with the capillary transfer tube, hold the tube slightly downward and touch the tip of the capillary transfer tube to the blood specimen.
- Page 21 For obtaining a drop of blood from the fingertip, adjust the penetration depth on the lancing device to reduce discomfort. Unscrew the lancing device cover from the body of the lancing device. Insert a sterile lancet into the lancet holder and push it until the lancet comes to a complete stop in the lancet holder.
- Page 22 Adjust the puncture depth by rotating the lancing device cover. There are a total of 5 puncture depth settings. To reduce discomfort, use the lowest setting that still produces an adequate drop of blood. Use settings 1 and 2 for delicate skin, 3 and 4 for normal skin, or 5 for calloused or thick skin.
- Page 23 Hold the lancing device against the side of the finger to be lanced with the cover resting on the finger. Push the release button to prick the fingertip. A click should be heard as the lancing device activates. Gently massage from the base of the finger to the tip of the finger to obtain the required blood volume.
- Page 24 Pull the used lancet off. Place the lancing device cover back on the lancing device. Note: For professional use, please refer to NCCLS Documents H04-A6, Collection of Diagnostic Capillary Blood Specimens. Safety Lancets 01. Carefully rotate and pull off the protective cap. 02.
- Page 25 correct specimen type. Testing For use with a test strip, insert a strip into the Test Strip Holder in the same direction as the arrows indicate on the strip. Ensure that the test strip is inserted all the way to the end of the Test Strip Holder. Note: For testing capillary blood, use the second drop of blood for accurate results.
- Page 26 Note: For testing capillary blood, use the second drop of blood for accurate results. The meter will begin testing automatically with four dashes in a line flashing on the display indicating the test is in progress. Results will be displayed within 300 seconds. Note: The date in the display will be shown according to the mode you previously selected.
-
Page 27: Section 7 Memory/Communication
Section 7 Memory/Communication Memory/Database Press to enter the MEM. Press ◄ or ► to display the latest 500 test records. Deleting Data To delete the data from the meter memory, press ◄ and ► at the same time to enable data deletion. Press to return to Setting screen. -
Page 28: Section 8 Optical Verify Strip Test
Section 8 Optical Verify Strip Test After entering the CTR Mode, the meter will display OPt . Press and then insert a optical verify strip into the Test Strip Holder. Follow the direction of the arrows indicated on the strip. Ensure that the optical verify strip is inserted all the way. The optical check will start automatically. -
Page 29: Section 9 Quality Control
Section 9 Quality Control Each lab should use its own standards and procedures for performance. Test known specimens/controls at each of the following events in accordance with local, state, and/or federal regulations or accreditation requirements: • When a new package of test strips is opened •... - Page 30 03. Compare the code number on the code chip with the code number printed on the test strip pouch label and ensure the two numbers are identical to avoid inaccurate results. 04. Press and hold for 2 seconds to enter the Setting mode. And press ► to to enter the CTR .
- Page 31 Interpreting Results The results should fall within the range(s) printed on the bottle label and are specific for each lot of controls. If the results fall within the specified control range, it indicates the Renal Function Analysis Meter is working correctly and the procedures are being performed properly.
-
Page 32: Section 10 Maintenance
Section 10 Maintenance Proper maintenance is recommended for best results. General Cleaning For best results, the meter should be cleaned after each day of testing. Meter Surface A cotton cloth can be used to clean the surface of the meter. Use a damp cotton cloth if necessary. - Page 33 Cleaning Process For best results, the meter should be cleaned after each day of testing. A cotton cloth can be used to clean the surface of the meter. Use a damp cotton cloth if necessary. A dry, soft cloth may be used to clean the LCD and the sensor area. It is recommended that the meter be stored in the carrying case after each use.
-
Page 34: Section 11 Precautions
Section 11 Precautions Follow the precautions listed below to ensure accurate results and proper operation of the meter. • The protection provided by the meter may be impaired if used in a manner not defined in this instruction manual. • Wear gloves to avoid contact with potentially hazardous biological specimens during testing. -
Page 35: Section 12 Limitation
Section 12 Limitation The following substances do not interfere with test results: Substance Amount Substance Amount Acetaminophen 1324μmol/L(20mg/dL) Cholesterol 12.9 mmol/L(500mg/dL) Ascorbic Acid 568 μmol/L(10mg/dL) Triglyceride 7.3 mmol/L(650mg/dL) Conjugated Bilirubin 240 μmol/L(20mg/dL) Uric Acid 0.6mmol/L(10mg/dL) Creatinine 442 μmol/L(5mg/dL) Hemoglobin 2 g/L(200mg/dL) Ibuprofen 2425 μmol/L(50mg/dL) Dopamine 5.87 μmol/L(0.09mg/dL) Methyldopa... -
Page 36: Section 13 Troubleshooting
Section 13 Troubleshooting Display Causes Solution The sensor area is damaged, Ensure the sensor area is clean and that dirty, or blocked at turn-on, there are no objects covering the sensor such as a used test strip left area. Refer to Maintenance. Restart the in the meter. -
Page 37: Section 14 Meter Performance
Section 14 Meter Performance The Accuracy Iterm Range of sample Bias 0.090mmol/L-0.300mmol/L (1.51mg/dL-5.04mg/dL) ≤±0.060mmol/L (±1.01mg/dL) 0.301mmol/L-1.200mmol/L (5.05mg/dL-20.17mg/dL) ≤±20% 0.044mmol/L-0.150mmol/L (0.50mg/dL-1.70mg/dL) ≤±0.030mmol/L (±0.34mg/dL) 0.151mmol/L-1.320mmol/L (1.71mg/dL-14.93mg/dL) ≤±20% 0.90mmol/L-10.00mmol/L (5.41mg/dL-60.06mg/dL) ≤±2.00mmol/L (±12.01mg/dL) 10.01mmol/L-40.00mmol/L(60.07mg/dL-240.24mg/dL) ≤±20% The Precision Iterm Range of sample 0.090mmol/L-0.300mmol/L(1.51mg/dL-5.04mg/dL) SD<0.023mmol/L (<0.38mg/dL) 0.301mmol/L-1.200mmol/L (5.05mg/dL-20.17mg/dL) CV<7.5% 0.044mmol/L-0.150mmol/L (0.50mg/dL-1.70mg/dL) -
Page 38: Appendix 1 Meter Specifications
Appendix 1 Meter Specifications Feature Specifications Methodology Reflectance Photometer Test Time ≤5 min Measurement Range UA: 0.090mmol/L-1.200mmol/L(1.51mg/dL-20.17mg/dL) CR: 0.044mmol/L-1.320mmol/L(0.50mg/dL-14.93mg/dL) UR: 0.90mmol/L-40.00mmol/L(5.41mg/dL-240.24mg/dL) Specimen Whole blood(capillary blood, venous whole blood), plasma and serum Specimen Volume 35 μL or 10 μL Power Source Charging battery;... -
Page 39: Appendix 2 Labelling And Information
Appendix 2 Labelling And Information Do not reuse Use by Manufacturer Keep dry CE marking Batch code Biological risks Catalogue number Consult instructions use Authorised representative in the European Community In vitro diagnostic medical device Caution, the user must be consulted in all cases where this symbol is marked Symbol for the marking of electrical and electronics devices according to Directive 2012/19/EU.The device accessories and the packaging have to be disposed of waste correctly at the end of the usage.Pleases follow Local Ordinances of Regulations for... -
Page 40: Appendix 3 Warranty
Appendix 3 Warranty Please complete the warranty card included in the packaging. Mail it to your local distributor to register your purchase within 30 days of purchase. Note: This warranty applies only to the meter in the original purchase. It does not apply to the other materials included with the meter. - Page 41 or implied (either in fact or by operation of law), including the warranties of merchantability and fitness for use, which are expressly excluded, and is the only warranty given by Lysun Biotechnology Co., Ltd. Limitations of Liability In no event shall Lysun Biotechnology Co., Ltd. be liable for indirect, special or consequential damages, even if Lysun Biotechnology Co., Ltd.