Table of Contents
Advertisement
Quick Links
Advertisement
Table of Contents

Related Manuals for Olitech EasyFlip 2


Summary of Contents for Olitech EasyFlip 2
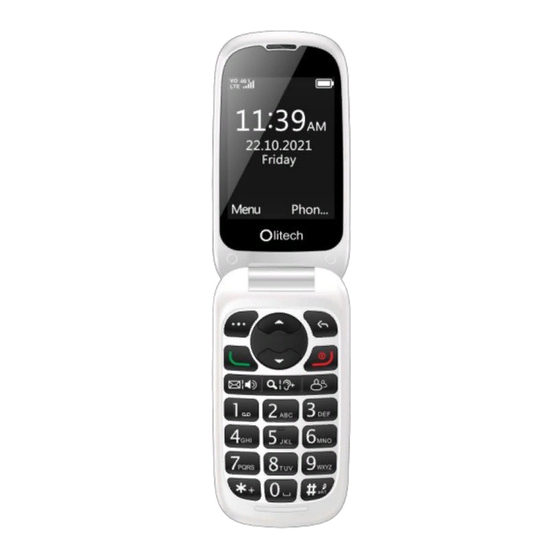
- Page 1 EasyFlip 2 Quick Set-Up Guide V1 Model number: OLT2908V2...
-
Page 2: Table Of Contents
Contents SIM insertion ..........3 Powering on/off ..........3 Notification light settings ......4 Save contacts to phonebook ......5 Photo/speed dial ..........6 Ringtone ............7 Loudspeaker ..........8 Voice guidance ..........9 Amplify receiver volume......10 Volume key/torch key status ....... 10 Emergency key setup ........ -
Page 3: Sim Insertion
SIM card and is 8.8 mm X 12.3 mm. Prior to SIM insertion, Olitech strongly advise that users review the SIM insertion instructions in the EasyFlip 2 User Manual (pages 10 – 13) and/or the instructional videos on Olitech’s website https://www.olitech.com.au/pages/... -
Page 4: Notification Light Settings
Notification light settings The EasyFlip 2 has three notification lights located on the front of the phone. • Missed call light: located on the left, flashes in blue when there is a missed call that has not been viewed in the call logs. -
Page 5: Save Contacts To Phonebook
The enables the contact’s name to be sounded when receiving an incoming call from them (e.g: “Ryan’s calling”). See pages 23 - 24 of the EasyFlip 2 User Manual for additional information. • When typing the name and phone number, press the # key to change the input method (letter settings or numbers). -
Page 6: Photo/Speed Dial
Photo/speed dial Eight photo/speed dial phone numbers can be programmed to the number keys 2-9; the number 1 key is reserved for voicemail. These programmed numbers can be dialled via two different methods. The dialling method used depends on what screen is present when the call is initiated: Dialling method one: When on the home/main screen or if photo dial is accessed by pressing... -
Page 7: Ringtone
(name, phone number, photo and ringtone) and select Save. Ringtone Ringtones and other alert sounds can be changed in the EasyFlip 2’s Audio settings. To change the ringtone: 1. Press the top left key to select Menu 2. Scroll to and select Settings 3. -
Page 8: Loudspeaker
8. Select Fixed ringtone 9. Scroll to and select your preferred ringtone Additional information: • Audio files saved on the EasyFlip 2 can be used as a ringtone. To programme an audio file as a ringtone, at step 8, select More ringtones. -
Page 9: Voice Guidance
(key above number 1) or the top right key during a call. Voice guidance The EasyFlip 2 is programmed to speak the function of number and symbol keys, e.g.: “2” and “#” (hash); and main menu headings, e.g.: “phonebook”. -
Page 10: Amplify Receiver Volume
voice output 5. Select Deactivate/Activate Amplify receiver volume The volume of the earpiece speaker can be boosted an additional 25db by pressing the Amplify receiver volume key (key above number 2) during a call. Once pressed during a call, a red ear icon will appear along the top of the screen;... -
Page 11: Emergency Key Setup
4. Select On/Off Emergency key setup Information in regards to the functionality of the Emergency key can be found in the EasyFlip 2 User Manual (pages 50-54). To access the Emergency key settings: 1. Press the top left key to select Menu 2. -
Page 12: Share Location
5. Activate/deactivate Warning tone 6. Turn Share location on/off * Share location must be on in order for emergency contacts to request the EasyFlip 2’s location. See Share location for more details. Note: all programmed emergency contacts must have the length of their ringtone set to 15 seconds or more to ensure their voicemail cannot answer the emergency call. -
Page 13: Low Battery Notification
Location to the EasyFlip 2. Please consult page 53 of the EasyFlip 2 User Manual for more information about the Share location function and factors that may impact on its functioning. Low battery notification The low battery notification function allows up to 3 mobile phone numbers to receive a text message stating that the user’s phone battery is... -
Page 14: Auto Answer
Auto answer Auto answer enables incoming calls from programmed phone numbers to automatically answer. When the EasyFlip 2 automatically answers it diverts audio to loudspeaker. To set-up the auto answer function: 1. Press the top left key to select Menu 2. -
Page 15: Alarm And Calendar Reminders
EasyFlip 2’s Organiser. A voice recording can be programmed to sound at the time of an alarm or event, thus creating a voice reminder. See pages 39 - 41 of the EasyFlip 2 User Manual for details regarding the programming of alarms and calendar events. -
Page 16: Complete Factory Reset
5. Input password 1234 6. Select OK 7. Confirm OK Note: Restoring factory settings will erase all data stored on the phone. Resources 1. EasyFlip 2 User Manual V1 2. Instructional videos www.olitech.com.au/easyflip2videos 3. Customer service: support@olitech.com.au 03 9755 8885...
Need help?
Do you have a question about the EasyFlip 2 and is the answer not in the manual?
Questions and answers
Where in the manual are there instruction for software updates???
The Olitech EasyFlip 2 manual does not contain instructions for software updates.
This answer is automatically generated