Advertisement
Available languages
Available languages
Quick Links
Valvole brevettate per compressori rotativi a vite e pistoni
Patented valves for piston and screw rotary compressor
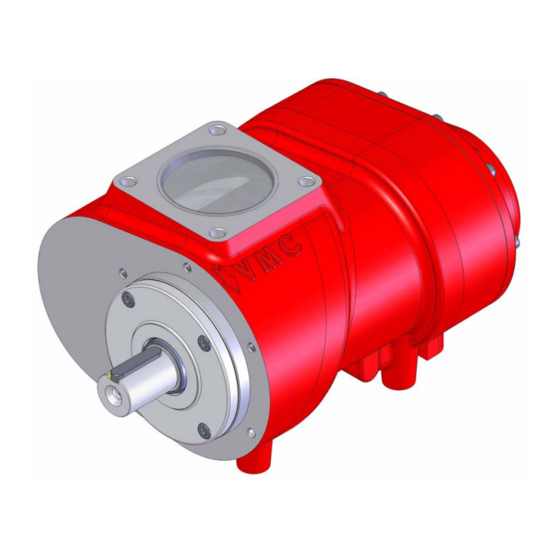
GRUPPO VITE V140
VERSIONE ITALIANO
V.M.C. s.p.a. Via Palazzon 35 – 36051 Creazzo (VI) – ITALY
Internet
www.vmcitaly.com
- Phone +390444/521471 +390444/341115 - Fax +390444/275112
TIPO
REVISIONE
DATA
GRUPPO
ARTICOLO
MODELLO
DM
03
12/12
935
.02
4H
TYPE
REVISION
DATE
LINE
ARTICLE
MODEL
Advertisement

Related Manuals for VMC V140


Summary of Contents for VMC V140
- Page 1 Valvole brevettate per compressori rotativi a vite e pistoni Patented valves for piston and screw rotary compressor GRUPPO VITE V140 VERSIONE ITALIANO V.M.C. s.p.a. Via Palazzon 35 – 36051 Creazzo (VI) – ITALY Internet www.vmcitaly.com - Phone +390444/521471 +390444/341115 - Fax +390444/275112...
-
Page 2: Manutenzione Ordinaria
Patented valves for piston and screw rotary compressor MANUTENZIONE ORDINARIA CODICE KIT DESCRIZIONE TEMPO MANUTENZIONE [ORE] 935.0248 KIT RICAMBI CUSCINETTI V140 20000 930.0249 KIT RICAMBI PARAOLIO V140 10000 V.M.C. s.p.a. Via Palazzon 35 – 36051 Creazzo (VI) – ITALY Internet www.vmcitaly.com... -
Page 3: Manutenzione Straordinaria
Valvole brevettate per compressori rotativi a vite e pistoni Patented valves for piston and screw rotary compressor MANUTENZIONE STRAORDINARIA CODICE DESCRIZIONE CODICE 900000 COPERCHIO POSTERIORE CON GUARNIZIONE 900001 COPERCHIO PORTACUSCINETTI COMPLETO 900002 CASSA GRUPPO VITE COMPLETA 900003 LINGUETTA ROTORE MASCHIO 900008 ROTORE FEMMINA CON CUSCINETTI E GURANIZIONI 900009... - Page 4 Perdita dalle guarnizioni. Guarnizioni usurate o danneggiate Sostituire le guarnizioni Ingresso di materiale estraneo nei gruppi vite Contattare il centro servizi VMC I rotori del gruppo vite non girano. Lubrificazione errata Contattare il centro servizi VMC V.M.C. s.p.a. Via Palazzon 35 – 36051 Creazzo (VI) – ITALY Internet www.vmcitaly.com...
- Page 5 Valvole brevettate per compressori rotativi a vite e pistoni Patented valves for piston and screw rotary compressor 930.0290 KIT UTENSILI PER MANUTENZIONE E’ disponibile un kit utensili che comprende gli accessori prodotti da V.M.C. necessari alla manutenzione completa del gruppo vite V.M.C.
- Page 6 Valvole brevettate per compressori rotativi a vite e pistoni Patented valves for piston and screw rotary compressor SOSTITUZIONE KIT K1 RICAMBI CUSCINETTI 1. Rimuovere la linguetta.Svitare le viti del coperchio frontale e rimuoverle. Rimuovere il coperchio frontale con molta attenzione. 2.
- Page 7 Valvole brevettate per compressori rotativi a vite e pistoni Patented valves for piston and screw rotary compressor 5. Riscaldare con un termosoffiatore le ghiere di fissaggio rotori, svitare le stesse con apposite chiavi* (utilizzare un utensile pneumatico).Porre attenzione a non far ruotare a vuoto i rotori in questa fase.
- Page 8 Valvole brevettate per compressori rotativi a vite e pistoni Patented valves for piston and screw rotary compressor 9. Rimuovere il cuscinetto del rotore maschio dal corpo vite. Utilizzare apposito tampone con dimensioni corrette per applicare pressione solo sui rulli. Posizionare il tampone in asse con il cuscinetto dalla faccia corretta (vedi figura), martellare il tampone fino ad estrazione del cuscinetto.
- Page 9 Valvole brevettate per compressori rotativi a vite e pistoni Patented valves for piston and screw rotary compressor 12. Assemblare i nuovi anelli interni sui rotori.Preriscaldare gli anelli interni a 120°C, assemblarli sulle rispettive sedi.Utilizzare guanti prottetivi al calore, ed eseguire tale procedura con le mani.
- Page 10 Valvole brevettate per compressori rotativi a vite e pistoni Patented valves for piston and screw rotary compressor 15. Posizionare i rotori accoppiati su un opportuno supporto, posizionare due spessimetri a nastro da 0.04mm sulla spalla dei rotori. Dovranno intraporsi tra la spalla rotori e il portacuscinetti, per regolare il gioco.
- Page 11 Valvole brevettate per compressori rotativi a vite e pistoni Patented valves for piston and screw rotary compressor 18. Pulire attentamente i filetti.Utilizzare colla adatta a bloccare e sigillare in modo ® permanente i giunti filettati. Si consiglia LOCTITE 2701 Per la sigillatura, applicare un cordolo di prodotto a 360°sui filetti del maschio, lasciando il primo filetto libero.
- Page 12 Valvole brevettate per compressori rotativi a vite e pistoni Patented valves for piston and screw rotary compressor 21. Controllare il buon accoppiamento rotori e portacuscinetti. Girare manualmente i rotori e verificare la rotazione libera senza impedimenti. Nel caso si riscontrano impedimenti od attriti verificare il corretto assemblaggio, in particolare il gioco tra rotori e cuscinetti.
- Page 13 Valvole brevettate per compressori rotativi a vite e pistoni Patented valves for piston and screw rotary compressor 24. Inserire il gruppo rotori e supporto cuscinetti nel corpo vite, fino ad allogiare gli stessi correttamente.Attenzione nella fase d’iserimento alberi su cuscinetti del copo vite, e attenzione alle spine di centraggio.Porre molta attenzione a non danneggiare i componenti durante questa fase.
- Page 14 Valvole brevettate per compressori rotativi a vite e pistoni Patented valves for piston and screw rotary compressor 27. Posizionare il coperchio posteriore sopra la guarnizione di carta. Fare molta attenzione a pulire molto bene le superfici di contatto. Verificare il corretto posizionamento. 28.
- Page 15 Valvole brevettate per compressori rotativi a vite e pistoni Patented valves for piston and screw rotary compressor 30. Controllare il buon assemblaggio del gruppo vite. Girare manualmente l’albero rotore e verificare la rotazione libera senza impedimenti dei rotori. Nel caso si riscontrano impedimenti od attriti verificare il corretto assemblaggio, in particolare il gioco tra rotori e cuscinetti.
- Page 16 Valvole brevettate per compressori rotativi a vite e pistoni Patented valves for piston and screw rotary compressor SOSTITUZIONE KIT K2 RICAMBI PARAOLIO Di seguito viene riportata la procedura di sostituzione kit ricambi paraolio per i gruppi vite. 1. Svitare le viti del coperchio frontale e rimuoverle, rimuovere il coperchio frontale con molta attenzione.
- Page 17 Valvole brevettate per compressori rotativi a vite e pistoni Patented valves for piston and screw rotary compressor 4. Montare l’estrattore facendo attenzione a posizionarlo sui solchi. 5. Estrarre la boccola. 6. Pulire la nuova boccola e la sua sede con del diluente. ®...
- Page 18 Valvole brevettate per compressori rotativi a vite e pistoni Patented valves for piston and screw rotary compressor 8. Preriscaldare la boccola a circa 120°C. 9. Inserire la boccola sulla propria sede, aiutandosi con un manicotto*. Attenzione: inserirla fino a fine corsa. Manicotto disponibili nel kit utensili 930.0290 Il montaggio del paraolio deve essere conforme alla normativa DIN3760.
- Page 19 Valvole brevettate per compressori rotativi a vite e pistoni Patented valves for piston and screw rotary compressor 12. Inserire il paraolio e batterlo a fine corsa attraverso l’uso di un punzone e di un martello. L’asse del punzone di montaggio coincide con l’asse della sede. Non è ammesso nessun posizionamento obliquo.
- Page 20 Valvole brevettate per compressori rotativi a vite e pistoni Patented valves for piston and screw rotary compressor 14. Inserire il calzatore* sull’albero, inserirla fino a fine corsa. Attenzione: il calzatore è neccessario per non danneggiare il paraolio durante il suo inserimento con il coperchio frontale.
- Page 21 12 mesi dalla data di consegna. Sono esclusi dalla garanzia i materiali di consumo e quelli soggetti ad usura. La garanzia decade se i dispositivi VMC risultino: • manomessi o alterati da persone che non siano state direttamente autorizzate in forma scritta dal servizio di Supporto Tecnico VMC Spa;...
-
Page 22: English Version
Valvole brevettate per compressori rotativi a vite e pistoni Patented valves for piston and screw rotary compressor SCREW AIR-END V140 ENGLISH VERSION V.M.C. s.p.a. Via Palazzon 35 – 36051 Creazzo (VI) – ITALY Internet www.vmcitaly.com - Phone +390444/521471 +390444/341115 - Fax +390444/275112... -
Page 23: Routine Maintenance
Patented valves for piston and screw rotary compressor ROUTINE MAINTENANCE KIT CODE DESCRIPTION MAINTENANCE TIME [HOURS] 935.0248 BEARINGS SPARE PARTS KIT V140 20000 930.0249 SHAFT-SEAL SPARE PARTS KIT V140 10000 V.M.C. s.p.a. Via Palazzon 35 – 36051 Creazzo (VI) – ITALY Internet www.vmcitaly.com... -
Page 24: Extraordinary Maintenance
Valvole brevettate per compressori rotativi a vite e pistoni Patented valves for piston and screw rotary compressor EXTRAORDINARY MAINTENANCE CODE DESCRIPTION 900000 REAR COVER WITH GASKET 900001 COMPLETE BEARINGS HOUSING 900002 COMPLETE BODY AIR-END 900003 MALE ROTOR TONGUE 900008 FEMALE ROTOR WITH BEARINGS AND GASKETS 900009 MALE ROTOR WITH BEARINGS AND GASKETS 900006... -
Page 25: Troubleshooting List
Remove and check. Replace if needed Leak from seal Bad seal Replace sealing and inner rings Foreign matter entry Call VMC service center The rotor group isn’t revolving Wrong lubrication Call VMC service center V.M.C. s.p.a. Via Palazzon 35 – 36051 Creazzo (VI) – ITALY Internet www.vmcitaly.com... - Page 26 Valvole brevettate per compressori rotativi a vite e pistoni Patented valves for piston and screw rotary compressor 930.0290 MAINTENANCE TOOLS SPARE PARTS KIT It’s available a specific tools spare parts kit made by V.M.C., necessary for the complete screw maintenance. V.M.C.
- Page 27 Valvole brevettate per compressori rotativi a vite e pistoni Patented valves for piston and screw rotary compressor BEARINGS SPARE PARTS KIT K1 SUBSTITUTION 1. Remove the tongueTo unscrew the screws of the frontal cover and remove all, remove the frontal cover with carefull. 2.
- Page 28 Valvole brevettate per compressori rotativi a vite e pistoni Patented valves for piston and screw rotary compressor 5. Heat the fixing nuts whit a heat gun. Unscrew the nuts with a suitable wrench* using an impact wrench.Be careful rotors do not revolve idly during this phase. *Tools available in spare parts kit 930.0290 6.
- Page 29 Valvole brevettate per compressori rotativi a vite e pistoni Patented valves for piston and screw rotary compressor 9. Remove the male rotor bearing from the air-end body. Use a specific right-size pad to apply the pressure only on rollers. Place the pad aligned with the bearing on the right side (see picture).
- Page 30 Valvole brevettate per compressori rotativi a vite e pistoni Patented valves for piston and screw rotary compressor 12. Assemble the new bearing rings on rotors.Pre-heat the bearing rings at 120°C. Assemble them on the relative sites. Use heatresistant gloves. Do not use any tools to carry out this procedure.
- Page 31 Valvole brevettate per compressori rotativi a vite e pistoni Patented valves for piston and screw rotary compressor 15. Place coupled rotors on an appropriate support. Place two thickness gauges at 0.04mm on the rotor back side.They will have to be between rotor back side and bearings housing to set tolerances.
- Page 32 Valvole brevettate per compressori rotativi a vite e pistoni Patented valves for piston and screw rotary compressor 18. Clean the threads carefully. Use a glue for permanent sealing of threaded joints. ® LOCTITE 2071 is recommended.For sealing applications, spread a thin strip of this product all over the male rotor threads,leaving the first thread free.
- Page 33 Valvole brevettate per compressori rotativi a vite e pistoni Patented valves for piston and screw rotary compressor 21. Check if rotors and bearings housing are coupled in the right way. Turn the rotors manually and check that their rotation is free without obstructions.In case of hindrances or frictions, control that the assembly is correct.Especially, check the gap between rotors and bearings housing.Control that components have not been damaged.
- Page 34 Valvole brevettate per compressori rotativi a vite e pistoni Patented valves for piston and screw rotary compressor 24. Insert rotors and bearings housing in the air-end body until they reach their allotted position. During the phase of shaft insertion on the bearings of air-end body,be careful with dowel pins.Pay attention not to damage components during this phase.
- Page 35 Valvole brevettate per compressori rotativi a vite e pistoni Patented valves for piston and screw rotary compressor 27. Place the back cover on the new paper gasket.Be careful you clean the contact surfaces accurately.Check the right positioning. 28. Assemble the fixing screws M10 again. Fix them with a 50Nm torque. WARNING: before fixing the inside screw to the discharge pipe, add the copper washer included in the spare parts kit.
- Page 36 Valvole brevettate per compressori rotativi a vite e pistoni Patented valves for piston and screw rotary compressor 30. Check the right assembly of the air-end. Turn the rotor shaft manually and be sure that the rotation is free without obstructions. In case of hindrances or frictions, check that the assembly is correct.
- Page 37 Valvole brevettate per compressori rotativi a vite e pistoni Patented valves for piston and screw rotary compressor REPLACE K2 SHAFT-SEAL SPARE PARTS KIT Here below you can find the procedure for the replacement of damaged or worn parts with shaft-seal spare parts kit for these air-ends. 1.
- Page 38 Valvole brevettate per compressori rotativi a vite e pistoni Patented valves for piston and screw rotary compressor 4. Install the sleeve extractor, making sure it is positioned on grooves. 5. Extract the sleeve. 6. Clean the new sleeve and its seat with a paint thinner. ®...
- Page 39 Valvole brevettate per compressori rotativi a vite e pistoni Patented valves for piston and screw rotary compressor 8. Pre-heat the sleeve at about 120°C. 9. Put in the sleeve in its seat, helping yourself with a muff*. WARNING: insert it up to its final part. Muff available in the spare parts kit 930.0290 The shaft-seal assembly must comply with Rule DIN 3760 10.
- Page 40 Valvole brevettate per compressori rotativi a vite e pistoni Patented valves for piston and screw rotary compressor 11. Spread some glue on the shaft-seal seat. 12. Insert the shaft seal and hit it up to its final part by using a hammer and a punch. The axis of the assembly punch coincides with the axis of the seat.
- Page 41 Valvole brevettate per compressori rotativi a vite e pistoni Patented valves for piston and screw rotary compressor 14. Insert the fitting tool* on the shaft. Insert it up to its final part. WARNING: the fitting tool is necessary to avoid any shaft-seal damages during its insertion with front cover.
- Page 42 Anyhow it cannot be earlier than 12 months from dispatch date. Commodities and wear-and-tear materials are not eligible to warranty. The warranty is not valid if VMC products turn out to be: •...