Advertisement
Quick Links
Air Purifier
MXAP-HEP200
Thank you for purchasing this MAXELL product. Before use, make sure to read this Instruction Manual and
use the product correctly and safely.
The illustrations used in the instruction manual (this document) may differ from the actual product.
User Manual
Table of contents
1
2
3
4
5
6
7
8
User Manual
使 用 說 明 書
MNL210126-00
EN
EN
TC
2
3
6
8
15
17
18
19
Advertisement

Related Manuals for Maxell MXAP-HEP200

Summary of Contents for Maxell MXAP-HEP200
-
Page 1: Table Of Contents
User Manual 使 用 說 明 書 MXAP-HEP200 MNL210126-00 User Manual Thank you for purchasing this MAXELL product. Before use, make sure to read this Instruction Manual and use the product correctly and safely. Table of contents Introduction Safety Caution... -
Page 2: Introduction
Manual without permission. Disclaimer ● Maxell shall not be responsible for any damage caused by fires, earthquakes, action of a third party, any accidents, intended or unintended misuse or other usage under abnormal conditions. ● All explicit and implicit contents not stated in the user manual are not covered. -
Page 3: Safety Caution
Safety Caution Please strictly follow If it is handled incorrectly, it is assumed that the user may suffer death or serious Warning injury If it is handled incorrectly, it is assumed that the user may suffer minor injury Caution there is a possibility that property damage may occur *1: Severe injury is indicated by those that have after effects such as blindness, injury, burns (high temperature/ low temperature/chemical), electric shock, fracture, poisoning, etc. - Page 4 ● Make sure the plug is fully inserted into socket If it is not fully inserted, it may cause electric shock or fire. Maintenance ● Be sure to disconnect the AC plug when cleaning and maintenance It may cause fire or electric shock. ●...
- Page 5 ● Do not use the air purifier in a room that is using an incense-type insect killer Chemical residue may accumulate in the machine and then be released, causing harm to physical health. After using insect killer or mosquito coils, allow the room to be fully ventilated before using the air puri er.
-
Page 6: Name Of Each Part
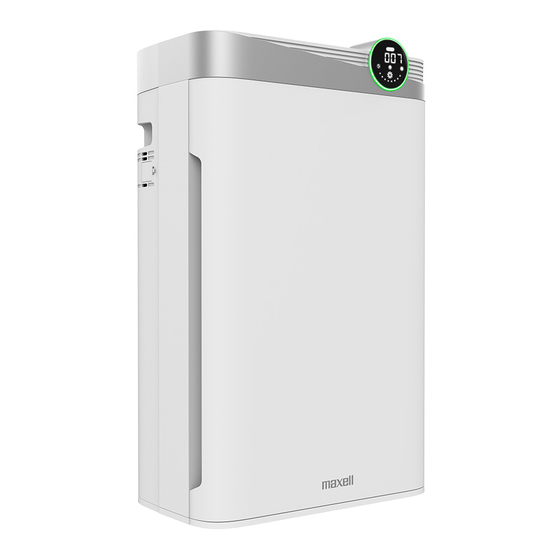
Name of Each Part Light Sensor Air Outlet Operation Panel Indicator Light of Air Quality Display PM2.5 Value Ionzier UV Light Sterilization Wind Speed Water Tank Power On/O Button Timer Button Automatic Operation Button Wind Speed- Button Wind Speed+ Button Sleep Mode Button Reset Button Child Lock Button... - Page 7 Handle (Left and Right) Air Inlet (Left and Right) Water Tank Particulate Sensor (Remove the cover)
-
Page 8: How To Use
How to Use Installing the Filter 1. Removing the lter from the 2. Installing the lter and front cover. plastic bag: A. There are di erences between the inside and the outside of the dust lter #3 (antibacterial cotton, H13 A. - Page 9 Prepare for Humidification 1. Pull the water tank out from the side of the 5. Add about 1L cold water through the inlet, puri er. lling around 80% of the water tank. 2. Remove the package of the humidifying 6. After adding water, close the lid. lter.
- Page 10 How to connect Connect the AC plug into a power outlet. When the machine is plugged in, the buzzer will sound once and the power button turns red. Attention Automatic stop function (when the front panel or air outlet grill is removed) If the front panel or air outlet grill is accidentally removed •...
- Page 11 2. Automatic mode The value detected by the PM2.5 sensor will a ect the wind speed level of the machine and the light sensor of the machine determines whether the machine should enter into sleep mode. When the ambient light is less than 3 lumens for 2 minutes, the machine enters into sleep mode. When the ambient light lumens is greater than 3-10 lumens for 3 minutes, the machine quits sleep mode.
- Page 12 5. Timer Function The working time can be set with the timer button when the machine is operating. When pressing the timer button, the timer button on the operational panel lights on. Timer setting will be shown on display. The minimum and maximum setting unit are 1 hour and 12 hours respectively (the setting unit is an hour).
- Page 13 Display Indicator Light PM2.5 Value Ionzier UV Light Sterilization Negative Ion UV Sterilization Wind Speed Water Tank 9. Power off To stop the operation, press the power button again. The power button’s light turns red, operation stops, and display turns o . Operation Panel Power On / O Button 10.
- Page 14 Note: 1. Please be sure to remove the insulation sheet at the battery compartment before rst use. 2. Use the remote control within a distance of 3 meters from the main unit. 3. If you need to control the main unit, please point the remote controller towards the display of main unit. 4.
-
Page 15: Maintenance
Maintenance Before cleaning, be sure to stop operation and unplug from the socket. ● Do not operate the machine in absence of a filter. It will not be able to remove the dust. Dust taken into the machine may cause malfunction. ●... - Page 16 5. Ceramic balls (Clean depends on dirt level. Suggest to replace every year or any damage occurred.) ● Clean the ceramic ball box with water and dry thoroughly. 6. Humidifying filter (Clean depends on dirt level. Suggest to replace every year or any damage occurred.) ●...
-
Page 17: Troubleshooting
Troubleshooting (If failure is suspected, check the following) Phenomenon Cause Solution Connect the plug to the power outlet securely and No power rmly Front panel came o / Air grid does Securely attach the front panel / Install air grid Does not operate. -
Page 18: Specifications
Specifications Product Name Air Puri er Power Input AC220V~50-60Hz Rated Power Power Cord Approx. 2m 20 million/cm Anion Concentration Amount of Particulate- 450m Cleaned Air (CADR) Amount of Formaldehyde- Cleaned Air (CADR) Suggested Applicable Area #1 Pre- lter 2 years #2 Cellular-Activated Carbon, cold catalyst lter Suggested Period to 6 months / 1500 hours... -
Page 19: Warranty Policy
Request for warranty service for any accessories or consumable items other than the main unit. h. Purchased as second-hand from such as auctions and recycling shops. 2. Maxell do not take responsibility for compensation for secondary damage (such as loss of expected pro t, mental damage, etc.) resulting from failure of this product. - Page 21 空氣淨化器 MXAP-HEP200 使 用 說 明 書 首先對您選購 Maxell 產品表示感謝。 使用本產品前, 請務必仔細閱讀本使用說明書,正確安全地使 用本產品。 如果附件中隨附有追加信息, 請務必參照該追加信息。 目錄 前言 安全注意事項 各部分名稱 使用方法 清潔保養方法 故障診斷 規格 保修條款 本使用說明書內的插圖可能與實際產品有所不同...
- Page 22 包裝品的確認 Auto ON/OFF UNLOCK TIMER 使用說明書 LOCK RESET STERILIZE (此說明) SLEEP IONIZER 陶瓷球盒 x 1 ( 在水箱內 ) 主機 x 1 遙控器 x 1 抗菌棉 初效過濾網 x 1 蜂窩式活性炭, 加濕濾網 x 1 H13 HEPA 高效空氣 ( 在主機內 ) 冷觸媒過濾網 x 1 ( 在水箱內...
- Page 23 安全注意事項 為確保安全使用,請您務必遵守。 警 告 表示錯誤使用時,會導致使用者死亡或重傷 之假定的危害程度。 *� 注意 表示錯誤使用時,會導致使用者輕傷 或發生物品損害 之假定的危害、損害程度。 *� *� ※1: 重傷是指,失明、受傷、燙傷 ( 高溫·低溫·化學 )、觸電、骨折、中毒等留下的後遺症以及需要住院或長 期接受醫院治療。 ※2: 輕傷是指毋需住院或長期接受醫院治療的受傷、燒燙傷、觸電等的傷害。 ※3: 財產損失是指波及到房屋、財產或家畜、寵物等的損失。 記號是表示在使用產品中對起火、破裂、高溫等的提醒注意。 具體的注意內容在圖形記號中或附近用圖標和文章表示。 (例: 注意觸電) 圖 標 記號是表示在使用產品中禁止該行為。 表 具體的禁止內容在圖形記號中或附近用圖標和文章表示。 示 ( 例: 禁止分解) 例 記號是表示在使用產品中必須根據指示內容的強制行為。 具體的強制內容在圖形記號中或附近用圖示和文章表示。...
- Page 24 插頭應確實牢固插入到插座盡頭 ● 如果在未完全插入的狀態下使用,可能導致觸電或引發火災。 保養 清潔保養時必須拔下電源插頭 ● 否則可能導致觸電或火災。 如果長期不使用,必須拔下電源插頭 ● 否則可能因絕緣劣化導致觸電或因漏電引發火災。 ● 請勿使用超出推薦額定功率的電源、通用插座或連接設備。僅限使用AC ���V電源 使用超過此額定功率的通用插座或連接電源可能會導致過熱並引起火災。 ● 請勿在機器運行時拿起或移動機器。移動或存放時,請勿拉扯電源線 否則可能會導致短路或對電源線造成內部損壞。這可能會導致火災或觸電。 ● 請勿損壞電源線或電源插座。請勿切割,過度扭、拉扯或折曲電源線。如果電源線已遭損壞, 請停止使用此產品 否則可能會引起觸電或火災 。 ● 請勿讓水、易燃清潔劑或其他液體進入產品 否則可能會引起觸電、火災或故障。 ● 此產品不能替代常規通風設備、真空吸塵器或廚用風機 產品用途不同。 ● 請勿在潮濕或高溫的環境下使用本產品,例如淋浴室、洗手間或廚房 否則可能會造成故障和異味。 注 意 請勿放置於陽光直射的場所或異常高溫的場所 ● 否則不僅會導致產品表面及部件劣化,還可能引發火災。 請避免放置於關閉的汽車內或陽光直射的場所或暖爐等暖氣設備附近。 請勿放置於不穩定的場所 ● 請勿放置於不穩定的枱上或傾斜的表面。 否則可能跌落或倒下,導致人身傷害或故障。...
- Page 25 不要在使用香型殺蟲劑的房間中使用空氣淨化器 ● 化學殘留物可能會積聚在機器中,然後被釋放出來,從而危害身體健康。 使用殺蟲劑或蚊香後,請在使用空氣淨化器之前讓房間完全通風。 ● 除非在對其安全負責的人針對本產品的使用對其進行監督或指導下,否則本電器不適合身體, 感官或心理能力較弱、或缺乏經驗和知識的人員(包括兒童)使用 否則可能會造成事故或傷害 。 ● 應該指導兒童以確保他們不應玩耍本產品 否則可能會造成事故或傷害 。 ● 關於清潔和用戶維護,請參閱 “ 清潔保養方法 ” 部分 否則可能會造成損壞和故障。...
- Page 26 各部分名稱 光感測器 出風口 操作面板 空氣質量指示燈 顯示屏 PM�.�值 負離子 紫外線殺菌 風速 水箱 電源開/關按鈕 定時按鈕 自動模式按鈕 風速- 按鈕 風速+ 按鈕 睡眠模式按鈕 重置按鈕 童鎖按鈕...
- Page 27 把手 (左右) 進風口 (左右) 水箱 顆粒傳感器 (取下外蓋)
- Page 28 使用方法 安裝過濾網 1. 從塑膠袋中取出過濾網 : 2. 安裝過濾網和前面板 : A. 灰塵過濾網 #3 (抗菌棉,H13高效空氣過濾網的 A. 拆下前面板。 內部和外部之間存在差異。注意:帶手柄的一側 應朝外放置。 手柄 B. 吸收式過濾網 #2 (蜂窩式活性炭, 冷觸媒過濾網) 的內部和外部之間存在差異。 注意:帶手柄的一側應朝外放置。 手柄 B. 拆下過濾網。 C. 安裝初效過濾網 #1。確保底部鎖處於正確位置, 並且頂部鎖已扣好。 鎖 C. 從包裝中取出過濾網。 鎖 D. 安裝前面板。 ※使用前請務必將塑膠袋從過濾網 ※如果前面板未蓋上,則主機將無法操作。 上取下。...
- Page 29 加濕準備 1. 從淨化器的側面拉出水箱。 5. 通過注水口添加約1L的冷水,填充約80%的 水箱。 2. 拆除加濕濾網的包裝。 6. 加水後,蓋上橡膠蓋。 7. 將水箱推回到淨化器中。 �. 將加濕濾網放入水箱。 8. 本機具有蒸發加濕功能。 4. 打開注水口的橡膠蓋。 往水箱加水, 水將隨著淨化的空氣以自 動蒸發形式隨風吹出,以提供濕潤和 清潔的空氣。加濕效果與風速有關, 並且在機器以較高風速運行時效果更 水箱 好。如果水位變低,機器繼續運行時指 示燈將閃爍。如果取出水箱,指示燈將 熄滅。...
- Page 30 連接方法 將電源插頭插入电源插座。 機器接通電源後,蜂鳴器會響一次,電源按鈕會變成紅色。 注 意 自動停止功能 (當拆下前面板或出風格柵時) · 如果在操作過程中不小心拆下了前面板或出風格柵,產品操作將停止。 重新安裝前面板和出風格柵,即可恢復操作。 自動停止功能(當產品翻倒時) 如果在操作過程中主機翻倒,產品操作將停止。通過重新豎立主機並按下電源 按鈕來重新開始操作。 警告:產品翻倒可能會導致漏水並造成產品故障。請確保產品放置在平穩的 表面上。 操作方法 當按下操作面板上的按鈕時,將發出“嗶”的操作音,並且操作將相應改變。 注 意 請用整個手指正確按操作面板 以下情況按按鈕可能不起作用。 ※ · 用指甲按按鈕 · 戴了手套或打著石膏 · 用乾燥的手指操作 · 觸摸到了其他操作按鈕 · 在操作面板上粘貼了標籤 · 操作面板有污垢 1. 電源開啟 按下電源按鈕時,操作面板上的電源按鈕和自動模式按鈕會亮起。機器進入默認的自動操作模式, 默認設置將啟動負離子和紫外線殺菌功能。本產品沒有記憶功能。因此,每次通過電源按鈕重新啟 動時,它將從風速為1級的自動模式開始。 顯示屏 操作面板...
- Page 31 �. 自動模式 PM2.5傳感器檢測到的數值將影響機器的風速級別,機器的光感測器決定機器是否應進入睡眠模式。 當環境光在2分鐘內小於3流明時,機器將進入睡眠模式。當環境光在3分鐘內大於3-10流明時,機 器會退出睡眠模式。 操作面板 風速與PM�.�數值之間的關係 風速 指示燈 風速 指示燈 PM2.5數值 PM2.5數值 � 綠色 黄色 0-50 121-140 � 51-80 141-160 � 81-100 161-300 紅色 藍色 � 101-120 301-500 自动模式按鈕 �. 手動模式 按下速度“+”或速度“-”按鈕,將機器更改為手動模式,操作面板上的速度“+”和速 度“-”按鈕會亮起。速度“+”按鈕增加風速,最大級別為�。速度“-”降低風速,最小 級別為�。手動模式下有�個風速級別。 操作面板 SPEED + AUTO 風速+/- 按鈕 �.
- Page 32 �. 定時功能 機器運行時,可以使用定時按鈕設置工作時間。按下定時按鈕時,操作面板上的定時按鈕會亮起。 工作時間設置將顯示在顯示屏上。最小和最大設置單位分別是1小時和12小時 (設置單位為1小時)。 完成定時設置後,顯示幕將在5秒鐘後返回顯示PM2.5的數值。 顯示屏 操作面板 工作時間 定時按鈕 �. 童鎖功能 機器運行時按下童鎖按鈕,操作面板上的童鎖按鈕會亮起,其他按鈕操作將被禁用。再次按住童 鎖按鈕�秒鐘,以解除童鎖功能。 操作面板 CHILD RESET SPEED + SLEEP AUTO TIMER POWER LOCK 童鎖按鈕 �. 重置功能 本機器配備有用於更換過濾網的計時器功能。短按重置按鈕可以檢查累計運行時間(單位為小時)。 當計時器累積到1500小時(最大為1500小時),重置按鈕將持續閃爍,以提醒用戶更換新的過濾網。 您可以長按重置按鈕5秒鐘以熄滅其指示燈,並且累積的操作時間將會重置。 顯示屏 操作面板 累計運行時間 CHILD RESET SLEEP LOCK 重置按鈕 �. 負離子/紫外線殺菌功能 開機時,負離子/紫外線殺菌功能會自動啟動。機器操作面板無法控制負離子/紫外線殺菌功能操作...
- Page 33 顯示屏 指示燈 PM�.� 值 負離子 紫外線殺菌 負離子 紫外線殺菌 風速1級 水箱 �. 電源關閉 要停止操作,請再次按下電源按鈕。電源按鈕的指示燈變為紅色,操作停止,並且顯示屏關閉。 操作面板 電源開啟 / 關閉按鈕 10. 遙控器 自動模式按鈕 電源開啟 / 關閉按鈕 Auto 童鎖解鎖按鈕 ON/OFF (短按可以解除童鎖功能) UNLOCK 風速 “+” 按鈕 風速 “-” 按鈕 TIMER 童鎖功能按鈕 LOCK 紫外線殺菌按鈕 重置按鈕 STERILIZE RESET 睡眠按鈕...
- Page 34 注意 �. 首次使用前,請務必移除電池蓋內的絕緣片。 �. 在距主機�米的範圍內使用遙控器。 �. 如果您需要控制主機,請將遙控器對準主機顯示屏。 �. 當主機收到有效的遙控信號時,將發出“嗶”的操作音。 �. 如果三個月或更長時間不使用電池,請勿將其留在遙控器中。 更換電池 如果遙控器停止工作或工作不正常,請更換新電池(CR2032鋰電池)。 � � � CR2032 CR2032 CR2032 CR2032 1. 如圖所示,拆下遙控器後部的電池蓋。 2. 取出舊電池並更換新電池 (“+”面朝上)。 3. 重新安裝電池蓋並將其扣緊。 電池警告: 1. 用完的電池應立即從設備中取出,並及時進行處理。 2. 將所有(舊的或新的)電池放在兒童接觸不到的地方。 3. 定期檢查電池,如果長時間未使用,請更換新電池。 4. 切勿將電池丟入火中,否則可能會引起爆炸。 5. 從長時間不打算使用的電子設備中取出電池。 6. 如果電池性能大幅下降,則更換新電池。...
- Page 35 清潔保養方法 清潔之前,請務必停止操作並從插座上拔下電源插頭。 ● 請勿在沒有過濾網的情況下操作機器。它將無法清除灰塵。灰塵進入機器可能會造成其故障。 ● 長時間不使用機器時,請拔下電源插頭。待機模式下也會消耗電力。 ● 根據使用設備的地點和方式,您可能需要更快更換過濾網(例如,吸煙人口多的家庭或空氣污染 程度較高的地區)。如果過濾效果不明顯,請更換過濾網。 1. 初效過濾網 ( 是否需要清潔取決於污垢程度。建議每兩年更換一次或者有損壞的情況下更換。 ) ● 用真空吸塵器清潔初效過濾網的表面或用水清洗並徹底晾乾。 2. 蜂窩式活性炭,冷觸媒過濾 網 ( 建議每月清潔一次,並在主機運行1500小時或6個月後更換此過濾 網。 ) ● 使用真空吸塵器清潔過濾網正面的灰塵。 ● 將過濾網放置在通風的地方,這樣可以消散有害氣體和細菌。請 勿將其暴露於強烈的陽光下。 ● 過濾網很脆弱。吸塵時,請勿用力按壓此過濾網。 ● 請勿用水清洗過濾網。 警告:如果用水清洗過濾網,過濾性能可能會降低。 3. 抗菌棉,H13高效空氣過濾網 ( 建議每月清潔一次,並在主機運行1500小時或6個月後更換此過濾 網。 ) ● 將過濾網放置在通風的地方,這樣可以消散有害氣體和細菌。 請勿將其暴露於強烈的陽光下。...
- Page 36 �. 陶瓷球盒 ( 是否需要清潔取決於污垢程度。建議每年更換一次或者有損壞的情況下更換。 ) ● 用水清洗陶瓷球盒並徹底晾乾。 �. 加濕濾網 ( 是否需要清潔取決於污垢程度。建議每兩年更換一次或者有損壞的情況下更換。) ● 用水清洗加濕濾網並徹底晾乾。 �. 清潔出風口 ( 是否需要清潔取決於污垢程度。) ● 關閉電源,然後從插座中拔出插頭。 出風格柵鎖 ● 將手放在出風格柵鎖上,並向上拉起以將其拆下。 ● 用一塊布清潔出風格柵並將其重新蓋好 警告:在操作過程中取出出風格柵後,機器將自動 停止。請在清潔之前關閉機器 �. 清潔負離子發生器 (是否需要清潔取決於污垢程度。) 發射頭 ● 當您聽到機器發出吱吱聲時,請使用棉花棒清潔。 將棉花棒從負離子發射頭上方的通風窗插入。定期 清潔發射頭周圍的灰塵。 棉花棒 �. 顆粒傳感器 ( 是否需要清潔取決於污垢程度。) ● 關閉電源,然後從插座中拔出插頭。 ●...
- Page 37 故障診斷 (疑為故障時) 現 象 原 因 處 理 方 法 沒有電源 將插頭穩固地連接到電源插座上 前面板脱落/ 出風格柵沒有裝好 穩固地連接前面板 / 把出風格柵正確裝好 產品不運行。 (電源 主機翻倒 直立放置主機 按鈕不亮)或按下按 鈕無反應 主機傾斜 將機器放置在平穩的表面上 童鎖功能已啟動 按住童鎖按鈕�秒鐘以取消童鎖功能 操作面板有污垢 清除操作面板上的污垢 戴了手套或紮了繃帶 用手指直接按下按鈕 無法操作 觸摸到另一個操作按鈕 每次按下一個按鈕 童鎖開啟 按住童鎖按鈕�秒鐘以取消童鎖功能 按照 使用方法"1. 從塑膠袋中取出過濾網" 和 沒有拆下過濾網上的塑料袋...
- Page 38 規格 主機 空氣淨化器 輸入 AC���V~��-��Hz ��W 額定功率 電源線長度 約�m 負離子濃度 �千萬/cm � 顆粒物潔淨空氣量(CADR) ���m � 甲醛潔淨空氣量(CADR) ��m � 建議適用面積 最大��m � #1 初效過濾網 2 年 #2 蜂窩式活性炭,冷觸媒過濾網 建議更換過濾網的期限 6 個月或1500 小時 #3 抗菌棉, H13 HEPA高效空氣過濾網 6 個月或1500 小時 約11.5kg 產品重量 產品尺寸...
- Page 39 保修條款 從購買當日起算為期一年的保修期間內,若根據本說明書或其他注意事項紙條(如有)所列明或提述 的正常使用情況下而出現異常或壞機狀況,則按照以下條款提供免費維修或免費更換服務。 有關詳細內容及疑問,可向購買本產品的商戶或代理商聯絡查詢。 1. 在保修期內,如果發生以下情況,可能會收取維修或更換的服務費用: a. 因未能按照說明書使用,改造或維修不當而造成的損壞和故障。 b. 購買後因處理不當 (例如掉落),房屋搬遷或運輸不當等人造性損壞和故障。 c. 由自然災害 (例如火災,地震,洪水,雷暴) 以及諸如污染,鹽害,氣體洩漏 (含水氣體等) 和異 常電源電壓等外部因素引起的損壞和故障。 d. 由商業用途 (例如,裝備在車輛,輪船等上) 和其他非家用用途 (包括示範,陳列品或展覽等) 引 起的損壞和故障。 e. 沒有出示購買證明 (例如收據或商店發票) 。 f. 沒有在保修卡填寫完整信息,例如購買日期,客戶名稱,商店或商戶名稱或是發現曾經篡改的內 容等。 g. 除主機以外的任何附屬配件或消耗性物品的保修服務。 h. 從拍賣或回收店等二手商店購買的本公司產品。 2. 本公司對因本產品故障而引起的二次損壞 (例如預期利潤的損失,精神損失等) 不承擔任何賠償責任。 3.
Need help?
Do you have a question about the MXAP-HEP200 and is the answer not in the manual?
Questions and answers