Table of Contents
Advertisement
Quick Links
Installation Guide
Tracer™ AH541 Version 2
Air-Handler Controller Hardware
Only qualified personnel should install and service the equipment. The installation, starting up, and servicing of
heating, ventilating, and air-conditioning equipment can be hazardous and requires specific knowledge and training.
Improperly installed, adjusted or altered equipment by an unqualified person could result in death or serious injury.
When working on the equipment, observe all precautions in the literature and on the tags, stickers, and labels that are
attached to the equipment.
April 2020
SAFETY WARNING
CNT-SVN02D-EN
Advertisement
Table of Contents

Related Manuals for Trane Technologies Tracer AH541

Summary of Contents for Trane Technologies Tracer AH541
- Page 1 Installation Guide Tracer™ AH541 Version 2 Air-Handler Controller Hardware SAFETY WARNING Only qualified personnel should install and service the equipment. The installation, starting up, and servicing of heating, ventilating, and air-conditioning equipment can be hazardous and requires specific knowledge and training. Improperly installed, adjusted or altered equipment by an unqualified person could result in death or serious injury.
- Page 2 Introduction Warnings, Cautions, and Notices Safety advisories appear throughout this manual as required. Your personal safety and the proper operation of this machine depend upon the strict observance of these precautions. The three types of advisories are defined as follows: Indicates a potentially hazardous situation which, if not avoided, could result in WARNING death or serious injury.
- Page 3 Introduction WARNING Personal Protective Equipment (PPE) Required! Failure to wear proper PPE for the job being undertaken could result in death or serious injury. Technicians, in order to protect themselves from potential electrical, mechanical, and chemical hazards, MUST follow precautions in this manual and on the tags, stickers, and labels, as well as the instructions below: •...
-
Page 4: Table Of Contents
Required tools ..........8 Installing the frame-mounted Tracer AH541 ......9 Enclosure requirements . - Page 5 Table of Contents Installing the door ..........43 Removing the door .
-
Page 6: Overview
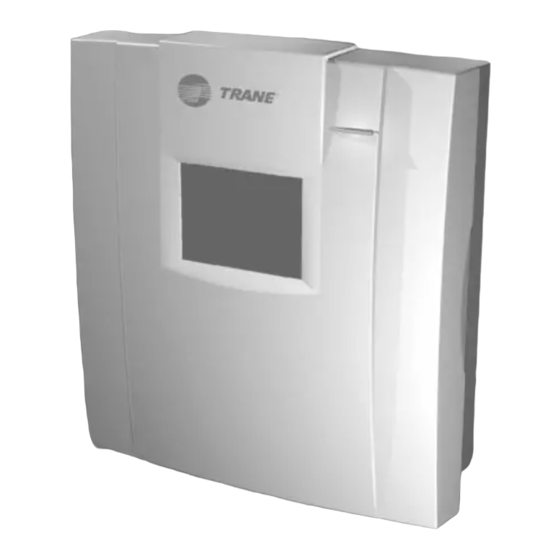
Overview This guide shows how to install the Tracer AH541 air-handler controller. Product description The Tracer AH541 air-handler controller is a low-cost, direct digital controller. It controls a wide variety of air-handlers and offers the following features: • Factory programming of many unit configurations and sequences of operation simplifies installation and brings consistency to the air-handler controllers on a site •... -
Page 7: Agency Listing/Compliance
The Tracer AH541 controller requires additional components for certain applications and has several options for adding an operator display. Power transformer The frame-mounted Tracer AH541, which ships without an enclosure, requires a UL-listed Class 2 transformer providing 70 VA at 24 Vac. Operator display The operator display is available in three models (see Figure 1, p. -
Page 8: Required Tools
Figure 1. Operator display models Door-mounted operator display Stand-alone operator display Portable operator display Required tools To install the Tracer AH541 controller and check it for proper operation, you will need the following tools: • Drill • Phillips-head screwdriver •... -
Page 9: Installing The Frame-Mounted Tracer Ah541
Installing the frame-mounted Tracer AH541 This section applies only to the frame-mounted Tracer AH541 controller. The frame-mounted Tracer AH541 can be used to replace older controllers in existing equipment or can be mounted in new equipment or custom enclosures. Enclosure requirements... -
Page 10: Installing The Termination Board
Installing the termination board Installing the termination board To install the termination board in a separately purchased enclosure or in other equipment: 1. Remove the controller from its packaging and separate the top and bottom frames. 2. Using the bottom frame (with the termination board) as a template, mark the location of the four mounting holes on the mounting surface (see Figure Figure 3. -
Page 11: Mounting The Enclosure
Mounting the enclosure This section describes location requirements and shows how to mount the Tracer AH541 enclosure. Note: The Tracer AH541 with enclosure is mounted in a National Electrical Manufacturers Association (NEMA) 1 enclosure. To meet NEMA 4 specifications, you can order the frame- mounted Tracer AH541 (model BMTA000CA0A0) and mount it in a separately purchased NEMA 4 enclosure. - Page 12 Mounting the enclosure Figure 4. Minimum clearances for enclosure 12 in. (30 cm) 24 in. (60 cm) 12 in. (30 cm) to fully open door 12 in. (30 cm) 50 in. (130 cm) recommended 36 in. (90 CNT-SVN02D-EN...
- Page 13 Mounting the enclosure Figure 5. Tracer AH541 enclosure dimensions Left Front Right Bottom Note: Six of the twelve knockouts are dual-sized knockouts for 1-inch (25 mm) and ¾-inch (19 mm) conduit. CNT-SVN02D-EN...
-
Page 14: Mounting The Enclosure
Mounting the enclosure Mounting the enclosure To mount the enclosure: 1. Using the enclosure as a template, mark the location of the four mounting holes on the mounting surface (see Figure Figure 6. Enclosure mounting holes Mounting hole (four locations) 24VAC IN10 IN11... -
Page 15: Wiring High-Voltage Ac Power
BMTA000CAA00 Frame-mounted, 24 Vac, CE-compliant Circuit requirements To ensure proper operation of the Tracer AH541, install the power supply circuit in accordance with the following guidelines: • The Tracer AH541 must receive high-voltage power from a dedicated power circuit. Failure to comply may cause control malfunctions. - Page 16 Unit terminals are not designed to accept other types of conductors. Failure to use copper conductors could result in equipment damage. (#C 7) Important: Make sure that you have the correct Tracer AH541 model for 120 Vac or 230 Vac. Table 3, p. 15 lists the available models. To connect high-voltage power wires: 1.
- Page 17 Wiring high-voltage ac power Figure 8. Terminal block for high-voltage power wires Line wire to L terminal Neutral wire to N terminal Ground wire to ground screw 7. Connect the neutral wire to the N terminal. 8. Connect the green ground wire to the chassis ground screw. The ground wire should be continuous back to the circuit-breaker panel.
-
Page 18: Installing The Pressure Sensor
Installing the pressure sensor This section shows how to install a pressure sensor in the Tracer AH541 controller. The pressure sensor available for the Tracer AH541 is a 5 Vdc, 0–5 inches water column, differential pressure sensor. To simplify installation of the pressure sensor, mount and wire it before wiring the other inputs and outputs. -
Page 19: Checking The Pressure Sensor
Installing the pressure sensor Figure 10. Wiring the pressure sensor 24VAC IN10 IN11 IN12 Duct static connector Checking the pressure sensor You can check the pressure sensor for proper operation only after supplying power to the controller and installing the main circuit board. You will need a digital multi-meter to complete the check. To check the pressure sensor for proper operation: 1. - Page 20 Installing the pressure sensor Figure 11. Connecting the multi-meter to the duct static input Green Black Duct static connector on termination board 5. Make sure that the multi-meter readings fall within the ranges shown in Table 4. If a reading is not within the expected range, check for faulty connections or a faulty pressure sensor Table 4.
-
Page 21: Wiring Inputs And Outputs
Each input screw-terminal on the termination board has a specific function. For example, an outside-air temperature sensor can be connected only to terminal IN5. Note that the Tracer AH541 does not use AO6. For additional information on inputs and outputs, refer to the Tracer AH540 user guide, CNT-SVX05B-EN. -
Page 22: Required Inputs
Wiring inputs and outputs Required inputs The Tracer AH541 must receive some values to function properly. These values can be supplied from hard-wired connections to the controller or from network variables communicated over a Comm5 link. Table 7 lists the required inputs and the configurations for which they are required. -
Page 23: Wire Routing
Wiring inputs and outputs Wire routing Figure 8 shows how to route input/output wires through the enclosure. It also shows the locations of wire-tie brackets. See Figure 5, p. 13 for knockout locations and dimensions. Metal conduit may be required by local codes when running input/output wires. Note: If your application requires a pressure sensor, install the pressure sensor before wiring other inputs and outputs. - Page 24 Wiring inputs and outputs Figure 12. Screw-terminal locations Common terminals Signal terminals BO1 Supply fan start/stop BO2 Exhaust fan start/stop BO3 DX stage 1 or Elec. heat stage 4 BO4 DX stage 2 or Elec. heat stage 3 BO5 DX stage 3 or Elec. heat stage 2 BO6 DX stage 4 or Elec.
-
Page 25: Binary Outputs
Wiring inputs and outputs Binary outputs The Tracer AH541 controller has six binary outputs that are normally-open, form-A binary relays. The relays act as a switch by either completing or breaking the circuit between the load (the end device) and the 24 Vac power. For example, when binary output 1 is energized, 24 Vac is supplied to terminal BO1, which in turn energizes the supply fan start/stop relay. - Page 26 Wiring inputs and outputs Figure 14. Wiring binary output Powered output < 1000 ft Signal (300 m) Common Pilot relay 24 Vac coil Tape back shield Signal < 1000 ft (300 m) Common Checking binary outputs Important: Perform the tests in this section before providing power to the termination board or installing the main circuit board.
-
Page 27: Analog Outputs
Wiring inputs and outputs Analog outputs The Tracer AH541 controller has five 0–10 Vdc analog outputs. Analog outputs control actuators and secondary controllers. Wiring analog outputs To wire an analog output: 1. Connect the common wire (if applicable) and shield wire to a common terminal at the... -
Page 28: Zone Sensor
4190 1090 4190 1094 4190 1117 Note: The Tracer AH541 can support zone sensors with High, Med, and Low switch positions, but interprets these as Auto. Zone sensors can provide the following inputs to the Tracer AH541: • Space temperature (IN1) •... - Page 29 Cancel requests to the controller. When a user presses the On or Cancel button, the signal is temporarily interrupted, which the Tracer AH541 interprets as an On or Cancel request. Zone sensors may have a setpoint-adjustment thumbwheel to configure a local setpoint. Hard-wire the local setpoint to the controller through the IN2 terminal.
- Page 30 Wiring inputs and outputs Figure 16. Wiring the zone sensor Fan mode Setpoint Common Space temp < 300 ft (100 m) Trane zone sensor Checking the zone sensor inputs Important: Perform the tests in this section before providing power to the termination board or installing the main circuit board.
-
Page 31: Analog Inputs
Economizing cannot be performed without a valid outdoor air temperature and mixed-air temperature. The Tracer AH541 has a universal analog input that can be configured using the Rover service tool for five purposes; space relative humidity, CO sensor input, entering water temperature, evaporator refrigerant temperature and generic temperature. - Page 32 Wiring inputs and outputs You can use the sensors described in Table Table 11. Sensors available from Trane Purpose Part number Sensor type 4190 1103 4-inch thermistor Discharge-air temperature 4190 1110 6-inch thermistor 4190 1111 12-inch thermistor Outdoor-air temperature 4190 1101 Thermistor 385 platinum 24-foot duct-averaging Mixed-air temperature...
- Page 33 Wiring inputs and outputs Checking the discharge-air and outside-air temperature inputs Important: Perform the tests in this section before providing power to the termination board or installing the main circuit board. Failure to do so will result in incorrect multi-meter readings.
- Page 34 Wiring inputs and outputs Table 12. Temperature and resistance characteristics of sensors Thermistor resistance () 385 platinum RTD Temperature for outdoor air temp and resistance () (°F and °C) discharge-air temp for mixed-air temp –40°F (–40°C) 325,000 –30°F (–34°C) 241,071 –20°F (–29°C) 170,041...
- Page 35 Wiring inputs and outputs 4. Set the multi-meter to measure resistance. If you completed steps 2 and 3 successfully, measure the resistance across the input at the signal and common screw terminals. For a 385 platinum RTD, the resistance should be between 844 and 1,381 , which translates to temperatures of –40°F and 210°F (–40°C and 100°C).
- Page 36 Wiring inputs and outputs Figure 18. Wiring 4–20 mA analog inputs 24 Vdc 4–20 mA out < 1000 ft (300 m) Common 4–20 mA sensor (current source) Tape back shield IN10 IN11 IN12 Tape back shield 24 Vdc < 1000 ft 4–20 mA out IN10 (300 m)
-
Page 37: Binary Inputs
Rover service tool to configure binary inputs for the Tracer AH541. Configure binary inputs that are not in use as Not Used. Note: The Tracer AH541 interprets a binary input signal of 0 Vdc as a closed contact and an input signal of 24 Vdc as an open contact. - Page 38 Wiring inputs and outputs the air-handler. Use an air flow switch (Trane part number 4190 6006) with an air flow pickup (4190 2006) for these inputs. You can also use a current sensing switch (Trane part number X13310270- 01). The filter status switch input indicates a dirty air filter. Use an air flow switch with an air flow pickup for this input.
- Page 39 Wiring inputs and outputs 3. Set the multi-meter to measure Vdc, then measure the voltage across the input at the signal and common screw terminals. The measured voltage should be less than 0.1 Vdc. If the voltage is greater than this, the input readings may be offset.
-
Page 40: Installing The Circuit Board
Installing the circuit board The top plastic frame, which holds the main circuit board, is not installed in the Tracer AH541 enclosure when it ships. The board can be kept in the office while the enclosure is mounted and wired. After wiring has been completed, connect the circuit board to the termination board. - Page 41 Installing the circuit board Figure 21. Connecting the frames 6. Wire the 4–20 mA analog inputs. See “Wiring 4–20 mA analog inputs” on page 35 for details. 7. For controllers with an operator display, connect the operator-display cable to the circuit board (see Figure 22, p.
- Page 42 Installing the circuit board Figure 22. Cable termination and Status LED locations 24 Vac power connector Supply fan LED (green) Exhaust fan LED (green) DX 1 or Electric 4 LED (green) DX 2 or Electric 3 LED (green) DX 3 or Electric 2 LED (green) DX 4 or Electric 1 LED (green) Service LED (red) 24VAC...
-
Page 43: Installing The Door
Installing the door This section shows how to install and remove the enclosure door. To install the enclosure door: 1. Unpack the door and check for missing or damaged parts. Check to make sure that the magnetic latches and touch screen (if ordered) are installed. Check for any cracks in the plastic. -
Page 44: Removing The Door
Removing the door Removing the door Remove the door to simplify wiring or when upgrading the controller with a door-mounted operator display. To remove the enclosure door: 1. Open the door to a 90° angle from the enclosure. 2. For doors with an operator display, disconnect the operator-display cable from operator display. -
Page 45: Installing The Stand-Alone Operator Display
With the attached cable, the stand-alone operator display can be mounted up to 10 ft (3 m) from the Tracer AH541 controller. You can extend this distance up to 150 ft (46 m) using using four- conductor wire and the included pig-tail connectors. Alternately, use three twisted-pair wires. - Page 46 9. Attach the operator-display cable to the operator-display connector on the circuit board (see Figure 25). The operator display receives power from the Tracer AH541 and turns on automatically when it is connected to the controller. Figure 25. Operator-display connector on the Tracer AH541...
-
Page 47: Connecting The Portable Operator Display
1. Open the Tracer AH541 enclosure door. 2. Attach the operator-display cable to the operator-display connector on the circuit board (see Figure 25, p. 46). The operator display receives power from the Tracer AH541 and turns on automatically when it is connected to the controller. CNT-SVN02D-EN... -
Page 48: Setting Up The Operator Display
Setting up the operator display This section shows how to set the time and date, calibrate the operator-display touch screen, and adjust the brightness and contrast. NOTICE: Equipment Damage! To clean the operator display, use a cloth dampened with commercial liquid glass cleaner. Spraying water or cleansers directly on the screen may result in equipment damage. -
Page 49: Adjusting Brightness And Contrast
Setting up the operator display Adjusting brightness and contrast To adjust the brightness and contrast of the operator display: 1. On the home screen, press the Setup button. The Setup menu appears. 2. Press the page down button to view the next screen. 3. -
Page 50: Verifying Operation And Communication
Verifying operation and communication This section describes: • Test button • Service Pin button • Light-emitting diodes (LEDs) • Diagnostic conditions • How to check the earth ground Test button The Test button is located on the main circuit board as shown in Figure 26. - Page 51 The controller exits the test by initiating a reset and returning the controller to normal operation. If the Tracer AH541 cooling type is hydronic or 2-pipe changeover, the valve will open 100% in step 4. If the cooling type is DX the first stage of cooling will be energized in step 4, and each additional DX output will energize sequentially with each Test button press (maximum of 4-stages).
-
Page 52: Service Pin Button
Verifying operation and communication Service Pin button The Service Pin button is located on the main circuit board as shown in Figure 26 on page 50. You can use the Service Pin button to: • Identify a device • Add a device to the active group in Rover •... -
Page 53: Interpreting Diagnostics
If this LED activity occurs at any other time, the site may have excessive radio frequency interference (RFI). Interpreting diagnostics The Tracer AH541 controller generates three types of diagnostics: • Critical—The controller shuts down the unit to prevent possible damage. The controller cannot operate until the diagnostic condition is corrected. - Page 54 Verifying operation and communication Tracer AH541 diagnostics have the following priorities, with 1 being the highest priority and 22 being the lowest priority: 1. Emergency Override 2. Manual Output Test 3. Low Temp Detect 4. Unit Shutdown 5. Low Supply Fan Air Flow 6.
- Page 55 Verifying operation and communication Table 19. Tracer AH541 diagnostics (continued) Diagnostic Configuration Outputs 2 Duct Static Press High Limit (critical or service required) VAV control Duct Static Press Failure (critical) 2 Unit Shutdown Supply fan: Off (critical or service required) Valves: Closed 2...
-
Page 56: Checking The Earth Ground
If the outdoor air temperature sensor or the mixed-air sensor fails or is not present, economizer operation is disabled and the outdoor air damper is opened to its minimum position. If the entering water temperature sensor fails, Tracer AH541 operation will default to heating mode. Checking the earth ground A proper earth ground is especially important in areas of high EMI or RFI, but you should always check the quality of the ground. - Page 57 Verifying operation and communication Figure 27. Checking the earth ground 4. Replace the cover plate. WARNING Hazardous Voltage! The cover plate must be in place when the controller is operating. Failure to replace the cover plate could result in death or serious injury. CNT-SVN02D-EN...
-
Page 58: Index
Evaporator Refrigerant Temp diag- clearances and input/output wiring 26 nostic 64, 65 for enclosure 13 for frame-mounted Tracer AH541 for frame-mounted Tracer AH541 filter status switch 42 CO2 Sensor Failure diagnostic 64, 65 frame-mounted Tracer AH541 CO2 sensor input 35... - Page 59 13 check-out procedure 37 for enclosure 13 weight 13 resistance characteristics of sensors wiring 35 for frame-mounted Tracer AH541 time clock 55 transducer, see pressure sensors Mixed Air Temp Failure diagnostic 64 resistance temperature detectors troubleshooting model numbers 17...
- Page 60 Index voltage wiring diagrams expected multi-meter readings analog outputs 31 Vac power, see 24 Vac power variable resistance inputs, wiring 35 binary input 42 Vdc power, see 24 Vdc power binary outputs 30 high-voltage power 18 weight specifications 13 screw-terminal location diagram wire ties, locations for 27 wiring variable resistance analog inputs...
- Page 64 Trane - by Trane Technologies (NYSE: TT), a global climate innovator - creates comfortable, energy efficient indoor environments for commercial and residential applications. For more information, please visit trane.com or tranetechnologies.com. Trane has a policy of continuous product and product data improvement and reserves the right to change design and specifications without notice.
Need help?
Do you have a question about the Tracer AH541 and is the answer not in the manual?
Questions and answers