
Related Manuals for Alliance Bio Expertise DOSYWEL


Summary of Contents for Alliance Bio Expertise DOSYWEL
- Page 1 DOSYWEL Revision 3 Alliance Bio Expertise – Le Tremplin ZA de Courbouton 35480 – Guipry +33 (0)2 40 51 79 53 – contact@abioexpertise.com...
- Page 2 Basic edition: Pages Version Date Written by: Verified by: sections modified 10/09/2015 A. PINEDA A. BLANCHARD Updates: 16/11/2015 A. PINEDA A. BLANCHARD A.B.E 17/07/2018 A.BLANCHARD N.CHEROTZKY version UM A.B.E. - DOSYWEL...
-
Page 3: Table Of Contents
Table of contents General Information ..................5 Specifications Dosywel ....................5 Overview ..........................5 Standard accessories shipped with your Dosywel ..........6 Dosywel optional accessories & consumable............6 Setting up your Dosywel ................... 8 Installation and operating environment ..............8 Unpacking .......................... - Page 4 Screen colour settings ....................23 Upkeep and maintenance ................24 Upkeep and daily cleaning ..................24 External body ........................24 Annual upkeep ......................... 24 Symbols Legend ......................25 Quick-Start Programming ..................26 Quick-Start set the parameters................27 UM A.B.E. - DOSYWEL...
-
Page 5: General Information
Polywel 3D (distribution automate XYZ) Communication USB, Ethernet, RS232 Memory of 19 dilution programs Traceability (USB, printer, Excel) Turbo mode Overview Dimensions: W x D x H: 21 x 20 x 24 mm Lightness 3.8 kg UM A.B.E. - DOSYWEL... -
Page 6: Standard Accessories Shipped With Your Dosywel
Standard accessories shipped with your Dosywel Set of tubing Mains supply unit Dosywel 3.2mm 120W Power cable Ref. DILW2002 Certification METRO report User Manuel Dosywel optional accessories & consumable Additional Tubing Product Code Product Description Set of tubing 6.4mm with dispensing... - Page 7 DILW2013 Foot switch (USB) DILW2012 Keypad for Diluwel/Dosywel Keyboard for Diluwel/Dosywel - DILW2033 Waterproof & rollable DILW2001 Additional pump (for turbo) UM A.B.E. - DOSYWEL...
-
Page 8: Setting Up Your Dosywel
- User Manual - Any additional ordered accessory or consumable. • Take the Dosywel out of the box by lifting it from the bottom. • Place the Dosywel on a stable and horizontal support preferably; • Make sure, no elements are remaining in the box before disposal. -
Page 9: Fixing The Tubing Set
• Sterilize the tubing set and the dispensing nozzle before use; • Open pump jaw and insert the rotor section which is indicated by two metal closures into the pump head rotor; • close the jaw and make sure the pump is properly adjusted; UM A.B.E. - DOSYWEL... -
Page 10: Supply Systems
To ensure the power, switch off of the unit; • the outlet must be immediately identifiable and easily reachable by the operator. • connect the power supply to the Dosywel’s back in the location indicated by the symbol 24V: UM A.B.E. - DOSYWEL... -
Page 11: Getting Started Your Dosywel
Getting Started your Dosywel Functions of the ambidextrous controller Button General Features Modality Powering Briefly pressing of the button (1 Sec.) to turn on and off. Access Settings menu Long pressing of the button (3 Secs.) Changing the program Briefly pressing of the button (1 Sec.) -
Page 12: Screen Of Your Dosywel
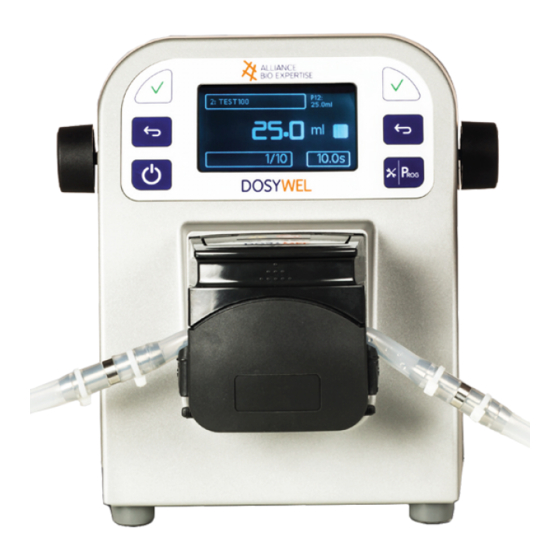
Screen of your Dosywel Figure 1. Principal screen’s work. Validate/Select – Menu/Cancel – On/Off – Program Switch/Parameters Program name – Pumps selected/Diluent name – Status, Stop/Play/Pause way – Dose delivered out of – Interval (1 to 60 seconds). Colours code of your screen... -
Page 13: Programming Your Dosywel
Note: you must always write at least one character. you don’t, the program will never exist click on the knob's side button to confirm the information entered. Figure 2. Steps to appoint a program. UM A.B.E. - DOSYWEL... -
Page 14: Dosage Settings
1 to 999 and click on the knob to validate o choose the interval time between each dose from 1.0 to 60.0 seconds; o click on the knob to confirm the interval time entered. Figure 3. Steps to choose the dosage’s volume. UM A.B.E. - DOSYWEL... -
Page 15: Pump's Number
Pump’s number (ONLY available if you connect a 2 pump for turbo dispensing) o Check that the pump used is connected to your Dosywel; o place the cursor over the pump number option in the Program Editor screen, by scrolling the knob. Click on the knob to validate o click on the knob’s side button to validate the pump number chosen. -
Page 16: Verification Test (Calibration)
, and click on the knob's side button to access to Diluent menu. Figure 5 Steps to set the verification. UM A.B.E. - DOSYWEL... -
Page 17: Diluent Choice
To clear or go back, press o click on the knob’s side button to validate the Volume (ml) chosen; o place the cursor over , and click on the knob's side button to confirm the information entered. UM A.B.E. - DOSYWEL... -
Page 18: Verification Mode Setting (Calibration)
On the Program Editor screen, place the cursor over scrolling one of the knobs; o confirm your new program by pressing the knob’s side button or UM A.B.E. - DOSYWEL... -
Page 19: Use Of Turbo Mode
Use of turbo mode o Place an additional pump (Dilupump, ref: DILW2001) provided by A.B.E on the additional port of the Dosywel (see the back panel). o Use a special adapter "y" for the turbo mode, in order to gather 2 tubings in one source. -
Page 20: Settings Up Users
write the name of the desired user using the knob’s side button or keyboad; confirm your username by pressing the knob’s side button. To delete a username created, keep pressing 2 secs on UM A.B.E. - DOSYWEL... -
Page 21: Programs Management
• change the parameter values, If no modifications are required: scroll the highlighted option by scrolling the knob; press on the knob or to confirm and go into the working mode. UM A.B.E. - DOSYWEL... -
Page 22: End Of The Cycle
Spanish, German, Polski) place the cursor over the icon to confirm the information entered. USB data export Connect the USB at the back of your Dosywel; place the cursor on “Export ” by scrolling one of the knobs; ... -
Page 23: Advanced Options
This one will disappear once your Dosywel has turned off (unplugged) Screen colour settings To change the colours of your Dosywel’s screen, click on the knob’s side button; choose the desired colour by scrolling the knobs;... -
Page 24: Upkeep And Maintenance
Upkeep and maintenance Upkeep and daily cleaning External body Clean the Dosywel’s body and the ambidextrous control using absorbent paper lightly moistened with a water-alcohol solution. Annual upkeep • It is recommended to perform a functional and safety check (continuity of protection) at least once a year. -
Page 25: Symbols Legend
Symbols Legend... -
Page 26: Quick-Start Programming
Quick-Start Programming... -
Page 27: Quick-Start Set The Parameters
Quick-Start set the parameters...
Need help?
Do you have a question about the DOSYWEL and is the answer not in the manual?
Questions and answers