
Subscribe to Our Youtube Channel
Related Manuals for JAKA Zu pro Series


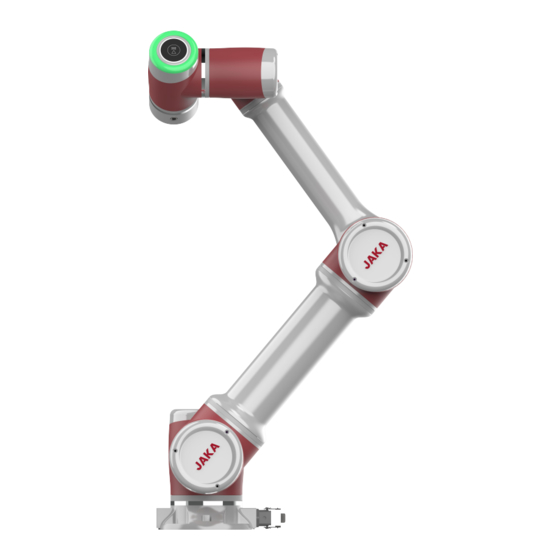
Summary of Contents for JAKA Zu pro Series
- Page 1 JAKA ROBOTICS User Manual-Hardware JAKA Zu 5 This manual also applies to Zu pro series...
- Page 2 JAKA ROBOTICS User Manual JAKA Zu 5 Ro b ot Se ri al Nu mbe r : Cabinet Serial Number...
-
Page 3: How To Read This Manual
The pictures in this manual are for reference only, please refer to the actual product. JAKA will not provide after-sales service for any transformation or disassembly of the product. JAKA robot owners and operators must be responsible for their own safety. JAKA is not responsible for the safety of using robots. -
Page 4: Table Of Contents
1.8 M ......................... 9 OVEMENT WITHOUT RIVE OWER ..................9 1.9 P RECAUTIONS FOR RANSPORTATION AND ANDLING 2 WELCOME FROM JAKA ZU ROBOT....................... 11 2.1 O ......................11 VERVIEW OF ROBOT CONFIGURATIONS ............................11 2.2 O PERATION ERMINAL ............................... 12 2.3 R OBOT 2.3.1 Robot End..............................12... - Page 5 6.3 F ....................... 45 UNCTIONAL AFETY ERTIFICATION 6.4 CE EMC C ............................48 ERTIFICATES 6.5 CE MD C ............................49 ERTIFICATES ............................50 6.6 R HS C ERTIFICATES 7 WARRANTY................................51 7.1 P ............................51 RODUCT ARRANTY 7.2 D ................................52 ISCLAIMER JAKA Zu 5...
-
Page 6: Preface
JAKAZu 5 is an intelligent, light weight, 6-DOF, modularized collaborative robot with a payload of 5kg , and belongs to the JAKA Zu Modularized Collaborative Robots Series What Do the Boxes Contain When you purchase a whole package of JAKAZu 5 , the items you will receive are shown in the table below. -
Page 7: Safety
4.A qualified person for robot operation is required to check each safety function and ensure that the parameters and procedures are correct before the robot can be started. JAKA Zu 5... - Page 8 This is because JAKAZu5 has a collision detection function. If the operator uses controllers not approved by JAKA, the potential risks are to be borne by himself. 1. Make sure the robot and tool are properly and securely bolted in place.
-
Page 9: General Warnings And Cautions
All safety information contained in this manual shall not be considered as a guarantee of JAKA. Even if all safety instructions are observed, the injury or damage caused by the operator may still occur. -
Page 10: Usage
JAKA constantly strives to improve the performance and reliability of our robots. JAKA is not responsible for any errors or omissions in this manual, and reserves the right of final interpretation of this manual. Risks A direct or indirect physical contact relationship exists when there an interaction between the operator and the robot exists. -
Page 11: Movement Without Drive Power
1. Make sure not to overload your back or other body parts when the equipment is lifted. Use proper lifting equipment. All regional and national guidelines for lifting shall be followed. JAKA cannot be held responsible for any damage caused by transportation of the equipment. -
Page 12: Welcome From Jaka Zu Robot
In this chapter the basics of JAKA Zu Robots would be introduced , for future hardware specifications and software usages please refer to other chapters. During using of JAKA Zu robots,if quick help is needed, feel to free to call our hotline :(+86)400-006-2665. -
Page 13: Robot Arm
The indicator and the pause button is located as Fig 2-2 and the meanings of different color are listed in table 2-2. When the robot is running program, press the pause button could pause and resume the program. JAKA Zu 5... -
Page 14: Flange Buttons And Interfaces
Fig 2-2 Ring Indicator and Pause Button Color Robot Status Blue Power on Green Enabled Fault Yellow Drag Mode Flashing Pause Mode Yellow Table 2-2 Indicator Meanings Warnings: The risks related to using of pause button should be evaluated carefully, the contact of robot and personnel could cause server injury of personnel or damage of equipment. -
Page 15: Electrical Cabinet And Control Stick
2.4 Electrical Cabinet and Control Stick The cabinet of JAKA Zu Robots contains several kinds of interfaces which are described in chapter 4. Along with the cabinet a stick is provided, and when the programming job is finished , the stick could be sued to control the robot. - Page 16 Disable robot:When robot enabled, short press the lock button + enable button Run program: press the terminate button to start the default loaded program. After robot moves to the initial position of the program, execute the Start/ default program . Stop Terminate program: When program operating, short press the button to terminate the program.
-
Page 17: Mechanical Specification
The tool can perform translational and rotational movements in the robot's working range. The following sections describe the basics to be aware of the installation of various components in the robot system. Fig 3-1 JAKA Zu 5... -
Page 18: Robot Working Range
3.1 Robot Working Range 3.1.1 Robot Dimensions The photo and dimensions of JAKAZu 5 robot and electrical cabinet are shown in Fig 3- 2 and Fig3-3. Make sure to take into account the working range of the robot during installation to avoid injury to people or damage to the equipment. -
Page 19: Installation
Fig3-4 3.2 Installation 3.2.1 General installation steps 1.Determine the working range of the robot; 2.Mount the robot on the base; 3.Install the required tools at the end of the robot. JAKA Zu 5... -
Page 20: Important Safety Instructions
3.2.2 Important safety instructions DANGER: 1. Make sure the robot is properly and securely bolted in place. 2. The mounting surface must be shockproof and sturdy. DANGER: 1. Make sure the tool is properly and securely bolted in place. 2. Make sure that the tool is constructed such that it cannot create a hazardous situation by dropping a part unexpectedly. -
Page 21: End Effector Installation
15 Nm. If you need to adjust the tool position very accurately, you can also drill a φ6 pin hole and fix it with a pin. Fig. 3-7 shows the drilling position and the screw mounting position. All measurements are in mm. Fig 3-7 JAKA Zu 5... -
Page 22: Electrical Interface
4 Electrical Interface 4.1 Introduction This chapter describes all the electrical interfaces of the robot and electrical cabinet. These interfaces are divided into three categories, each of which has different purposes and properties: • Front panel interface of the electrical cabinet •... -
Page 23: Front Panel Of The Electrical Cabinet
Safety function interface (P8) USB3.0 interface (P9) and Ethernet interface (P10) The USB interface and Ethernet interface are reserved for internal use and can be contacted by JAKA technical support personnel if needed. The layout is shown in Figure 4-1. -
Page 24: Digital Input (Di)
Electrical control cabinet front panel interface definition table: Index Name Label Description 1st digital input, PNP Type, the input is active high 2nd digital input, PNP Type, the input is active high 3rd digital input, PNP type, the input is active high 4th digital input, PNP Type, the input is active high 5th digital input, PNP Type, the input is active high DI(1~8) - Page 25 The internal 24V output is positive and supports a maximum of 1.5A current output The internal 24V power supply output is negative The isolated power input is negative, and the factory default is connected to the internal GND JAKA Zu 5...
- Page 26 The protection stop function input 2, the factory default is V+ The protection stop function input 2, the factory default is V+ Emergency stop function input 2, the factory default is V+ Emergency stop function input 1, the factory default is V+.
- Page 27 4-5 and Figure 4-6 for wiring. Figure 4-5 and Figure 4-6 show how to use one or more emergency stop switches. The example uses an internal 24V power supply and the user can also use an external 24V power supply. JAKA Zu 5...
- Page 28 Figure 4-5 Figure 4-6 3. Connect the protective stop switch Protective stop function, support automatic recovery. The electrical cabinet door switch is an application case of the protection stop device, and the robot stops when the electrical cabinet door is opened. The wiring diagram is shown in Figure 4-7.
- Page 29 (as shown in the figure, the switch or relay is closed), the corresponding LED turns on. You can also see the DIx status on the APP interface b) PNP type signal as input JAKA Zu 5...
-
Page 30: Digital Output(Do)
Figure 4-10 Figure 4-10 shows the input wiring diagram of the PNP interface. The V + pin is connected to V +, the OUT pin is connected to DIx, and the 0V pin is connected to V-. When the signal is triggered, the LED on the panel turns on, and the DIx status on the APP interface is changed. -
Page 31: Analog Input&Output(Ai&Ao)
The wiring method for analog input and output is shown in Figure 4-13. Figure 4-14 The JAKA CAB V2 AI/O interface can be configured to work in different modes (factory default is 0~10V analog input). The user can set the AI/O working mode through the APP. -
Page 32: High Speed Interface
• Use the same GND for equipment and electrical cabinet. The analog AI/O is not isolated from the electrical control cabinet. • Use shielded cables or twisted pairs. Connect the shield to the "AG" on the "Power". • The sensitivity of the current signal is lower for the device operating in current mode than the interface. -
Page 33: Power Connection
4.4.2 Robot Connection Be sure to connect the robot to the control cabinet using the robotic connection cable provided by JAKA. Be sure to lock the connector before starting the robot. Before disconnecting the cable robot, the robot must cut off the power supply. -
Page 34: Tool Input And Output
Figure 4-16 Caution: 1.Do not disconnect the robot cable when the robot is turned on. 2.Do not extend or modify the original cable. 4.5 Tool Input and Output The tool input and output position is on the side of the robot tool flange. Includes two digital inputs, two digital outputs and one analog input. - Page 35 The dry contact input (ie, switch input) is connected to the negative pole of the 24V power supply in TIO (gray wire), and the other end is connected to the DI digital input (blue or green wire), as shown in Figure 4-19. b) The input type is NPN JAKA Zu 5...
-
Page 36: Technical Specifications
* Note: It is strongly recommended to use protection DIODES for the inductive loads (such as relays, electromagnets, DC motors, etc.). Otherwise, this port may damage the hardware circuit 4.6 Technical Specifications 1.JAKA Zu5 Robot Technical Specifications: Robot type: JAKA Zu 5 Maximum payload... - Page 37 2.Electrical cabinet technical specifications: IP classification IP44 16 digital input I/O ports 16 digital output 2 analog input/output I/O power Electrical Communication TCP/IP, Mod bus TCP, Mod bus RTU cabinet Power 100-240VAC,50-60Hz 410*307*235(mm)(W*H*D) Size 12kg Weight Material Powder-coated SPCC JAKA Zu 5...
-
Page 38: Maintenance And Repair
Maintenance and repairing must be performed in compliance with all safety instructions in this manual. Repairing must be performed by an authorized system integrator or JAKA staff. Parts returned to JAKA should be returned as specified in the Service Manual.。 5.1 Safety Instructions After maintenance and repair, product must be checked to ensure the required safety level.The valid... - Page 39 3.4 Nm 9 Nm 6.9 Nm 15.3 Nm 11.8 Nm 37 Nm 28.4 Nm The tightening torques will vary depending on the type of base metal or bolt. When not specified, please follow the tightening torques above. JAKA Zu 5...
- Page 40 2、 Fire, malfunction, and wrong movements caused by modification may result in personal injury or damage to the robot. 3、 Any loss caused by the user's own modification of JAKA's products is not covered by JAKA’s warranty. 1、 To prevent electric shock, when replacing parts, please turn off the circuit breaker, and then turn off the main power supply.
-
Page 41: Filter Cleaning And Replacement
・ A-2: Regular replacement parts / recommended spare parts ◆Maintenance parts • B: Maintenance parts prepared when purchasing multiple robots ・ B-1: Parts purchased from JAKA In order to maintain normal operation, the A-1 and A-2 are the minimum necessary important parts. It is recommended to prepare one whole set. - Page 42 2. If the user needs support services, it is required to fill out the service application form and fax it to JAKA. If the situation is urgent, user can call directly to request the service.
- Page 43 III. Service call hotline and contact information •Email:support@jaka.com •Telephone:400-006-2665 •Information required •Robot serial number •Software version •Detailed fault description •Attached log files JAKA Zu 5...
-
Page 44: Applied Standards And Certificates
6 Applied Standards and Certificates 6.1 Collaborative Robot Certification The company's product JAKA Zu5 robot has passed CR certification and complies with the relevant requirements of CR certification standards for collaborative robots. The test standards and certifications are as follows: 《ISO 10218-1:2006 Robots for industrial environments - Safety requirements - Part 1: Robot》... -
Page 45: Industrial Robot Certification
6.2 Industrial Robot Certification The company's product JAKA Zu5 robot has passed CR certification and meets the relevant requirements of CR certification standards for industrial robots. The test standards and certifications are as follows: 《IEC 60204-1:2005+A1:2008 Safety of machinery - Electrical equipment of machines - Part 1: General requirements》... -
Page 46: Functional Safety Certification
6.3 Functional Safety Certification The company's product JAKA Zu 5 robot has passed ISO 13849- 1 machinery safety certification and complies with the relevant requirements of ISO 13849- 1 machinery safety certification standards. The test standards and certifications are as follows: 《Machinery Directive 2006/42/EC》... - Page 47 《Machinery Directive 2006/42/EC》 《EN ISO 13849-1:2015 Safety of machinery -- Safety-related parts of control systems - Part 1: General principles for design》 JAKA Zu 5...
- Page 48 《Machinery Directive 2006/42/EC》 《EN ISO 10218-1:2011 Robots and robotic devices - Safety requirements for industrial robots - Part 1: Robots》 JAKAZu 5...
-
Page 49: Ce Emc Certificates
6.4 CE EMC Certificates The company's product JAKA Zu5 robot has passed the EU CE EMC directive and complies with the relevant requirements of the CE EMC directive. The test standards and certifications are as follows: 《EN 61000-6-4:2007+A1:2011 Electromagnetic compatibility (EMC) - Part 6-4: Generic standards –... -
Page 50: Ce Md Certificates
6.5 CE MD Certificates The company's product JAKA Zu 5 robot, through the EU CE MD (machine safety) directive, meets the relevant requirements of CE MD (machine safety). The test standards and certifications are as follows: 《EN ISO 10218-1:2011 Robots and robotic devices - Safety requirements for industrial robots - Part 1: Robots》... -
Page 51: Rohs Certificates
6.6 RoHS Certificates The company's product JAKA Zu 5 robot passed the European Union RoHS 2.0 (2011/65 /EU) and Amendment Directive (EU) 2015/863 and complies with the European Union RoHS 2.0 (2011/65 / EU) and Amendment Directive (EU) 2015/863 The relevant requirements, test standards and certifications are as... -
Page 52: Warranty
7 Warranty 7.1 Product Warranty JAKAZu 5... -
Page 53: Disclaimer
JAKA strives to ensure the accuracy and reliability of the contents of this manual, but is not responsible for any errors or omissions. - Page 54 Shanghai JAKA Robotics Ltd Add:Building 33-35,No.610 Jianchuan Road, Minhang District Tel:400-006-2665 Web:www.jaka.com JAKAZu 5...
Need help?
Do you have a question about the Zu pro Series and is the answer not in the manual?
Questions and answers